

Key takeaways
- The desktop app records your camera, screen, or both together, just like the Chrome extension, but with more capability.
- Its advantages: record outside your browser (over PowerPoint, PDFs, and other apps), record multiple videos back-to-back without waiting on processing, and use more of your computer’s processing power to reduce lag.
- Download it for Mac or Windows, then pick your Recording Type, Camera Input, and Mic Input on launch. Mac users can also see the macOS app guide, and change camera or microphone source if the wrong device is picked up.
- Use the gear icon to adjust Countdown, Toolbar, and Camera Effects, and customize the camera bubble’s Shape, Size, Avatar, and Location.
- Keep the Chrome extension installed too, for Instant Integrations with Gmail, LinkedIn, and other messaging platforms.
- If a recording fails to upload, you can often recover it from the desktop app, but only while you still have the app open.
- ✅ Record your camera bubble outside of your browser(to record over PowerPoint, PDFs, and other non-browser application)
- ✅ Record multiple videos back-to-back, without waiting for earlier videos to finish processing.
- ✅ Access more processing power from your computer, so you are less likely to experience lag issues than you are with the browser extension.
Record with Sendspark’s Desktop Application
1. Install the Desktop Application
Download the Sendspark app for your Mac or Windows to get started.2. Launch the Application
Click on the Sendspark icon on your computer to launch the Sendspark desktop app.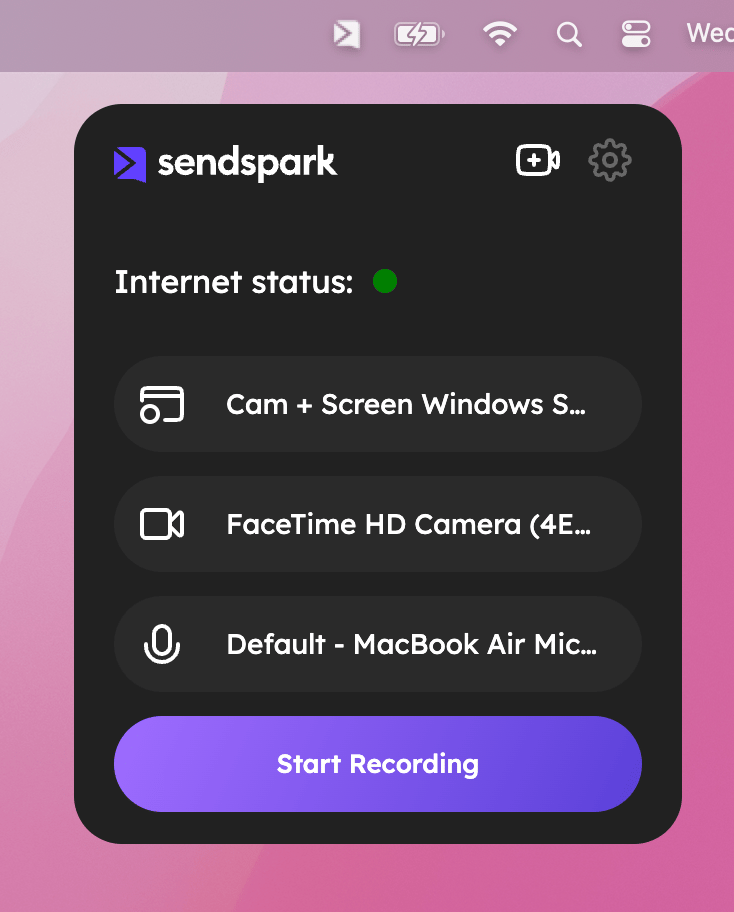
- Recording Type — Choose between recording your camera (just yourself), your screen, or your camera in a little bubble over your screen.
- Camera Input— Select between your default computer webcam, or an external camera.
- Mic Input— Select between your default computer microphone, or an external mic.
3. Adjust Settings
Click on the gear icon (⚙️) to adjust settings before you record.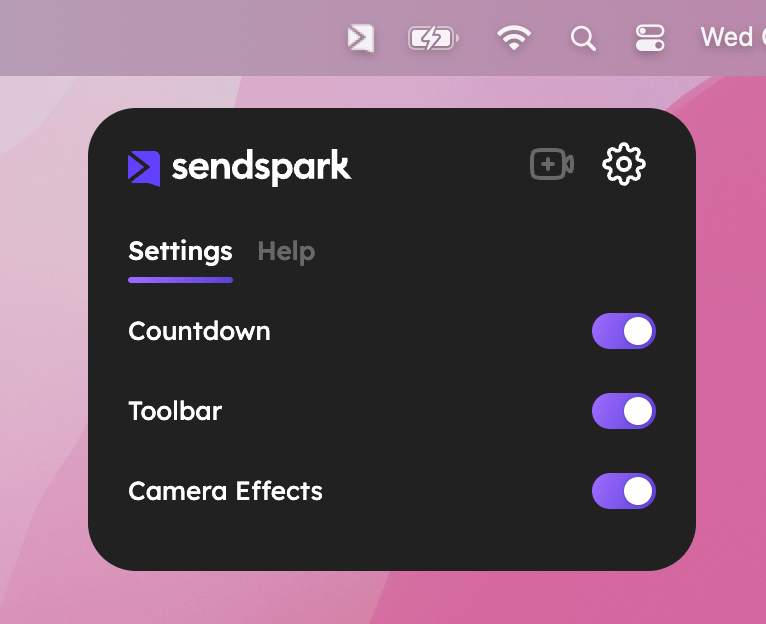
- Countdown — Lets you use 3 second countdown between the time you click “Start Recording” to when the recording actually starts. This gives you a little time to prepare your screen. (The countdown timer is available in the Chrome extension and the web app too.)
- Toolbar — Lets you show or not show a toolbar when you’re recording. The toolbar can make it easier to pause, end, or restart the recording, but some people prefer to record without a toolbar for a more polished video.
- Camera Effects — Lets you add a subtle effect to touch-up your appearance and blur your background.
4. Adjust the Camera Bubble Settings
If you are recording your webcam and screen together, you will see your camera appear in a little camera bubble on the bottom left of your screen.
- Shape — Choose between a circle, square, or rectangle shape for your camera
- Size — Choose how small or large you want the camera bubble to appear
- Avatar — Choose if you would like to display your camera bubble or an avatar (image) or yourself These sit on a small toolbar across the bottom of the bubble itself, as icons rather than named fields.
5. Start Recording
Hit “Start Recording” when you’re ready!6. Select What To Share
You’ll be prompted to choose what you want to share on your screen.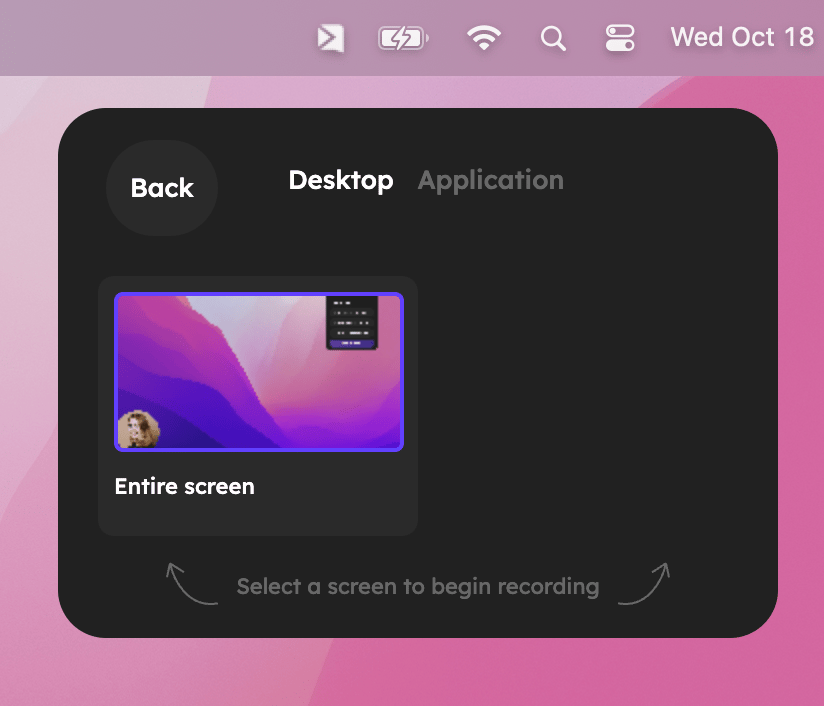
- Desktop — If you select an option under “Desktop” you will record everything on your screen. This is the best way to make sure you aren’t missing anything.
- Application — If you select an option under “Application” then you will only record what is visible over that application. This will get you a cleaner, more polished recorded, as it doesn’t include folders on your desktop or anything extra, but if you want to show multiple applications, make sure to use the desktop option!
7. Finish Recording
Click the square (◼️) option on your recording toolbar to complete recording.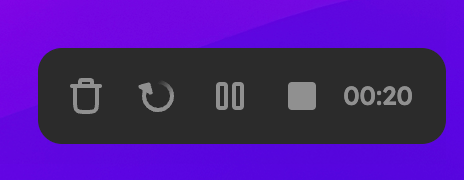
- Trash — Lets you delete the recording
- Restart — Lets you delete this recording and start a new one
- Pause — Lets you pause the recording record so you can take a break or move things on your screen (and then resume recording). See pause and resume for the hotkey and the ways to pick the recording back up.
8. Edit & Quick Share
After you finish the recording, you’ll see some options to quickly edit and share your video.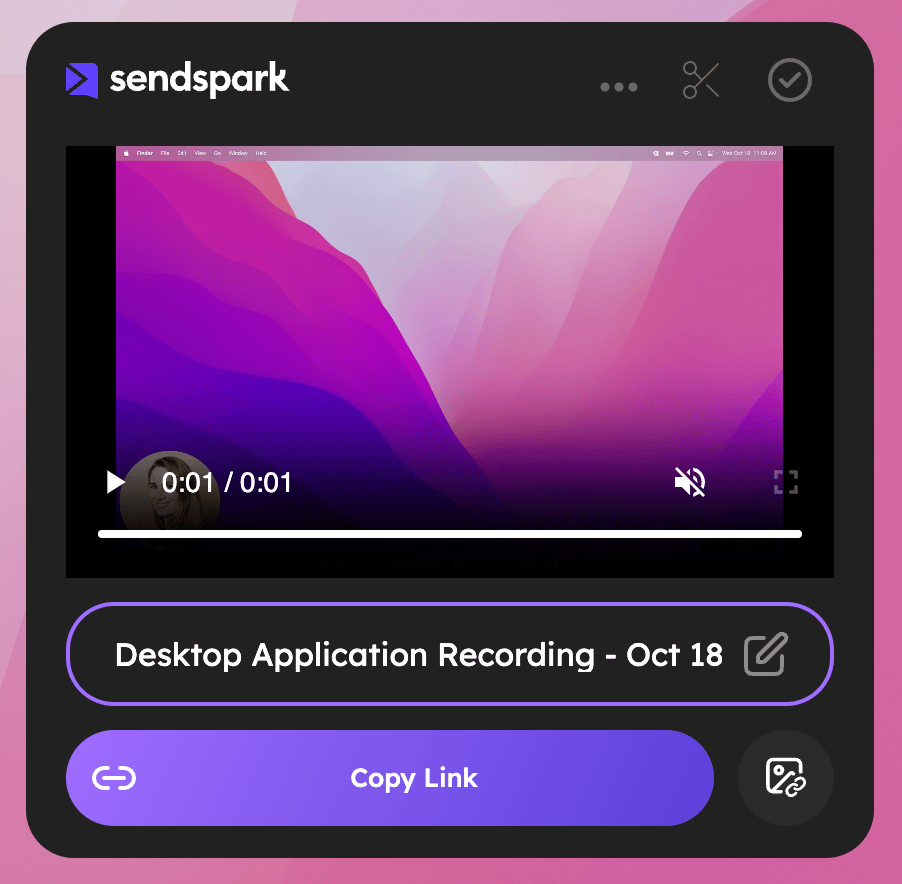
- Rename — Give your video a name that will help you find it later. This is internal-only, your viewer will not see this name.
- Copy Link— Copy the link to your video to share it with anyone. This is the best way to share videos on LinkedIn, Slack, and other direct messaging platforms (but not email).
- Copy Link + Thumbnail— Copy the link to your clipboard with an animated thumbnail to share your video in email. Now, you can just paste in any email draft to share your video in email.
- Edit — Click the scissors icon to open up the Sendspark edit page. This will give you more options to trim, combine videos, add a call-to-action, and do more to improve your video.
- Close — Click the checkmark to close this preview and get back to the home screen to record another video.
9. Or, Find & Share Later!
After you’ve recorded some videos, you’ll be able to access them from your home screen to easily edit or share them. This will refresh every 24 hours.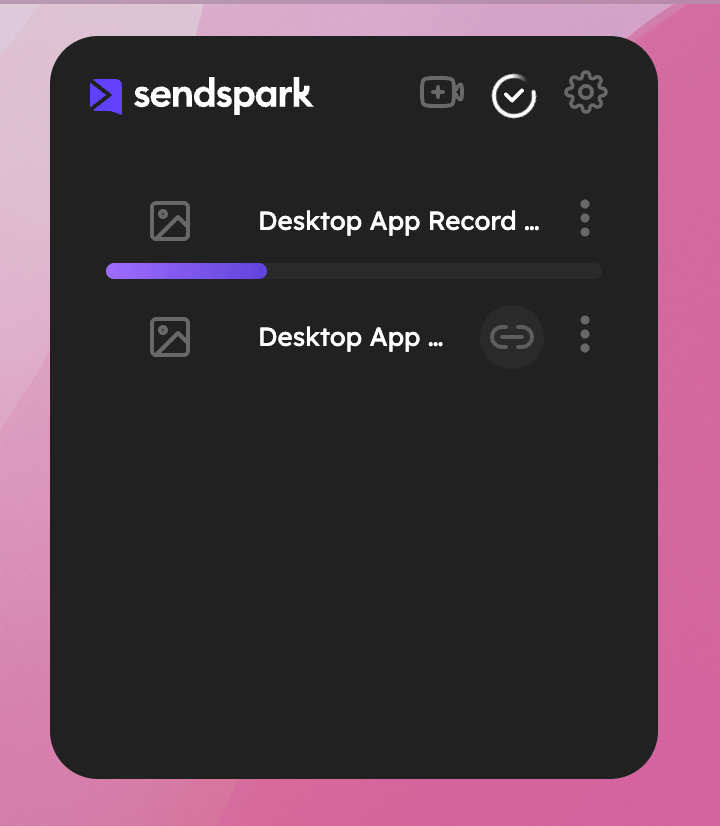
Frequently asked questions
Why use the desktop app instead of the Chrome extension?
Why use the desktop app instead of the Chrome extension?
The desktop app lets you record your camera bubble outside of your browser (so you can record over PowerPoint, PDFs, and other non-browser applications), record multiple videos back-to-back without waiting for earlier ones to finish processing, and tap into more of your computer’s processing power so you’re less likely to hit lag.
Where do I download the desktop application?
Where do I download the desktop application?
Download the Sendspark app for Mac or Windows from the download page, then click the Sendspark icon on your computer to launch it.
What's the difference between recording the Desktop and an Application?
What's the difference between recording the Desktop and an Application?
Choosing a Desktop option records everything on your screen, which is the best way to make sure you don’t miss anything. Choosing an Application option records only what’s visible in that one app, giving a cleaner, more polished recording. If you need to show multiple apps, use the Desktop option.
Can I move the camera bubble to another screen while recording?
Can I move the camera bubble to another screen while recording?
No. The camera bubble stays on the screen where Sendspark was opened and cannot be moved to another screen during a recording session. You can still customize its shape, size, avatar, and location before recording.
My recording didn't upload. Can I still get it back?
My recording didn't upload. Can I still get it back?
Often yes, as long as you haven’t closed the desktop app since recording. Open the app, click the middle icon in the app header, select the video’s thumbnail, open the three-dot Options menu, and download the file so you can re-upload it. See how to recover videos in the desktop app. Once the app is closed the recording is gone, so check before quitting.
Should I still keep the Chrome extension installed?
Should I still keep the Chrome extension installed?
Yes. We recommend keeping the Chrome extension installed alongside the desktop app so you can use Sendspark’s Instant Integrations with Gmail, LinkedIn, and other messaging platforms.