

Key takeaways
- The workflow has two important pieces: a trigger (Sendspark Dynamic Video Generated for Contact) and an email built with an HTML module containing the Sendspark share snippet.
- Use the “When filter criteria is met” trigger and filter on the Dynamic Campaign Id of the campaign you created.
- Find the Dynamic Video Campaign ID in the campaign URL, between the slashes after “edit-v2”.
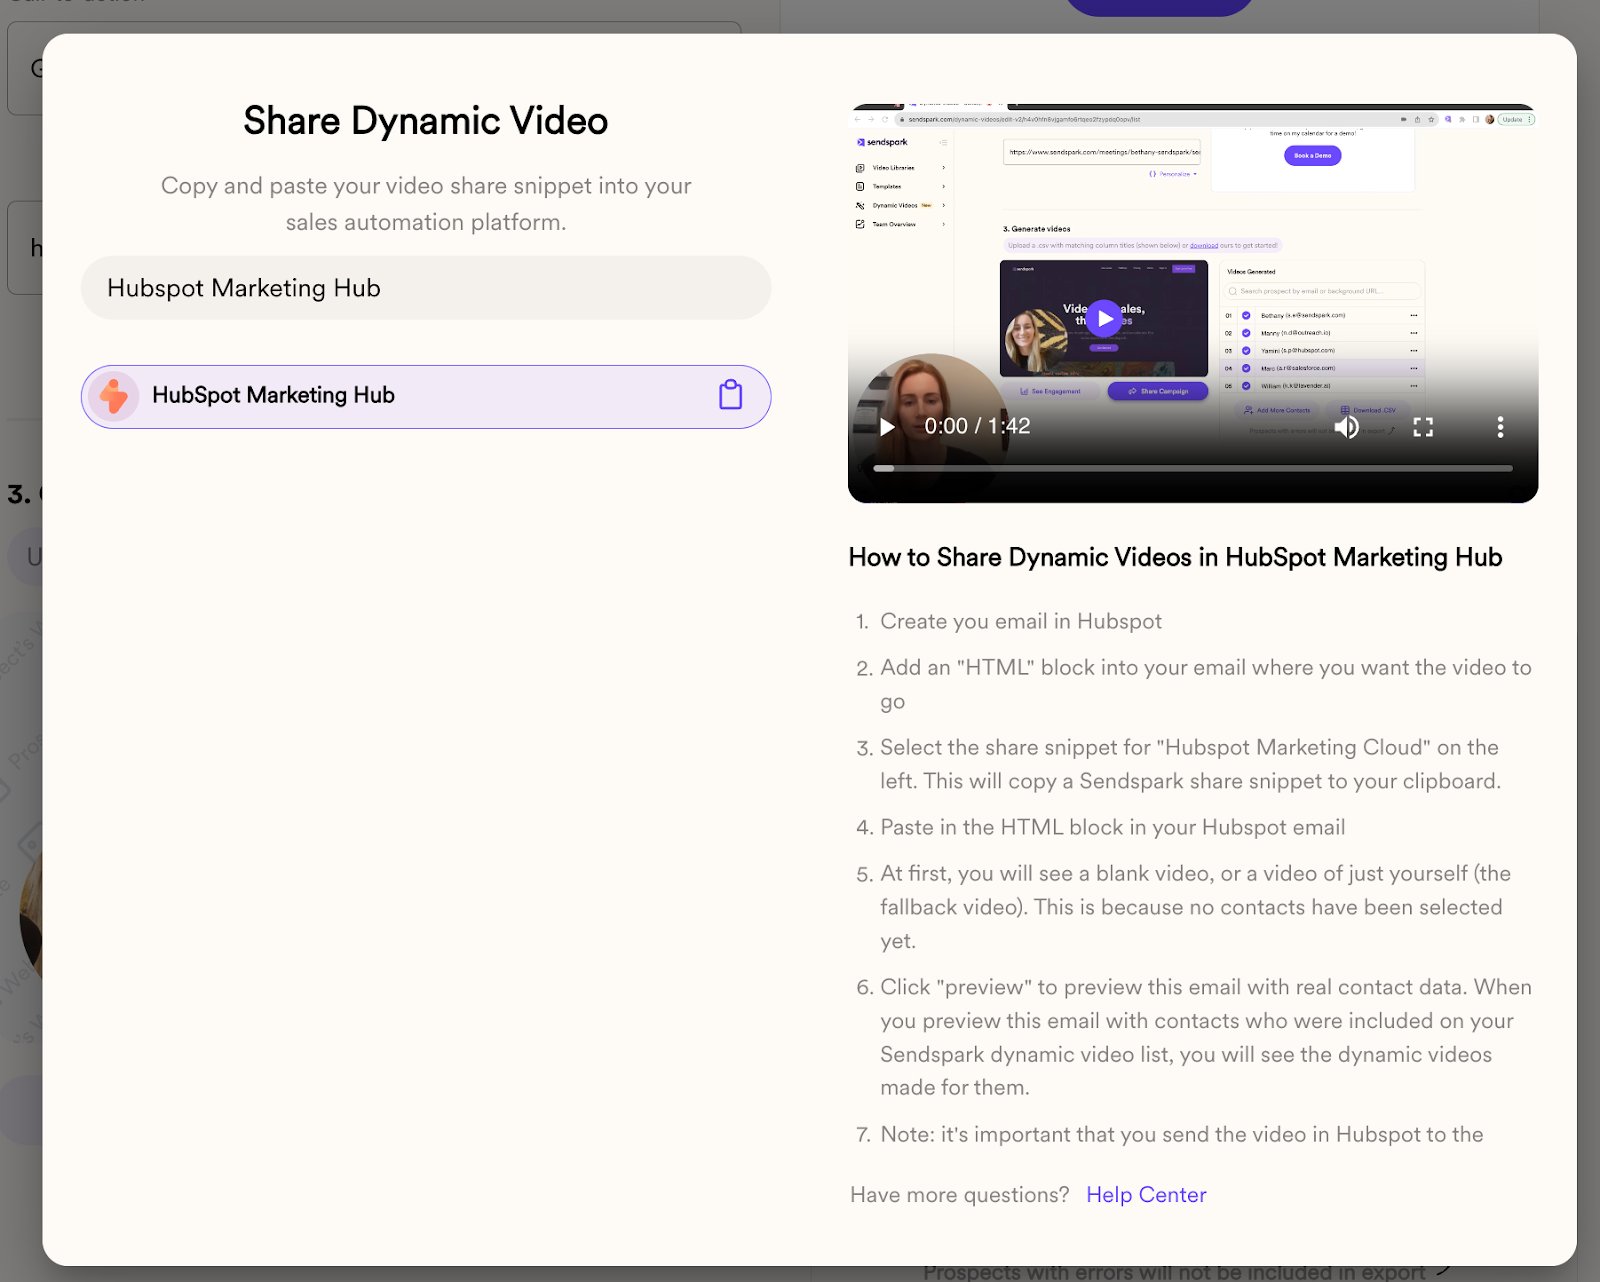
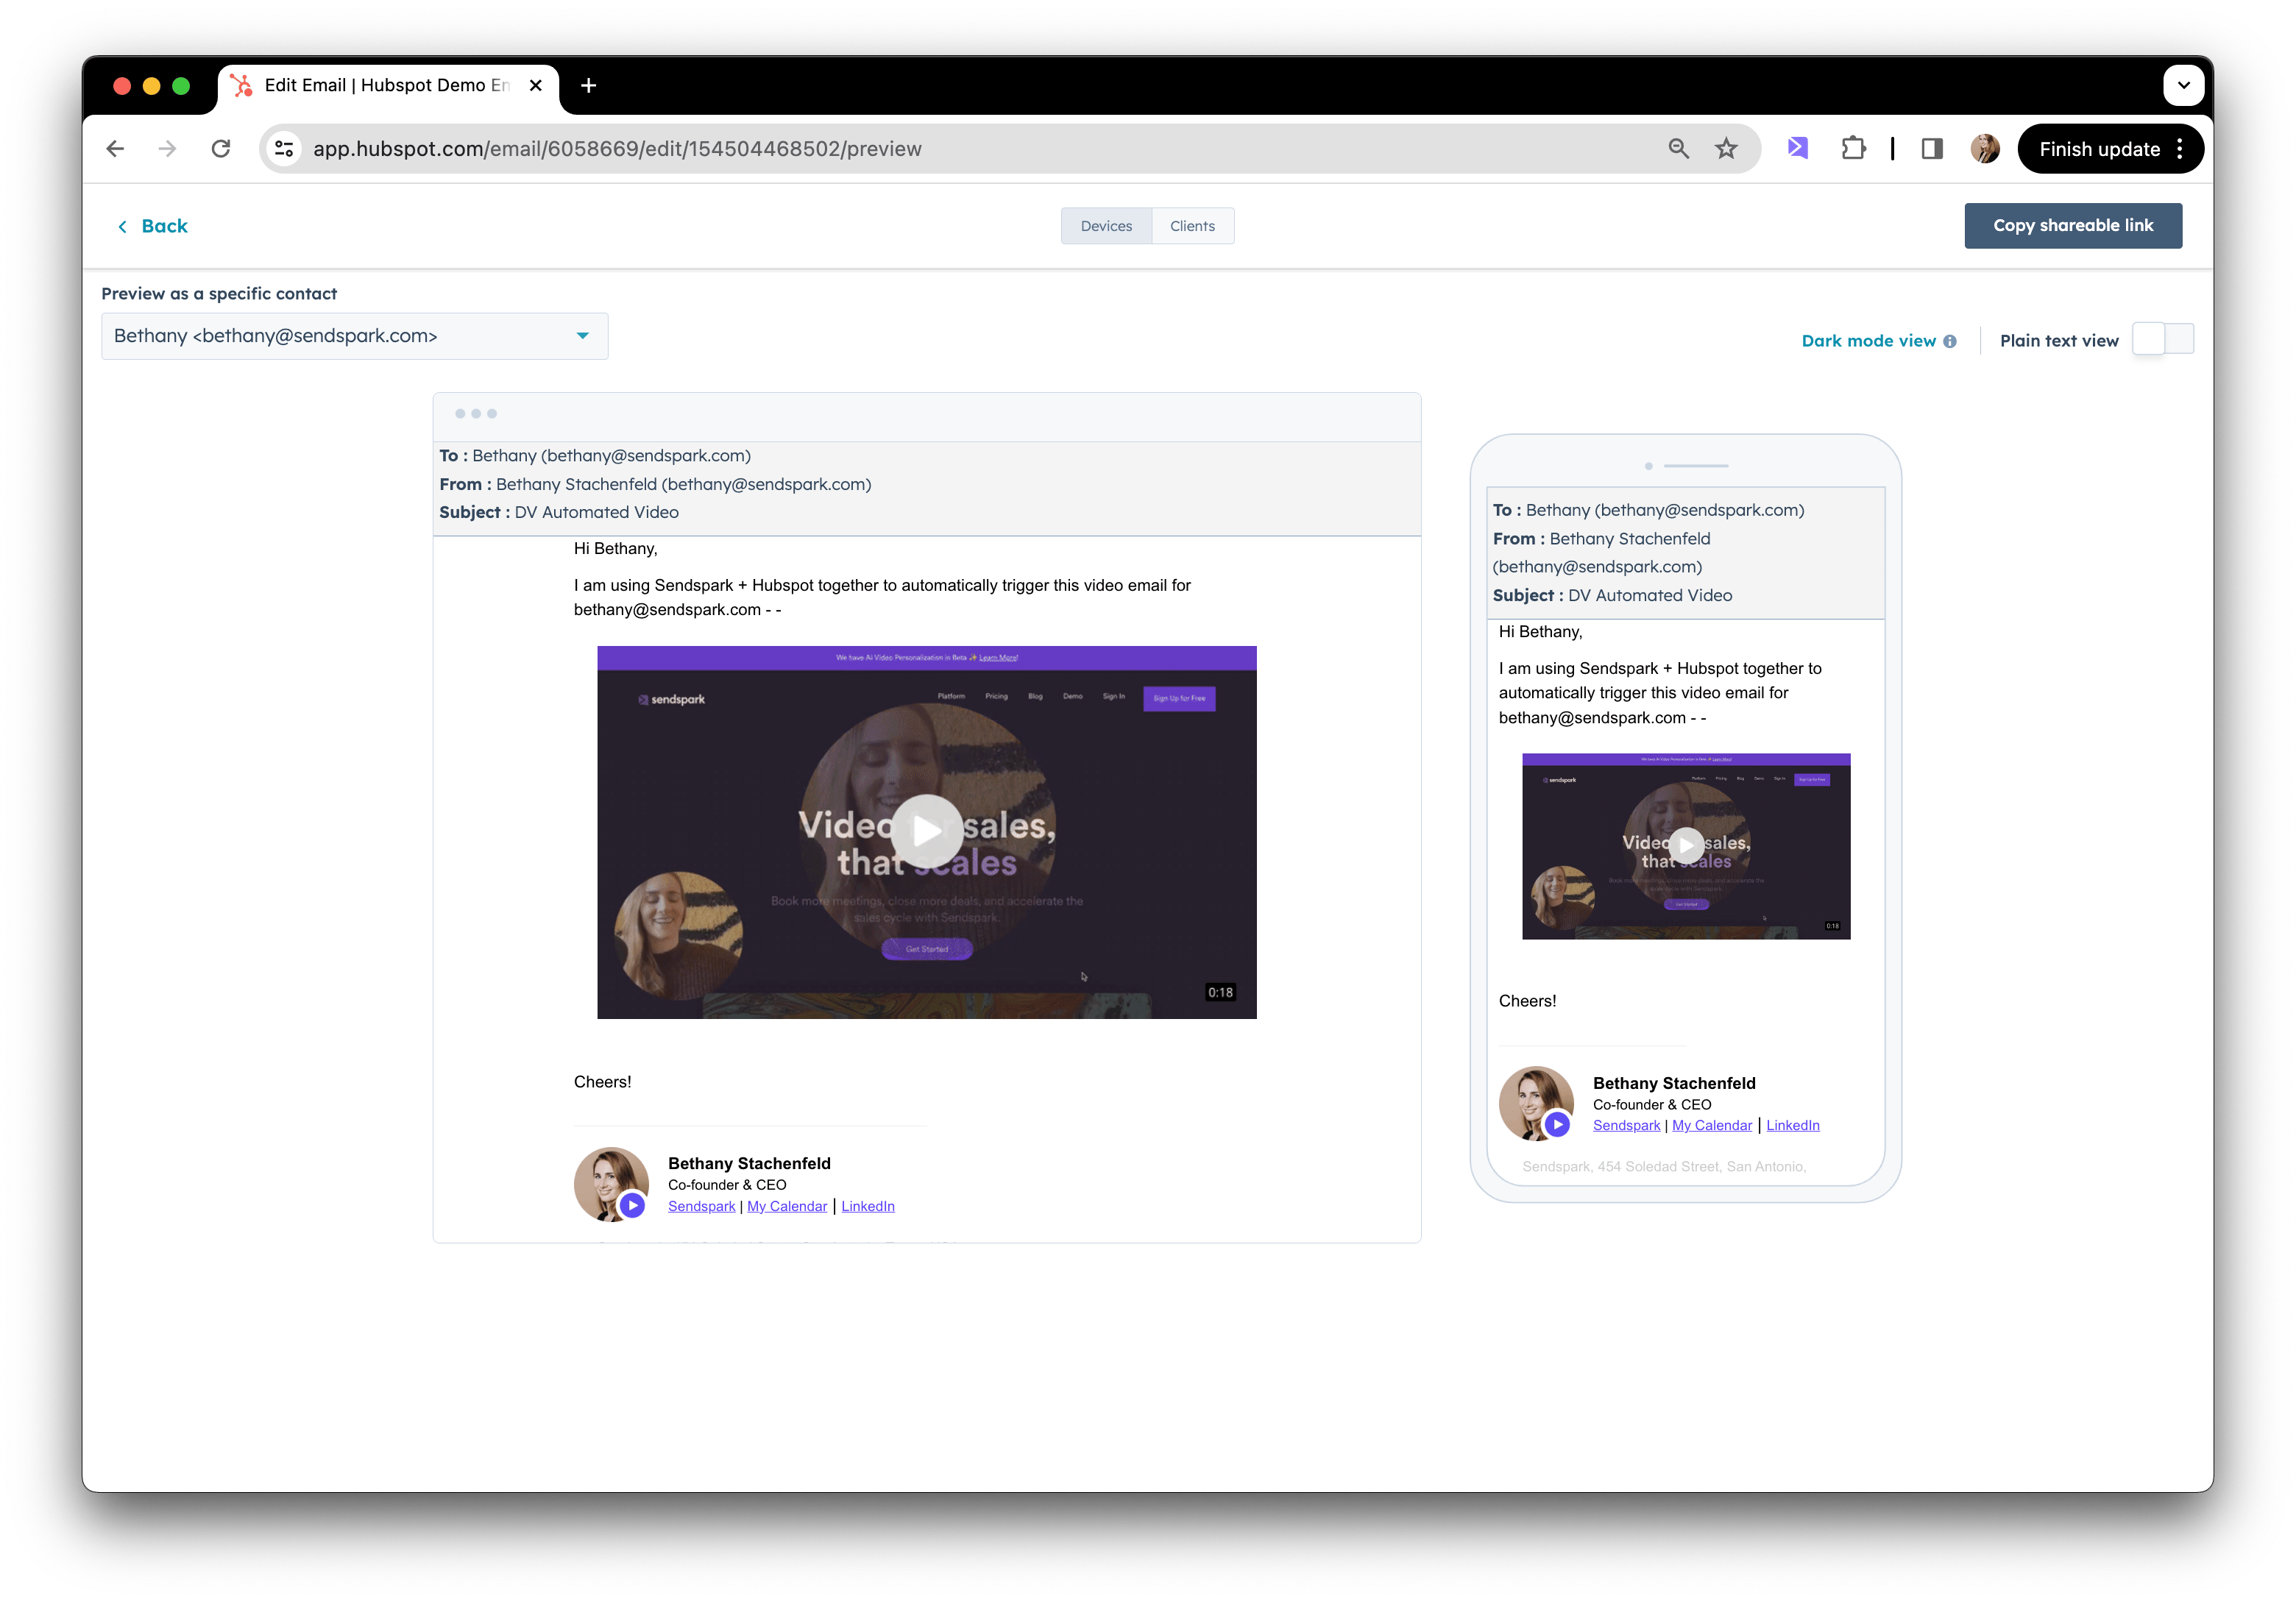
- Paste the share snippet (from Share Campaign → HubSpot Marketing Hub) into an HTML email module. It will look like a broken image, which is expected; preview with a contact to confirm videos render.
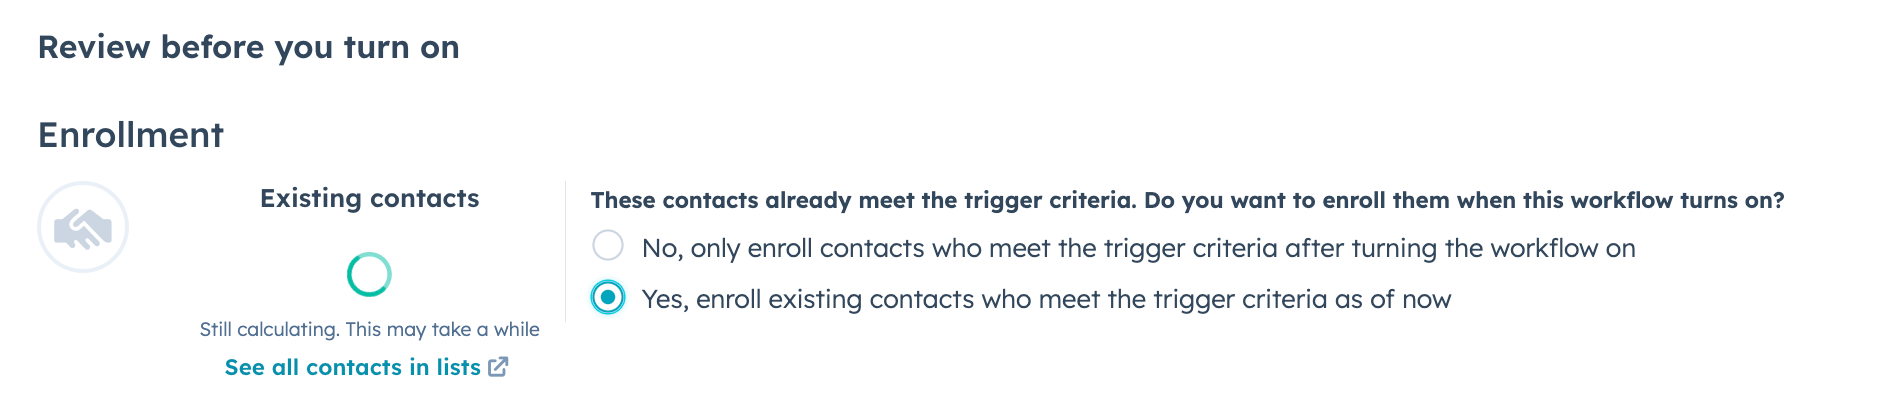
- When publishing, choose “Yes, enroll existing contacts who meet the trigger criteria as of now” to include contacts you already generated videos for.
How to Automatically Send AI-Personalized in HubSpot Workflows
1. Create Your Dynamic Video in Sendspark
Go to the dynamic videos tab in Sendspark. Click on “Create Dynamic Video,” and follow the steps to create a dynamic video campaign. Here’s you’ll be able to take one video and use placeholders (i.e. “contact first name”) that will get updated when you import your contact information. Learn more about creating AI-personalized videos here.2. Set Up Your Workflow in HubSpot
The goal of the workflow is automatically send dynamic video emails in HubSpot as soon as contacts are added to the Sendspark Dynamic Video Campaign.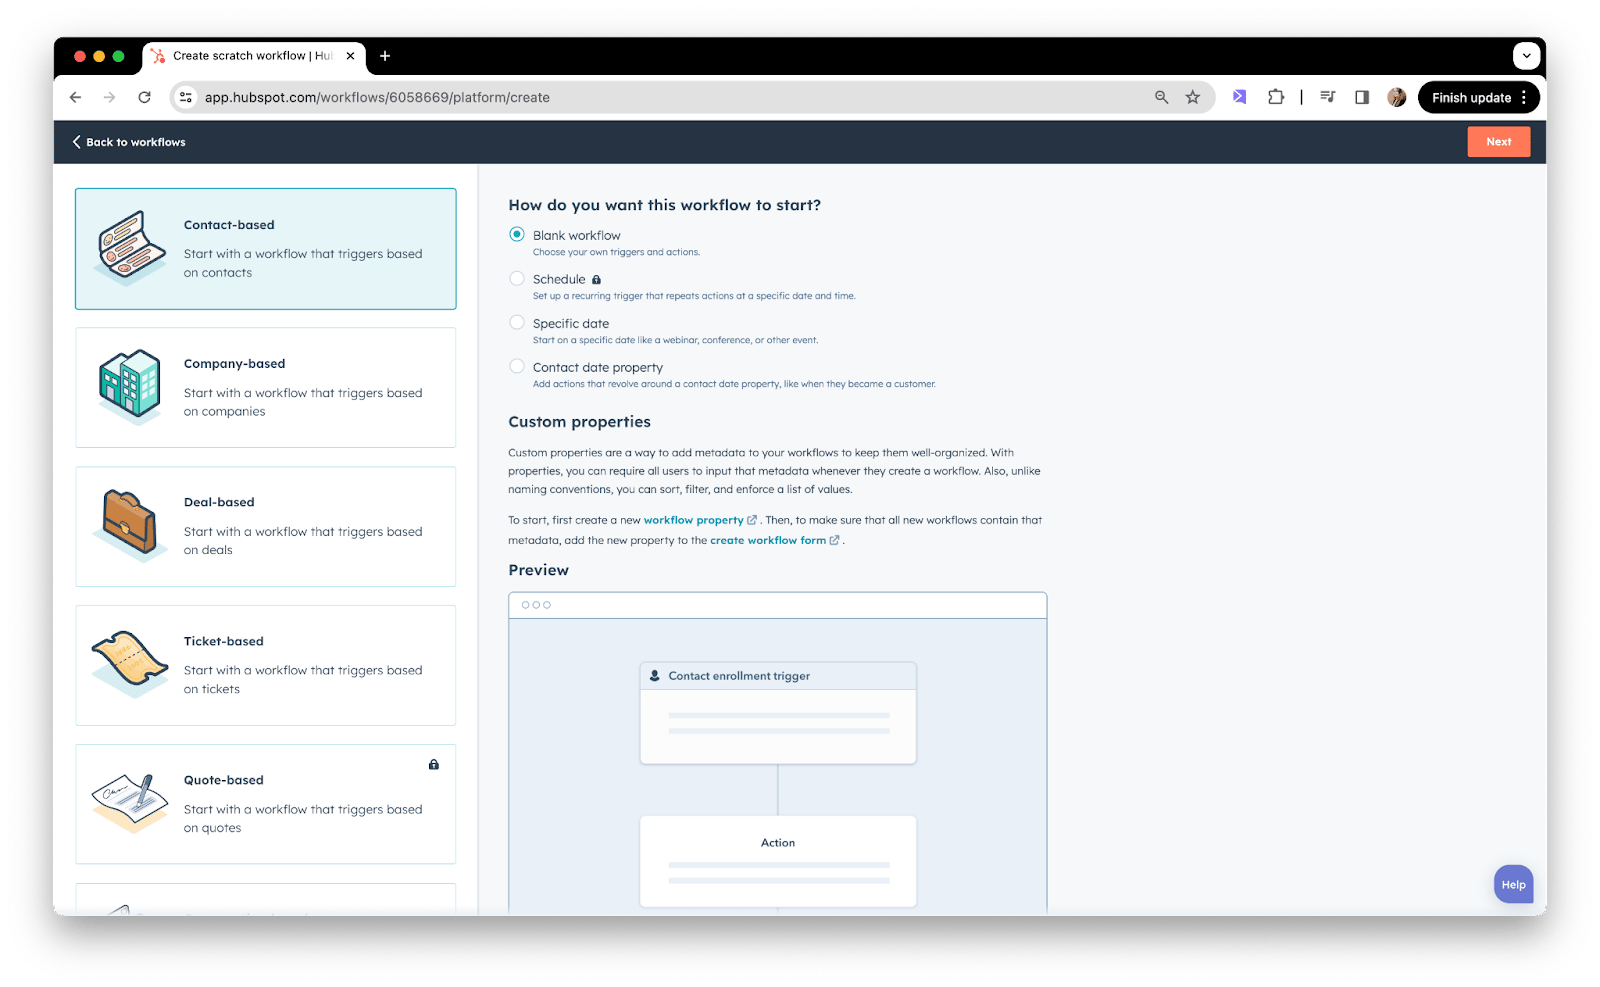
A) The Trigger: Dynamic Video Generated
The trigger indicates when someone should be enrolled in this workflow. In this case, you should use a “Filter Criteria” trigger: Sendspark Dynamic Video Generated for Contact This basically means: when a contact has a video from that campaign generated for them, enroll them in this HubSpot Workflow! I. Click “Set up triggers”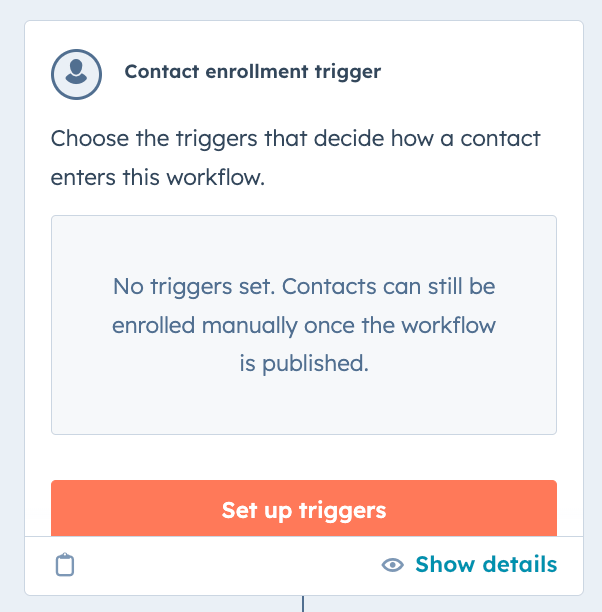

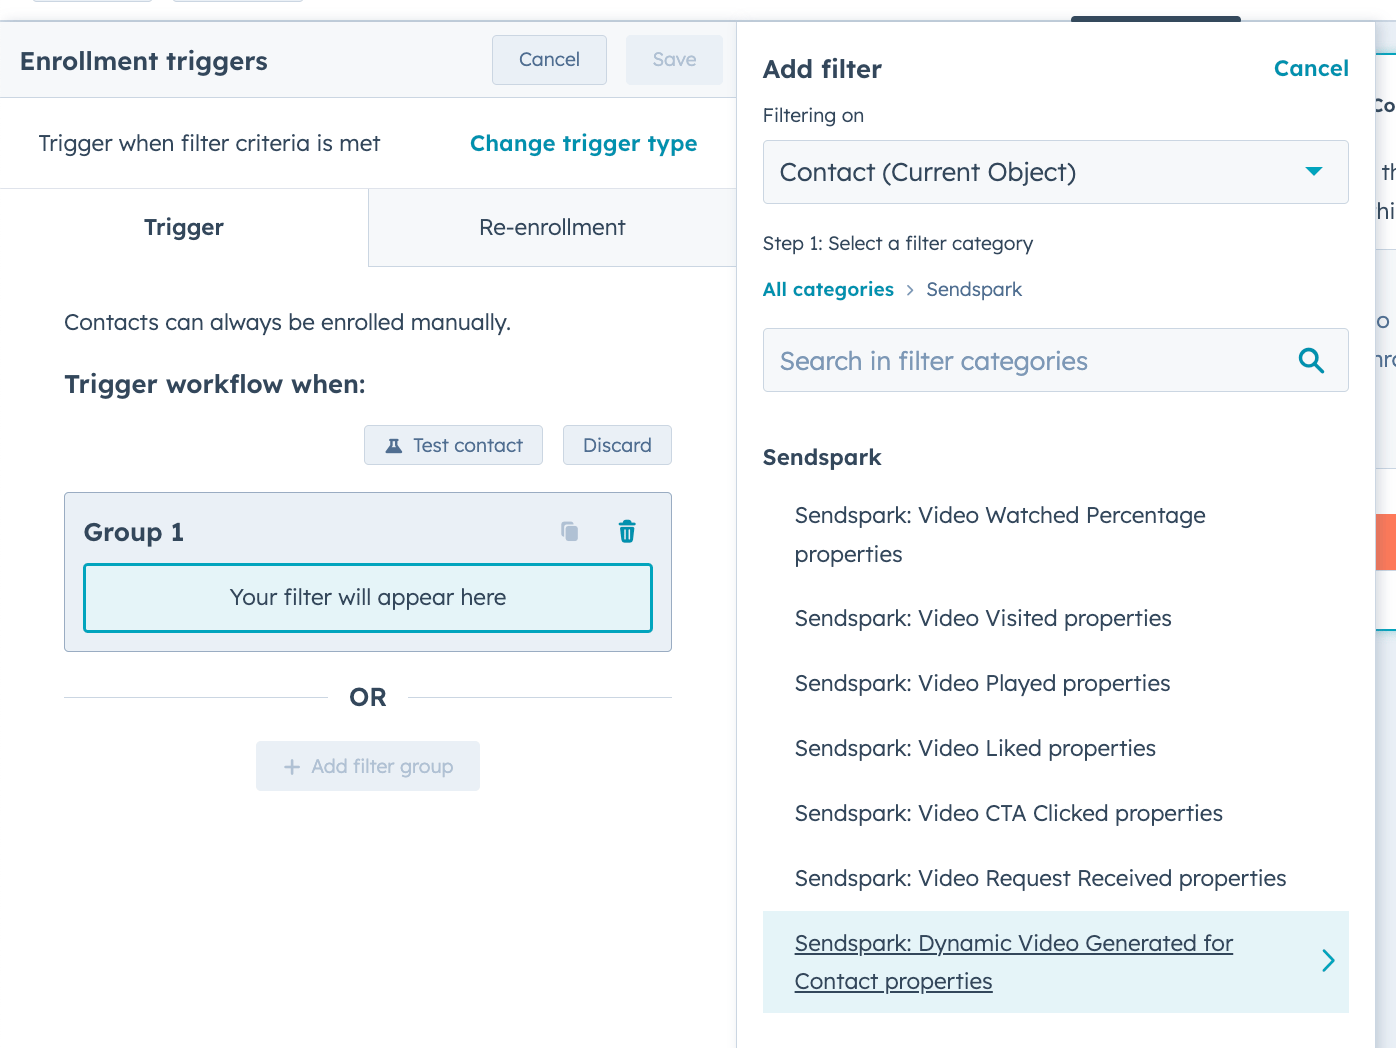

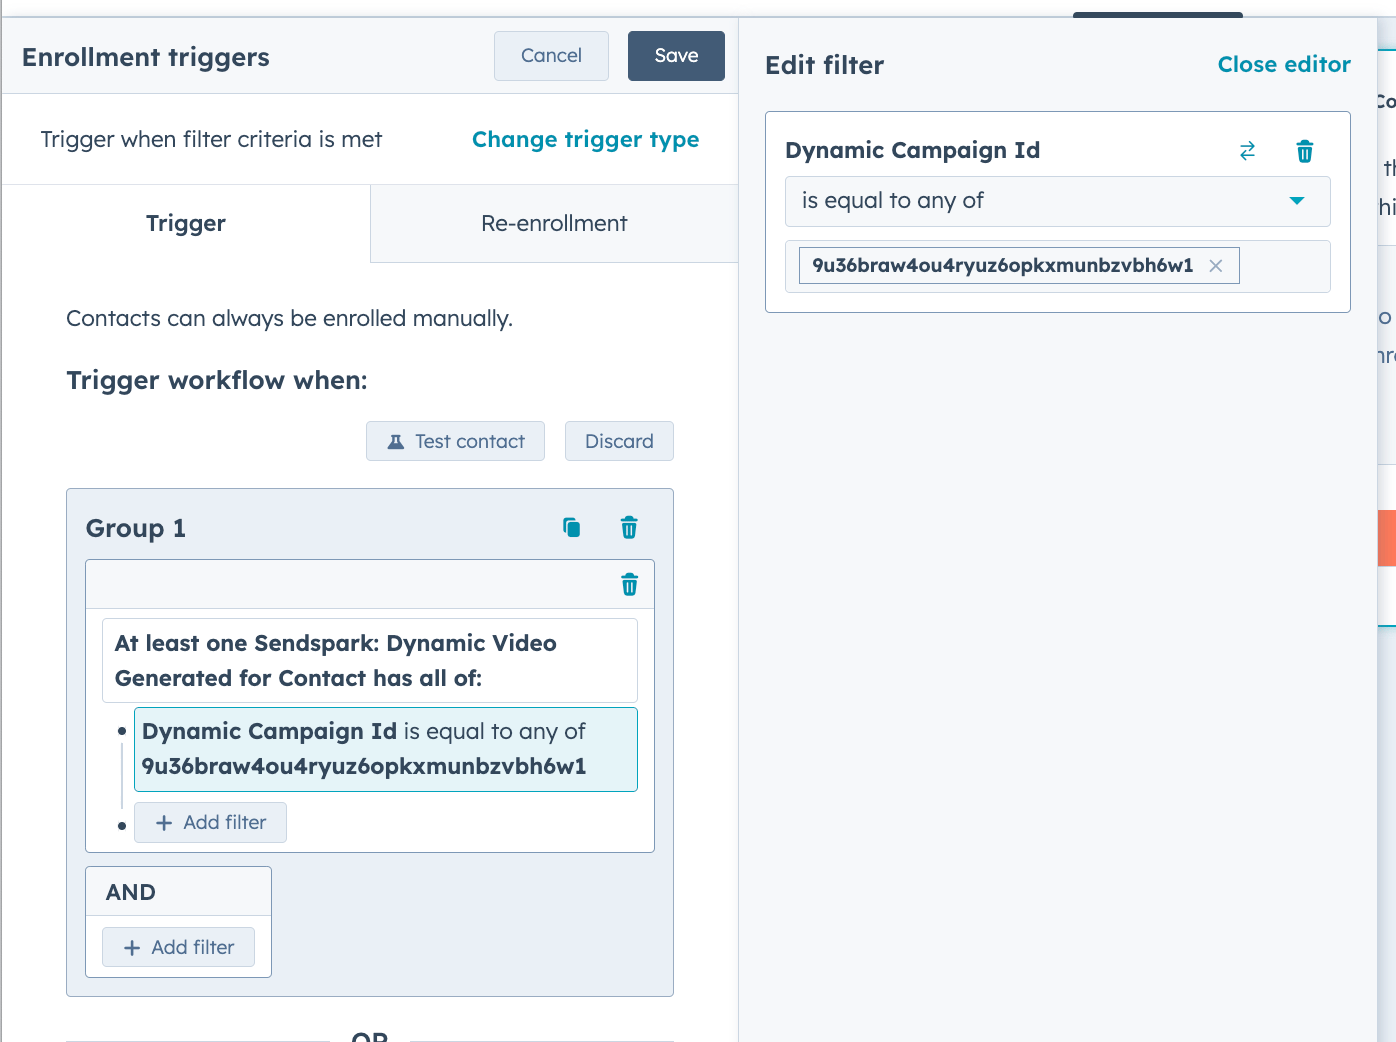
B. Create Email in HubSpot
I. Create a new marketing email. II. Add an HTML module. Search the module list, or open Other modules and pick HTML - Email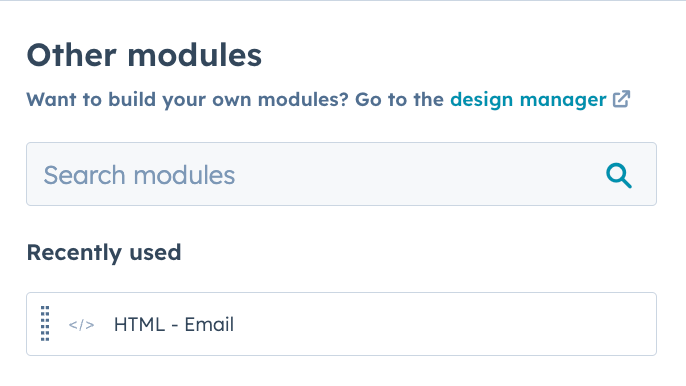
3. Publish HubSpot Workflow
Go back to your workflow, add your email as a step.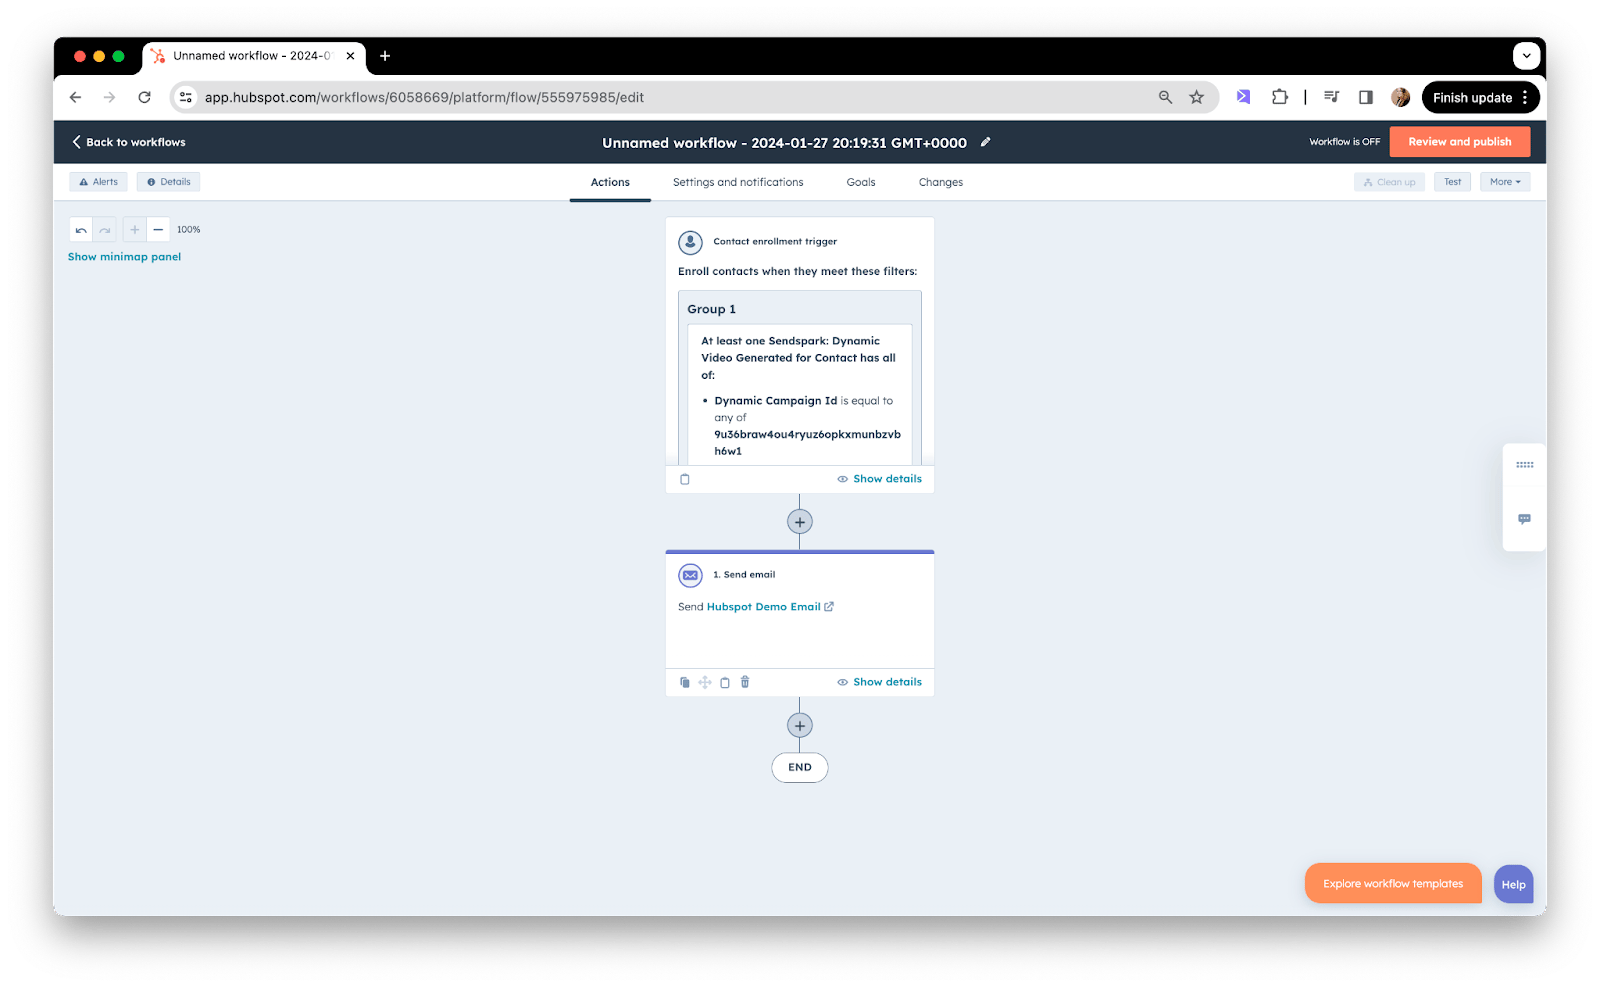
Frequently asked questions
What triggers the HubSpot workflow?
What triggers the HubSpot workflow?
Use a “When filter criteria is met” trigger and select the Sendspark → Dynamic Video Generated for Contact properties. When a contact has a video from that campaign generated for them, they’re enrolled in the workflow.
Where do I find my Dynamic Video Campaign ID?
Where do I find my Dynamic Video Campaign ID?
You can find the Dynamic Video Campaign ID in the URL of your dynamic video campaign, between the slashes after “edit-v2”. Paste that value into the Dynamic Campaign Id field in your HubSpot trigger.
How do I add the video to the HubSpot email?
How do I add the video to the HubSpot email?
Create a new marketing email, add an HTML module (search the module list, or open Other modules and pick HTML - Email), then in Sendspark click “Share Campaign” and “HubSpot Marketing Hub” and paste that snippet into the HTML code block.
The pasted snippet shows a broken image. Is that a problem?
The pasted snippet shows a broken image. Is that a problem?
No, that’s okay and expected. You can preview the email with one of the contacts from your dynamic video campaigns to make sure the videos are rendering correctly.
How do I include contacts I already generated videos for?
How do I include contacts I already generated videos for?
When you Review and Publish the workflow, use the option “Yes, enroll existing contacts who meet the trigger criteria as of now” to include all the contacts you’ve already generated videos for in Sendspark.