

Key takeaways
- A custom domain lets you serve your video share pages and video request pages from your own subdomain, which helps videos get through firewalls and gives customers a consistent, white-label experience.
- Set your subdomain in Workspace Settings under Custom Domain, then copy the generated Type, Host, and Value into your DNS provider’s records.
- A custom domain is hard to remove or update once set up, so be sure of your subdomain first. If you do need to swap domains, follow custom domain migration. Subdomains are per-workspace, so each workspace needs its own unique subdomain.
- DNS changes can take up to 48 hours to verify. In Cloudflare, set the Proxy Status to “DNS Only,” and after setup run your new URL through the Twitter Card Validator so previews show on Twitter.
Important Considerations:
- Once your custom domain is set up, it will be hard to remove or update. Please be absolutely sure of the subdomain you want to use before setting it up.
- If you have already set up a Custom Domain and you want to remove it so that you can add a new one, please contact support
- Subdomains are set on a per-workspace basis. If you are using multiple workspaces with Sendspark, you must add a new, unique subdomain for each workspace.
To start the domain connection process…
- In your Sendspark account, go to workspace settings
- Scroll to the bottom of the page, where it says Custom Domain
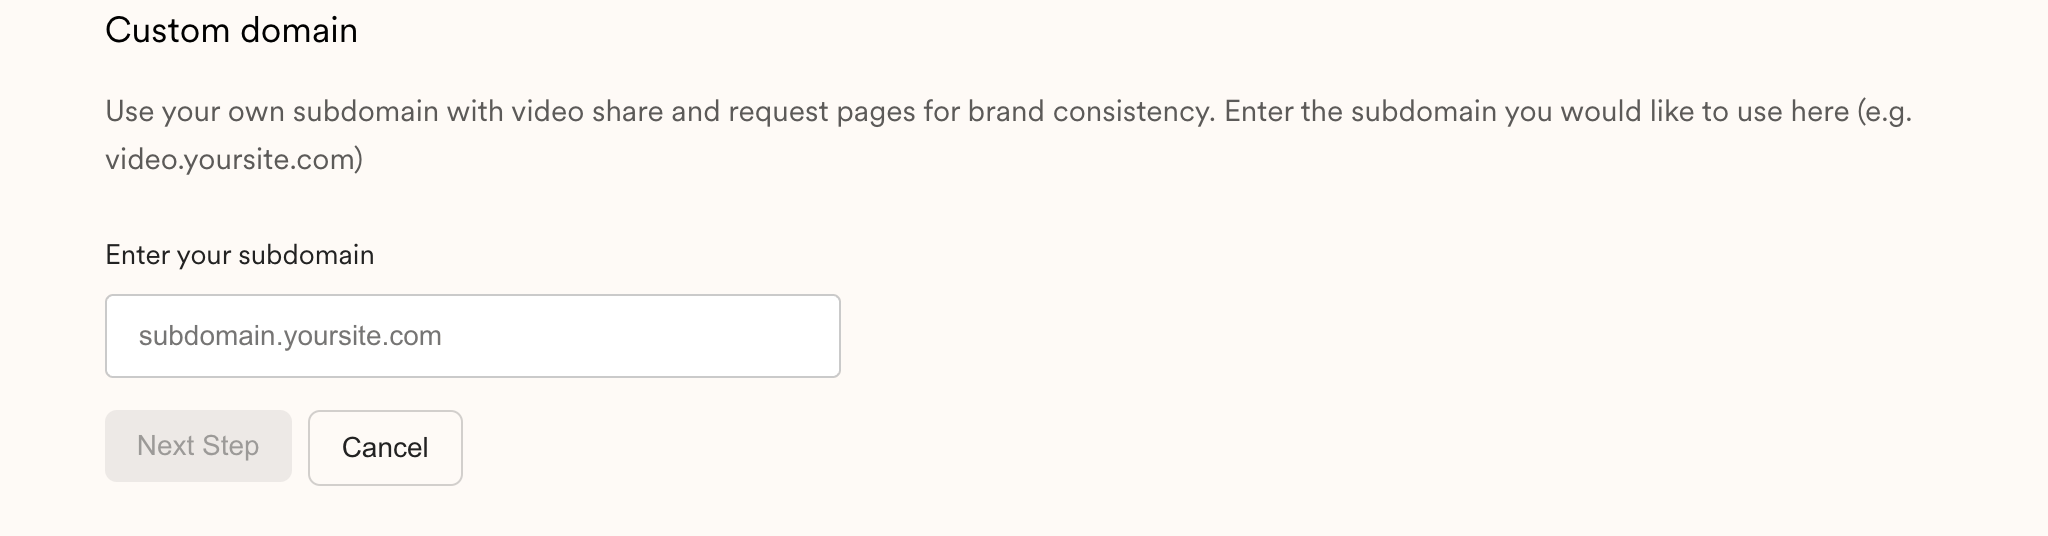
Enter your subdomain
- Enter the subdomain you want to use with Sendspark (e.g. videos.yourdomain.com)
- Click Next Step
Access your DNS Settings
In a separate tab, please access your DNS settings:- Log in to your DNS provider where you purchased your domain (i.e. name.com)
- Locate the records for the domain you want to use
- Go to DNS Settings
Add Sendspark to your DNS Records
- Back in Sendspark, click “I’ve done this, let’s start” on the modal that’s popped up. This will generate the Type, Host, and Valuefor you.

- Please copy and paste the values you see for Type, Host, and Value into your DNS records.
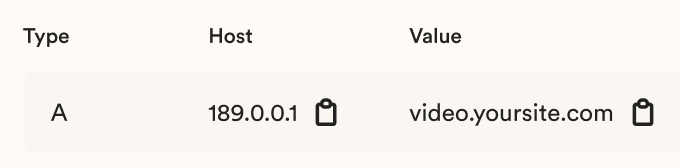
Important Notes
- You might need to modify the value based on your DNS provider. For example, in GoDaddy and Cloudflare, you will only paste the subdomain (“video”) and not the root domain (“yoursite.com”).
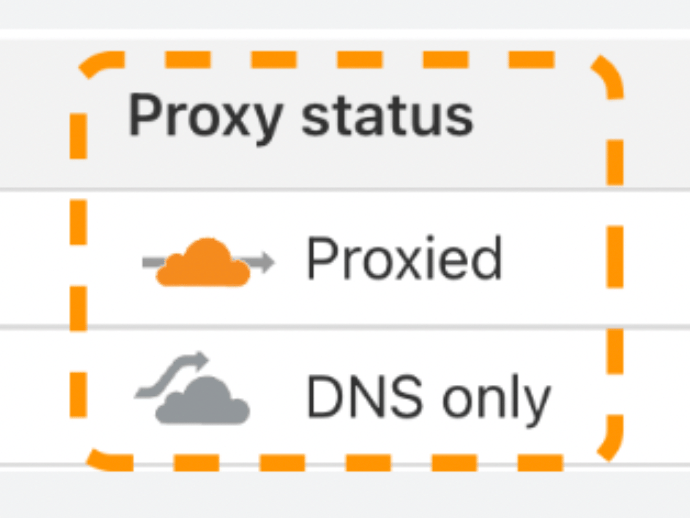
- For Cloudflare, the Proxy Status should be**“DNS Only”** (so you will need to change the default, which is “Proxied”)
Verify your Domain
- Back in Sendspark, click Test Connection
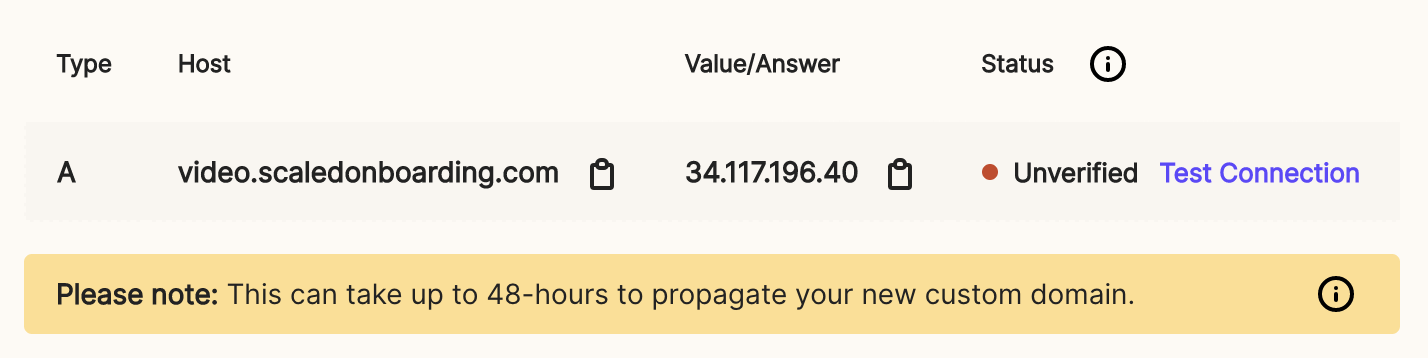
- If your domain is connected, you will see a green dot, and the word **Connected.**Way to go — you’re all set! 🥳

- If you’re still seeing Unverified, no worries! It can take up to 48 hours to update your DNS records. Please pour yourself some coffee, and try again in a bit. ☕️
Twitter Validation
Please note, after you set up your custom domain, you may have to run the new URL through Twitter Card Validator to get video previews to show up when you share Sendspark links on Twitter. Validate Twitter cards here.Frequently asked questions
How do I set up a custom domain for my Sendspark videos?
How do I set up a custom domain for my Sendspark videos?
Go to your workspace settings, scroll to Custom Domain, and enter the subdomain you want to use (e.g. videos.yourdomain.com), then click Next Step. Copy the Type, Host, and Value that Sendspark generates into your DNS provider’s records, then return to Sendspark and click Test Connection.
Can I change or remove my custom domain later?
Can I change or remove my custom domain later?
Once your custom domain is set up it is hard to remove or update, so be absolutely sure of the subdomain before setting it up. If you have already set up a custom domain and want to remove it so you can add a new one, contact support.
Do I need a separate subdomain for each workspace?
Do I need a separate subdomain for each workspace?
Yes. Subdomains are set on a per-workspace basis, so if you use multiple workspaces with Sendspark, you must add a new, unique subdomain for each workspace.
Why is my domain still showing as Unverified?
Why is my domain still showing as Unverified?
It can take up to 48 hours for DNS records to update, so try again a bit later. If you use Cloudflare, make sure the Proxy Status is set to “DNS Only” rather than the default “Proxied.”
Do I need to do anything for video previews on Twitter?
Do I need to do anything for video previews on Twitter?
Yes. After setting up your custom domain, you may need to run the new URL through the Twitter Card Validator to get video previews to show up when you share Sendspark links on Twitter.