

Key takeaways
- These steps are for agencies that plan to run multiple workspaces and have subscribed to an agency plan.
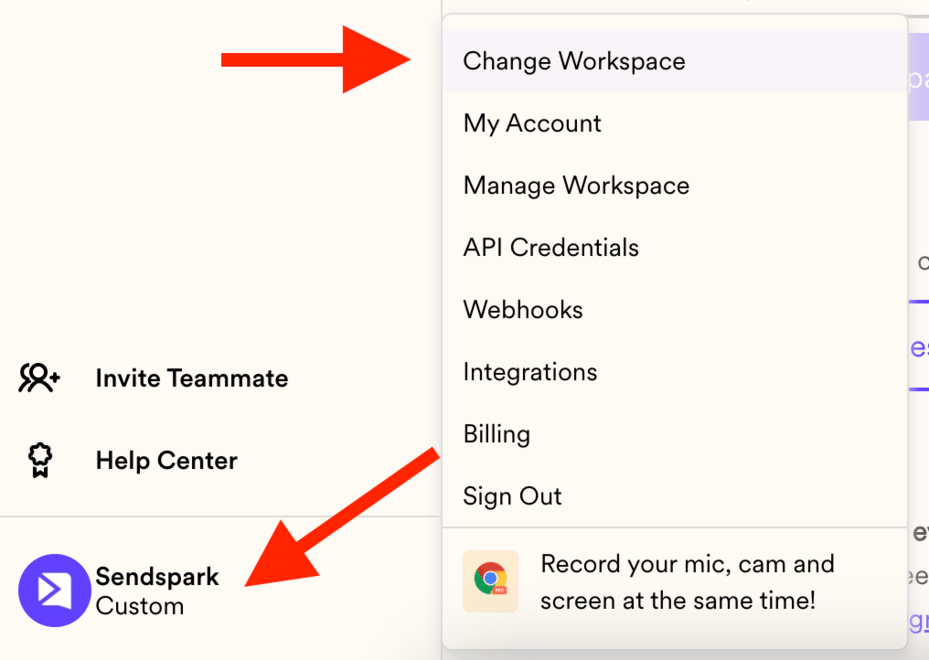
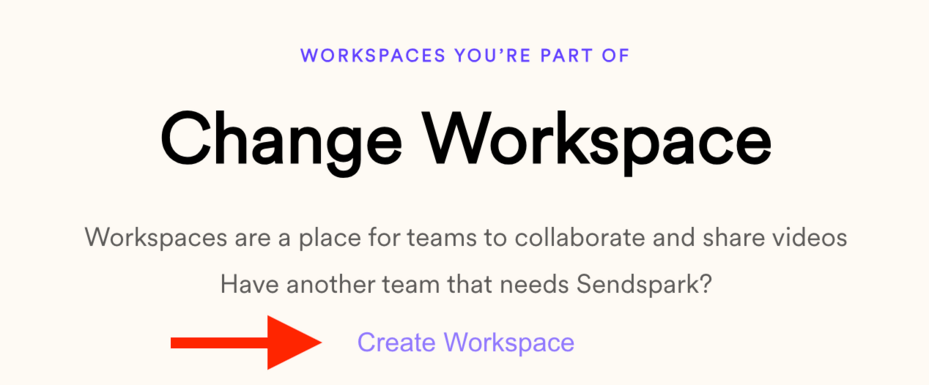
- Create a workspace via the menu → Change Workspace → Create Workspace.
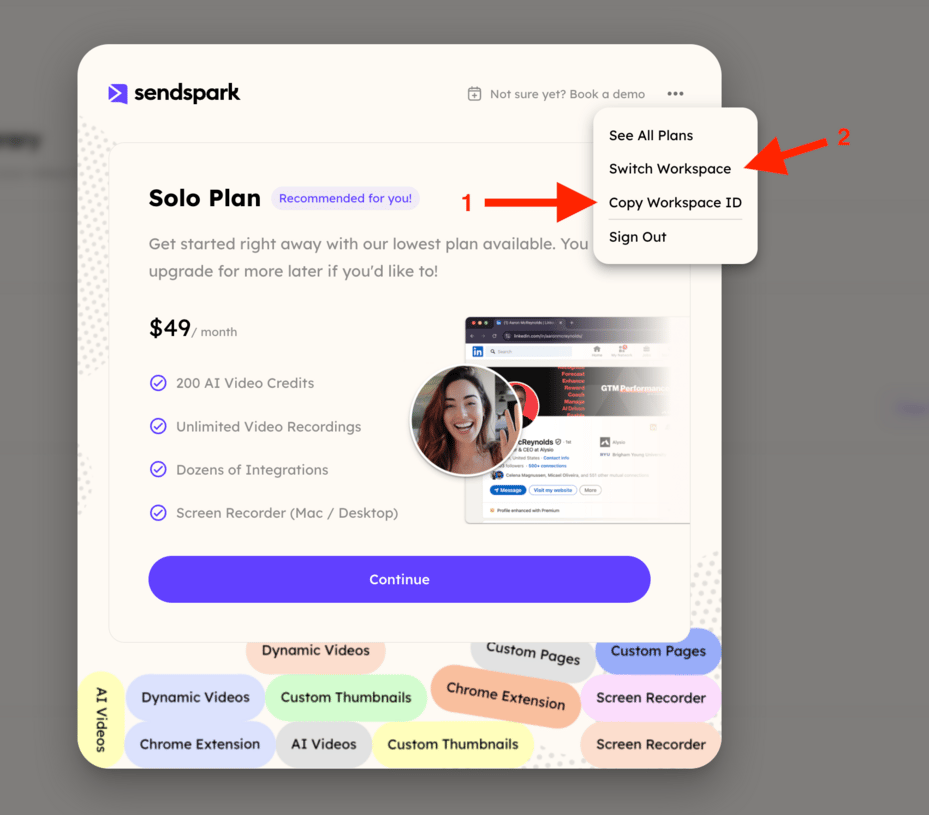
- After setup, copy the Workspace ID and share it with Tech Support through the chat system to activate it.
- If you’re on an agency plan, let Tech Support know how many minutes you’d like allocated to the workspace and they’ll transfer them.
Frequently asked questions
Who can activate a new workspace this way?
Who can activate a new workspace this way?
These steps are for agencies that plan to run multiple workspaces and have subscribed to an agency plan.
How do I activate the new workspace?
How do I activate the new workspace?
Go to your menu and hit Change Workspace, click Create Workspace, and finish the required steps. Then copy the Workspace ID and share it with Tech Support through the chat system.
How do I get minutes allocated to the new workspace?
How do I get minutes allocated to the new workspace?
If you have an agency plan, let Tech Support know how many minutes you’d like to allocate to that workspace and they’ll transfer them for you.
Where do I find the Workspace ID to send to support?
Where do I find the Workspace ID to send to support?
Open Workspace Settings, click the Manage Workspace tab, then click the hidden Workspace ID on the right-hand side to copy it. See How to find your Workspace ID for details.