

Key takeaways
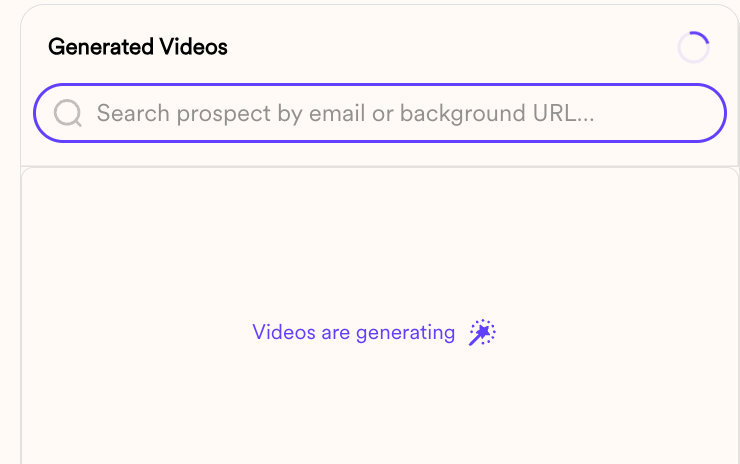
- The workflow has three parts: create a Dynamic Video Campaign, generate videos via a Make HTTP Request to the Sendspark API, and send them when a webhook confirms each video is ready.
- Videos are generated by POSTing prospect data to
https://api-gw.sendspark.com/v1/workspaces/{workspaceId}/dynamics/{dynamicId}/prospectwith your API key and API secret in thex-api-keyandx-api-secretheaders. - A Sendspark webhook linked to the campaign fires each time a video is created, enrolling that contact in your Make scenario so you only send after the video is ready.
- Send by link using the
videoLinkvariable, or embed an animated thumbnail using bothvideoLinkandthumbnailUrlin an HTML snippet.
- Create dynamic video campaign
- Automatically Generate Videos in Make
- Automatically send videos
How to Create AI-Personalized Videos in Make
1. Create Dynamic Video Campaign
Before you get started, you will want to have your Dynamic Video Campaign set up in Sendspark. To create a dynamic video campaign….- Go to the Dynamic Video Section of Sendspark
- Record, upload, or select a video. Remember to use the placeholder word “Watermelon” for where you want your viewer’s first name to go
- Customize the “scroll” effect as you’d like.
- Toggle on “Voice Cloning” if you want to use a custom intro, (ex: “Hi First Name”) for each of your viewers
- Customize a page template for what you want to appear on your video page alongside the video.
Benefits of AI-Personalized Videos
- Improved Engagement: Tailored content helps capture and retain the viewer’s attention.
- Ease of Implementation: With proper setup, personalization can be applied to numerous videos efficiently.
- Scalability: The automation process allows you to personalize videos for hundreds or thousands of recipients with minimal manual effort.
2. Automatically Generate Videos in Make
In this step, we are going to show how you can automatically generate videos in Make.- In Make, click Create a new scenario

- You can set any trigger to start your automation.
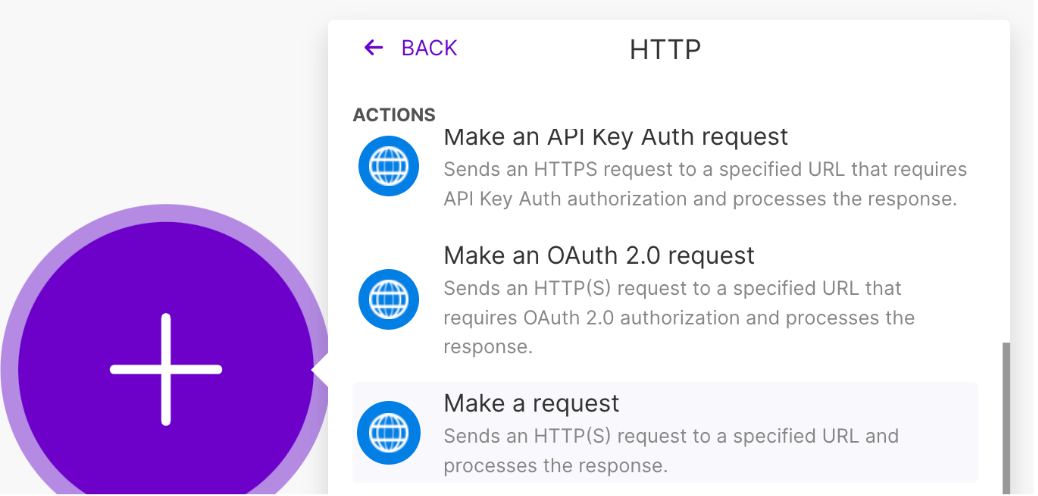
- To automatically create Sendspark videos, make an HTTP Request
- Fill out the HTTP request with this information:
- URL:
https://api-gw.sendspark.com/v1/workspaces/{workspaceId}/dynamics/{dynamicId}/prospect - You can find the workspaceId from your API Credentials tab
- You can find your dynamicId from the URL of your dynamic video campaign
 Method: POST
 - Headers: You’ll need two:
x-api-key(your API key) andx-api-secret(your API secret). Set Body type toRaw, Content type toJSON (application/json), and leave Parse response asNo - You can find these both from your API credentials tab
- Body: Use this data into the body. You can make the “prospect” fields dynamic by using data from your Make automation.
{ "processAndAuthorizeCharge": true, "prospectDepurationConfig": { "forceCreation": false,"payloadDepurationStrategy": "keep-last-valid" }, "prospect": { "contactName": "John", "contactEmail": "john@sendspark.com", "company": "Sendspark", "customfield": "", "backgroundUrl": "https://sendspark.com"}}
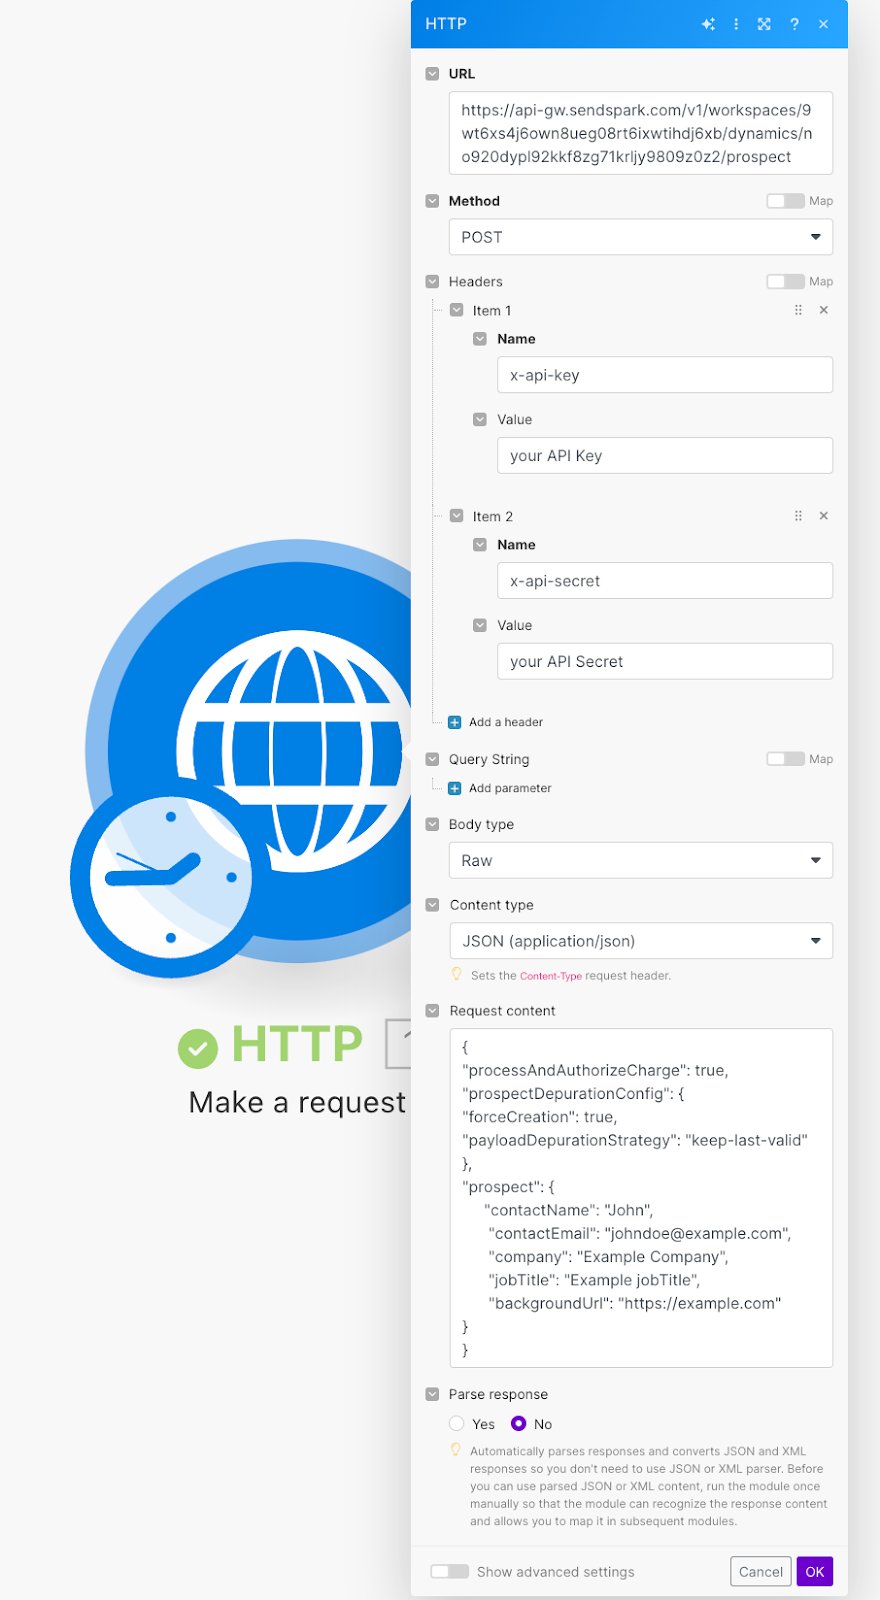
HTTP Request settings at a glance
3. Automatically Send Videos
For the last step of this automation, we’ll create a webhook to know when AI videos have successfully generated, and are ready to send to contacts.- In Make, create a new Scenario, using a “Custom Webhook”
- Click Copy address to clipboard
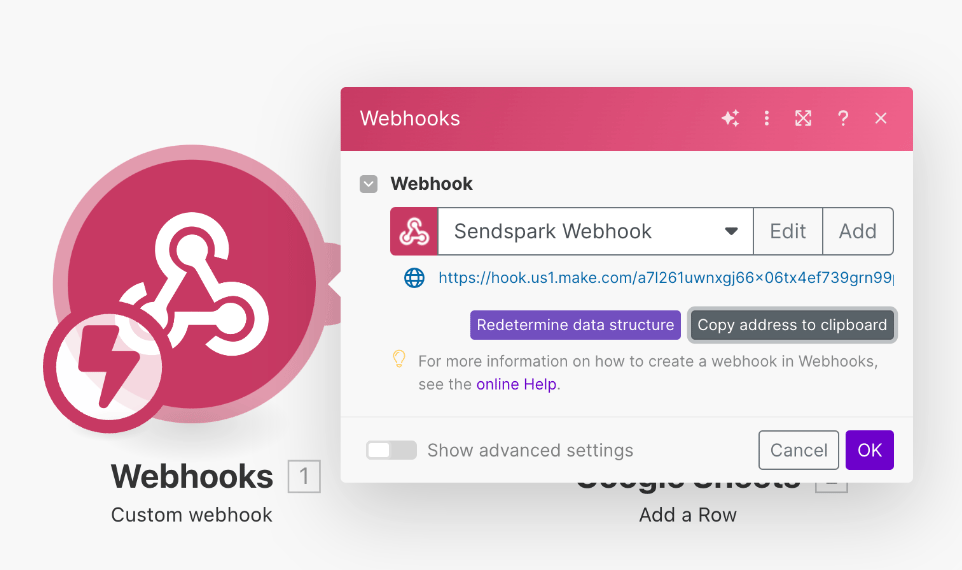
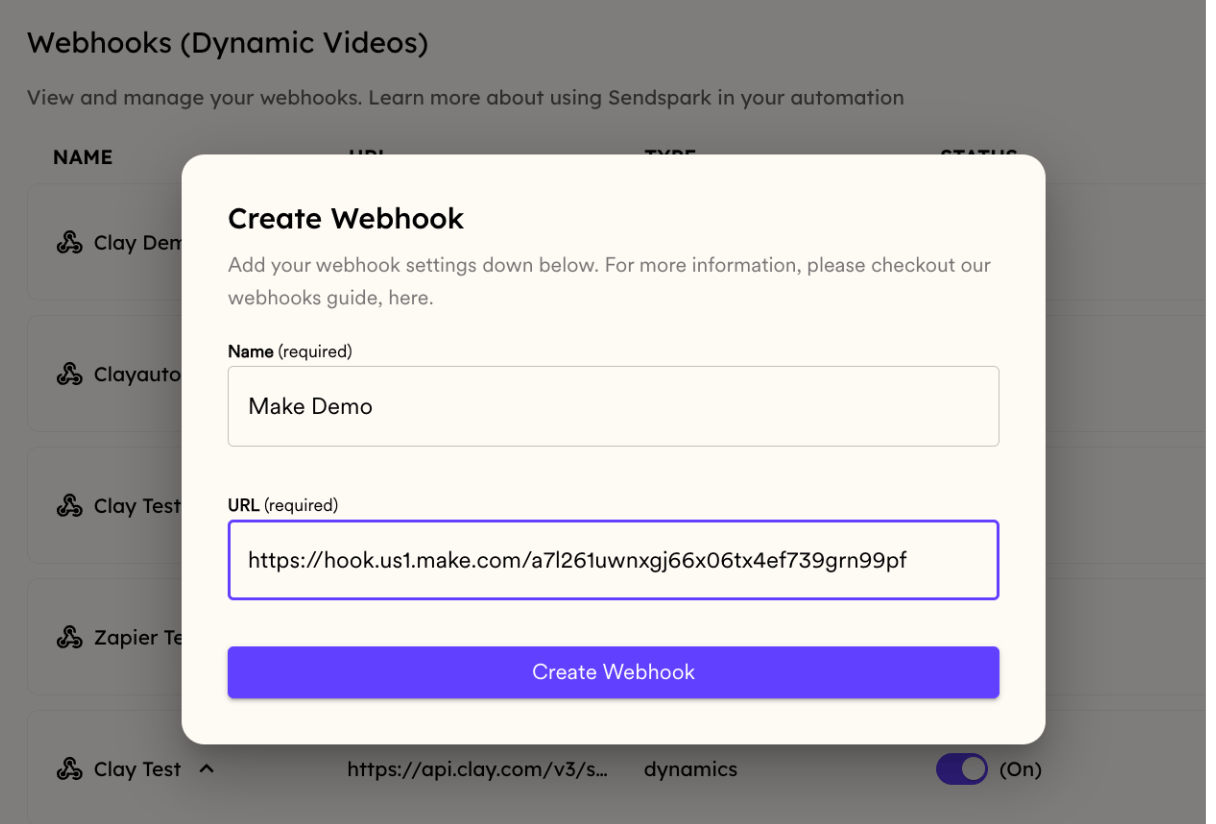
- In Sendspark, go to the Webhooks Section
- Click New Webhook, then give it a Name and paste the URL Make provided into URL. Both are required.
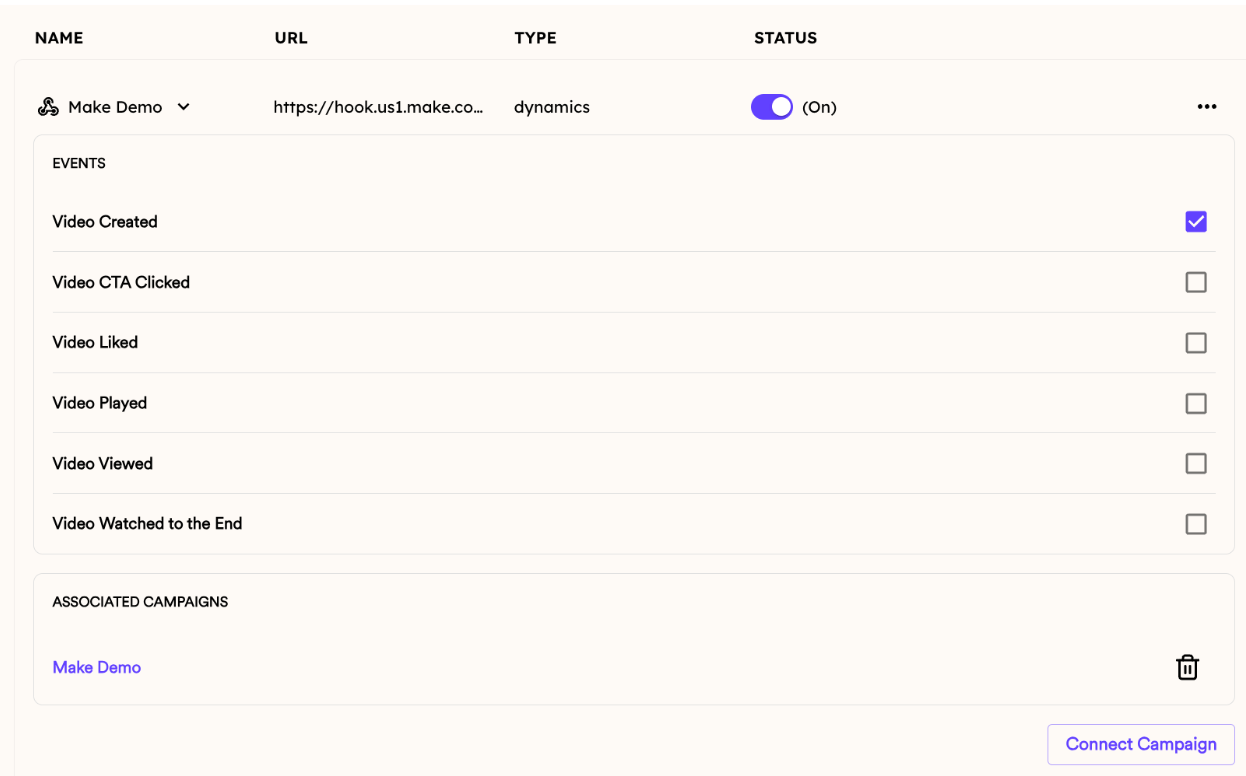
- Open the webhook, tick the Video Created event, then use Connect Campaign to attach your dynamic video campaign. This makes it so every time a video is created from that campaign, a webhook sends into Make.
Send a Direct Email
This is how you can send your AI-personalized video to your recipient in a direct email (Gmail, Outlook, etc):- Add an “Email” as a second step to your Make Scenario
- Use the information returned to you in the Sendspark webhook in your email like so:
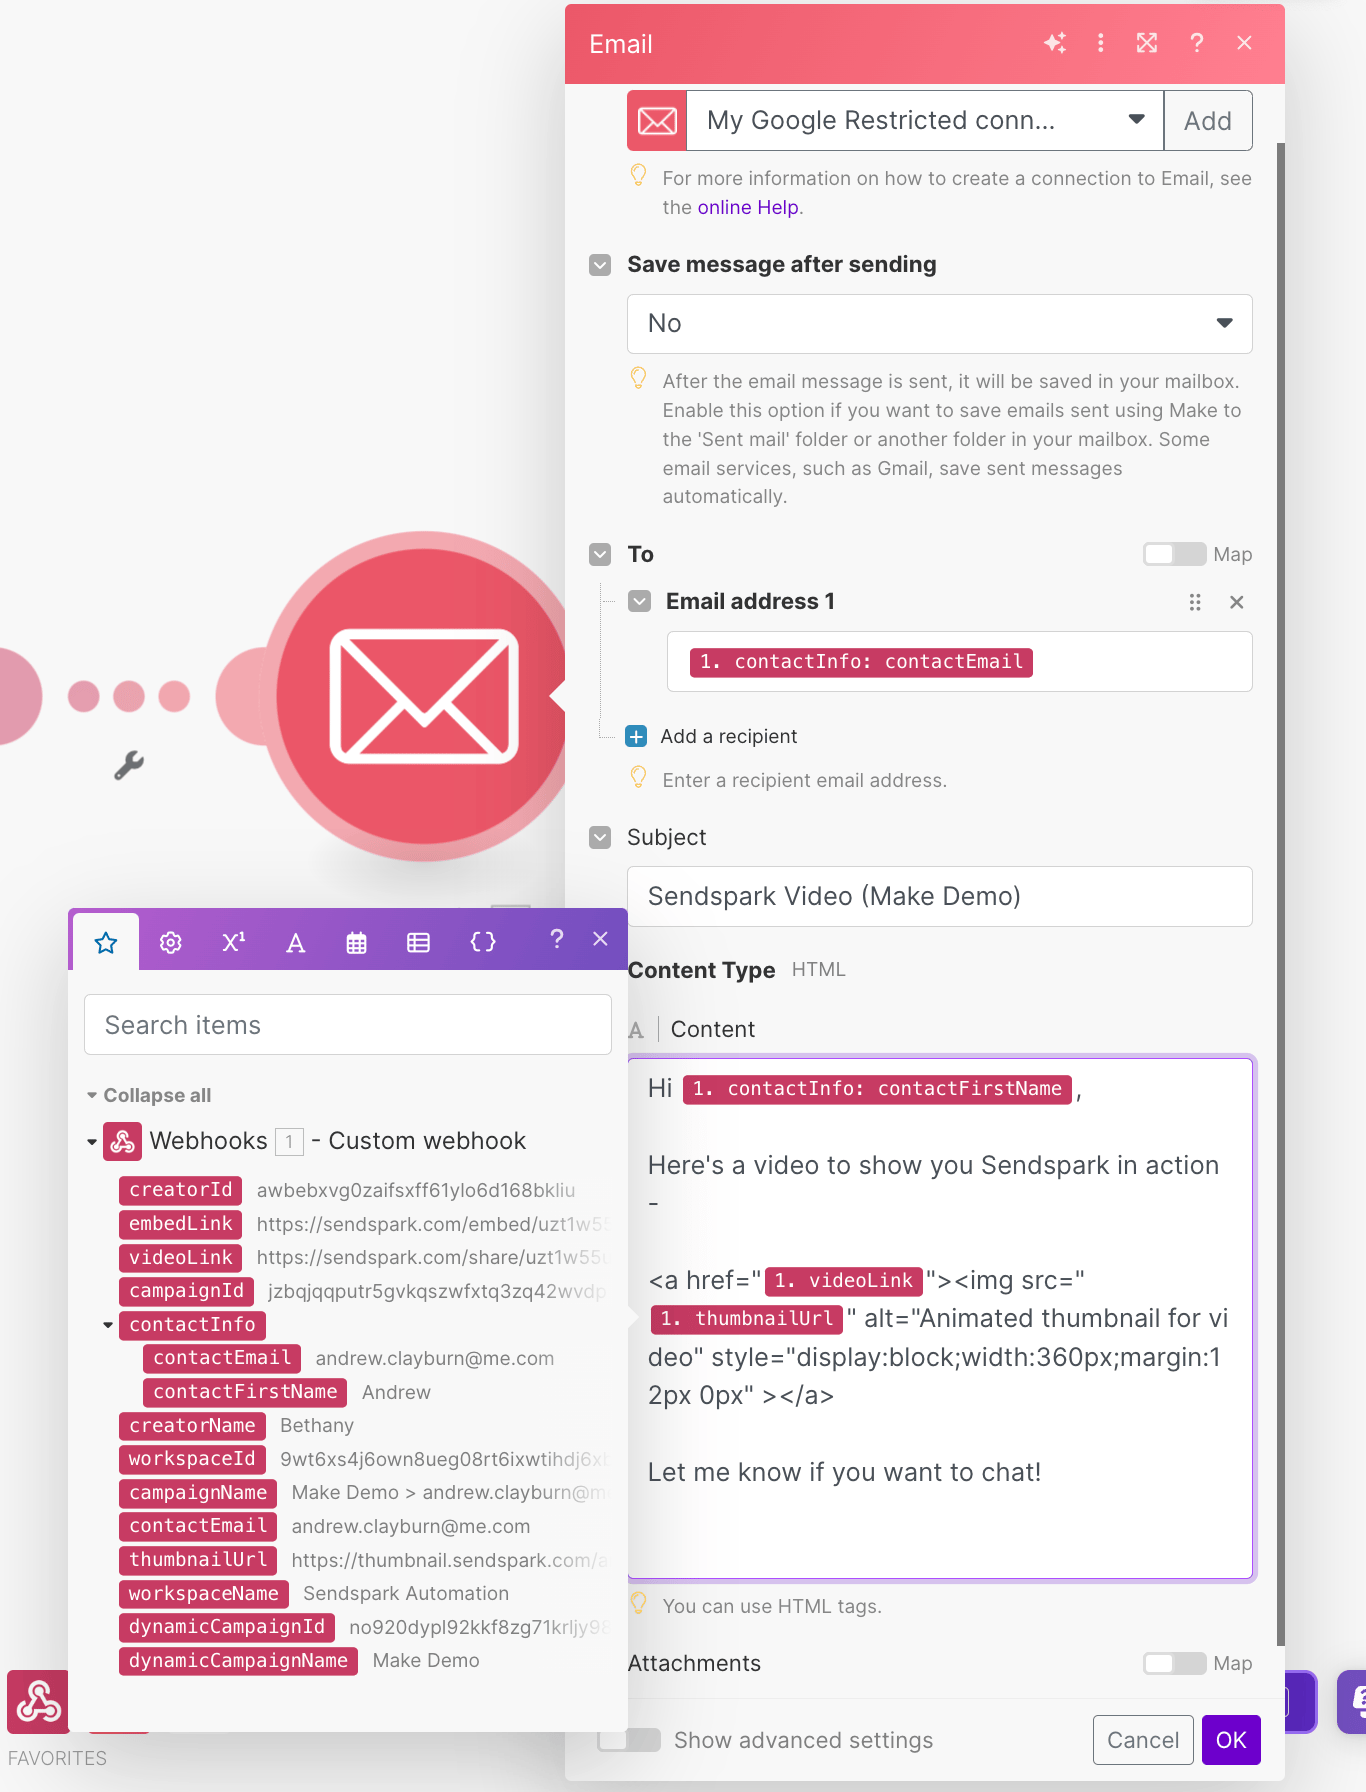
- Make sure you are using the variable for contactEmail in the “to” field to send the video to the correct recipient.
- In your email, you can use the variable videoLink to send the right video to the right person. If you do this, you will be emailing the video as a link
- The advanced way to send the video is to embed it as an HTML snippet using both the videoLink AND the thumbnailUrl. This way, instead of appearing as just a link, your viewers will see an animated thumbnail of the video.
Using an Email Automation Platform
If you’d like to use an email automation platform (Outreach, Smartlead, Instantly, etc.) you can do that too. Before you can set up the automation, you want to make sure that the Sendspark dynamic video placeholder is in the sequence you want to send. In this example, we’ll use Instantly as an email sending platform. This method will work similarly with most email sending platforms – you can find thespecific guide here. How to add Sendspark video placeholder to your email Sequence:- In your dynamic video campaign in Sendspark, click “Share Campaign”
- Select your email sending platform. This will copy a dynamic snippet to your clipboard.
- Follow the instructions in the Sendspark share modal to insert this into your email template where you want the video to go.
- When you do this, it will look like a placeholder snippet. However, when you enroll real contacts for whom you’ve generated Sendspark videos for, they will see the personalized videos made for them. You just want to make sure their email address in your email platform matches their email address in Sendspark.
- when the webhook is received
- The contact is automatically enrolled in that email sequence.
Frequently asked questions
How do I automatically create AI-personalized videos in Make.com?
How do I automatically create AI-personalized videos in Make.com?
Build a Make scenario with an HTTP Request module that POSTs each prospect to the Sendspark API endpoint
https://api-gw.sendspark.com/v1/workspaces/{workspaceId}/dynamics/{dynamicId}/prospect, using your API key and API secret in the x-api-key and x-api-secret headers. When the scenario runs, Sendspark generates a personalized video for each contact you send.Where do I find my workspaceId and dynamicId for the Sendspark API?
Where do I find my workspaceId and dynamicId for the Sendspark API?
Your workspaceId is in the API Credentials tab, alongside your API Key and Secret Key. Your dynamicId comes from the URL of your dynamic video campaign in Sendspark.
How does Make know when a Sendspark video is ready to send?
How does Make know when a Sendspark video is ready to send?
Create a Custom Webhook in Make, then add that URL as a webhook in Sendspark and link it to your dynamic video campaign. Every time a video generates for a person, Sendspark fires the webhook and enrolls that contact in your Make scenario, so you only send once the video is ready.
Should I send the video as a link or as an embedded thumbnail?
Should I send the video as a link or as an embedded thumbnail?
Both work. Using the
videoLink variable alone sends the video as a link. The more engaging way is to embed an animated thumbnail using both videoLink and thumbnailUrl in an HTML snippet, so viewers see a moving preview instead of a plain link.Why won't the API body copy and paste correctly into Make?
Why won't the API body copy and paste correctly into Make?
Copying the sample JSON directly into Make will not work because of hidden formatting. Run it through a JSON validator such as jsonlint.com first to clear the formatting, then paste the cleaned JSON into the request body.