Key takeaways
- You must have the Sendspark Chrome Extension installed and be using a Chrome browser to see the Sendspark icon.
- The Sendspark icon appears in the HubSpot email compose window next to the native HubSpot options.
- Beyond recording, the menu offers Request Video, Meet Now, Send Calendar, Add Last Recording, and Video Library options.
- To finish recording, click the Sendspark Chrome Extension icon on the top right of your browser.
Please refer to these other guides to send videos through other Hubspot email features:
- Bulk Personalized Videos in Hubspot Sales Hub
- Embed videos in Hubspot Marketing emails
- Embed videos on Hubspot web pages
- Add your Hubspot tracking code to see Sendspark views right in your contacts’ timelines.
Before you get started:
Please install the Sendspark Chrome Extension to use the Hubspot integration. As long as you have the Chrome Extension installed, you’ll automatically be able to access Sendspark from Hubspot. Install Chrome ExtensionHow to Send Videos in Hubspot
1. Click the Sendspark Icon in Hubspot
Create a new email in Hubspot. You’ll see the Sendspark logo appear in the compose window next to the native Hubspot options.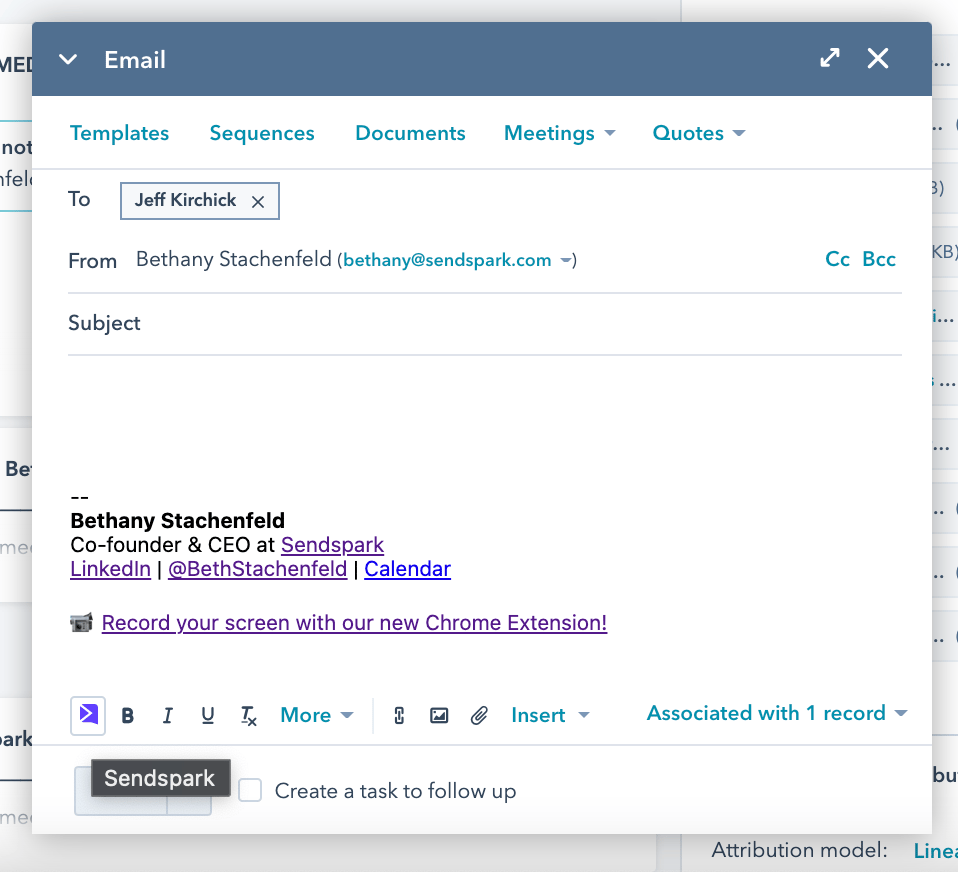
2. Record a New Video
Click Record New Video. This will launch the Sendspark Chrome Extension, so you can record a video of yourself or your screen.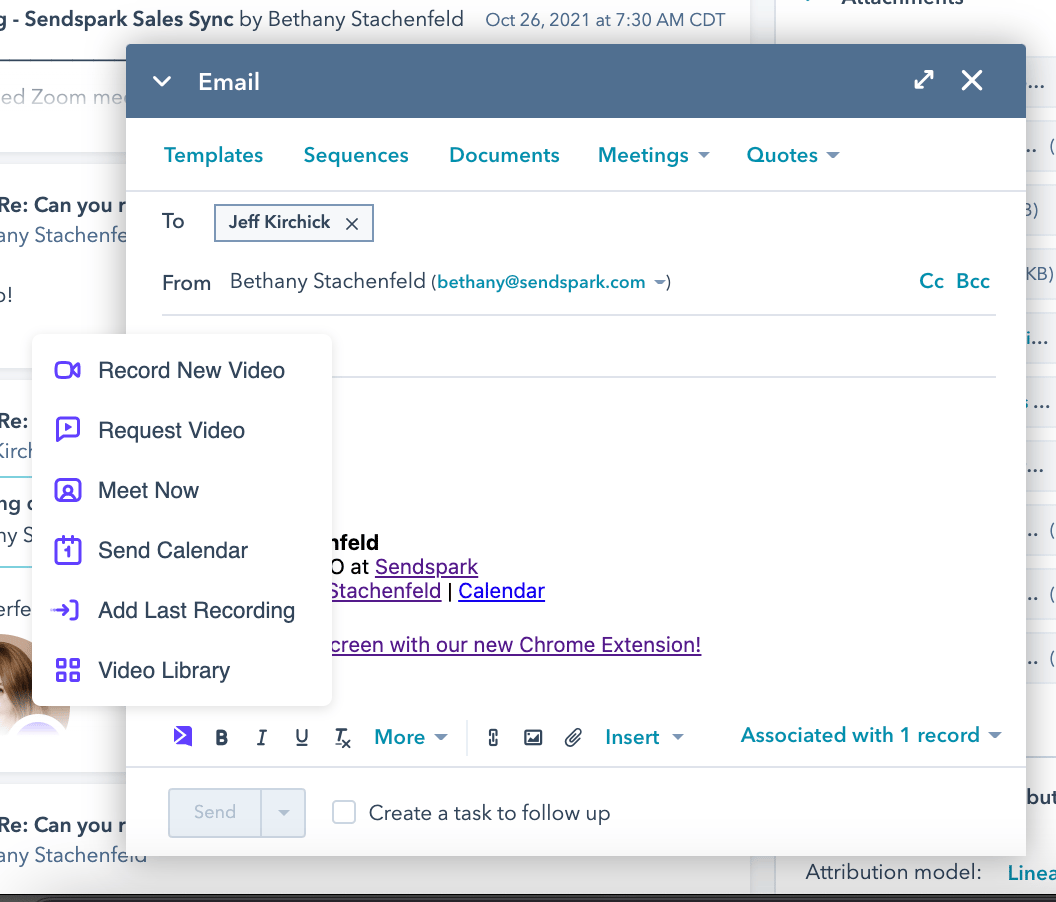
- Request Video — inserts a video request link to easily get a video recording or testimonial from your customer
- Meet Now— inserts a Zoom or Google Meet link to connect face-to-face
- Send Calendar — inserts a Calendly or scheduling link to coordinate a time to connect
- Add Last Recording — inserts the last Sendspark video you recorded
- Video Library — opens your Sendspark dashboard to find or manage existing videos
3. Complete Recording
To end your video, click the Sendspark Chrome Extension icon on the top right of your browser.
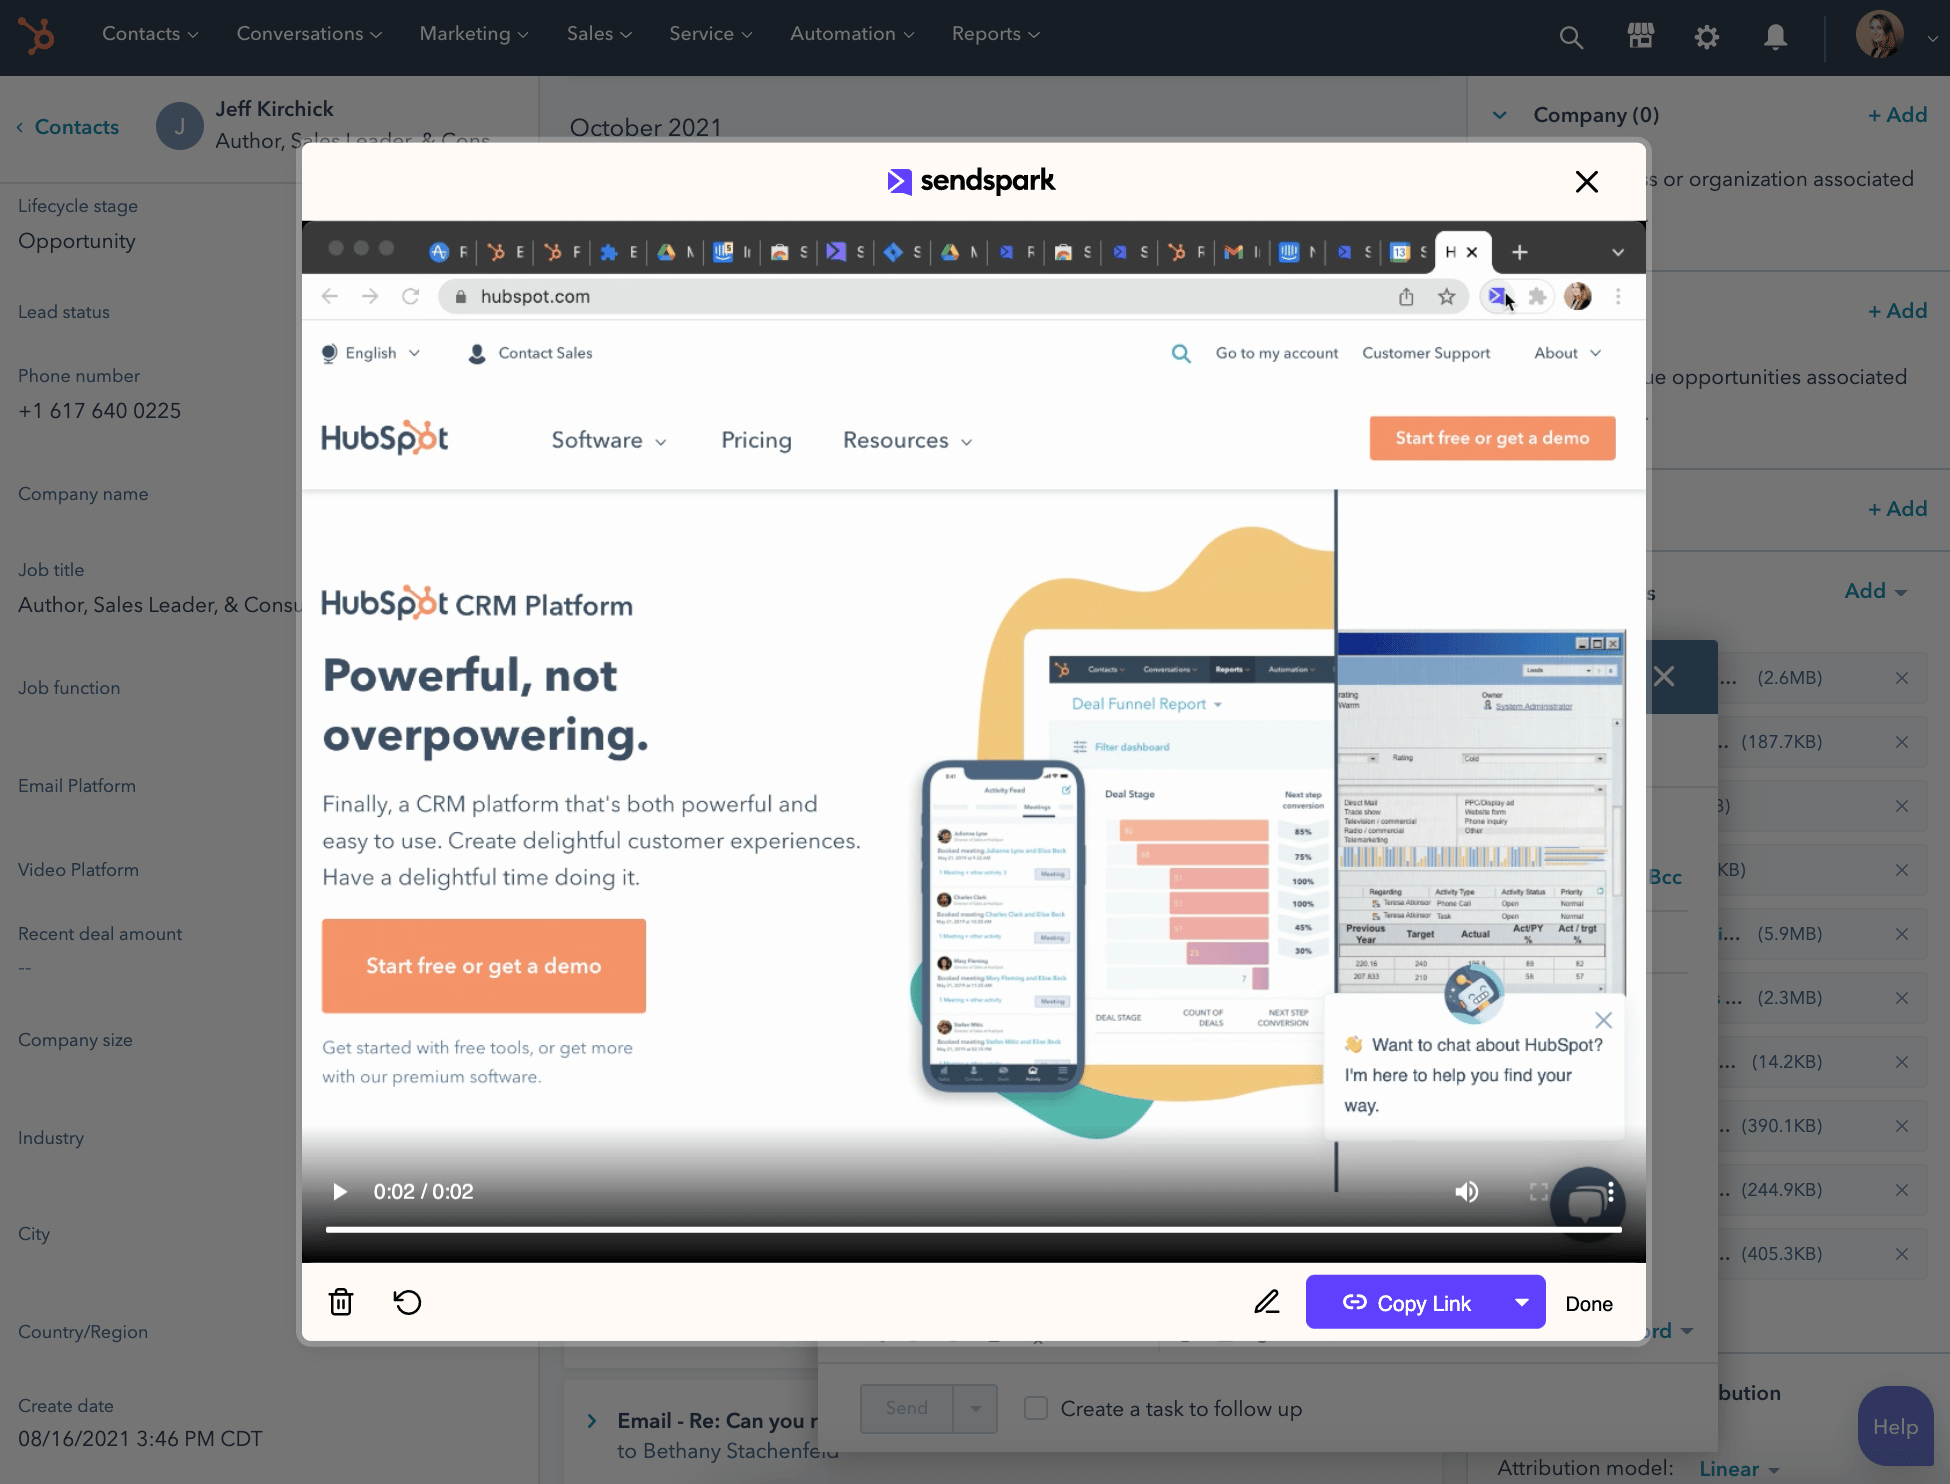
4. (Optional) Edit Video Page in Sendspark
You can customize your video before sharing it by clicking Edit Page / Thumbnail.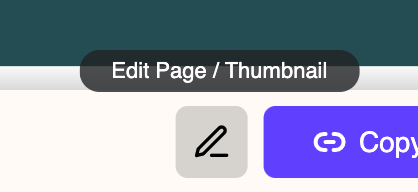
Note: When you edit the page, you’ll leave Hubspot and go to Sendspark. Now, instead of inserting your video, you’ll need to copy and paste your video preview into Hubspot.
5. Copy Linked GIF
Click Linked GIF to copy the video preview to your clipboard.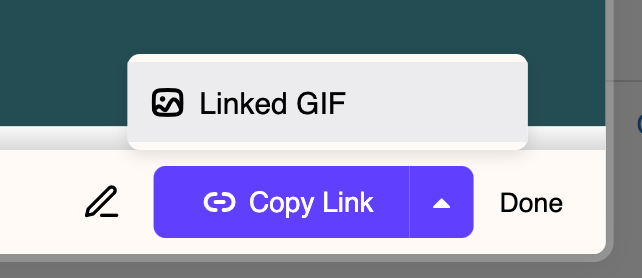
6. Paste into your Hubspot email
Now paste directly into your Hubspot email. You will see a GIF preview of your video that’s linked to your video share page.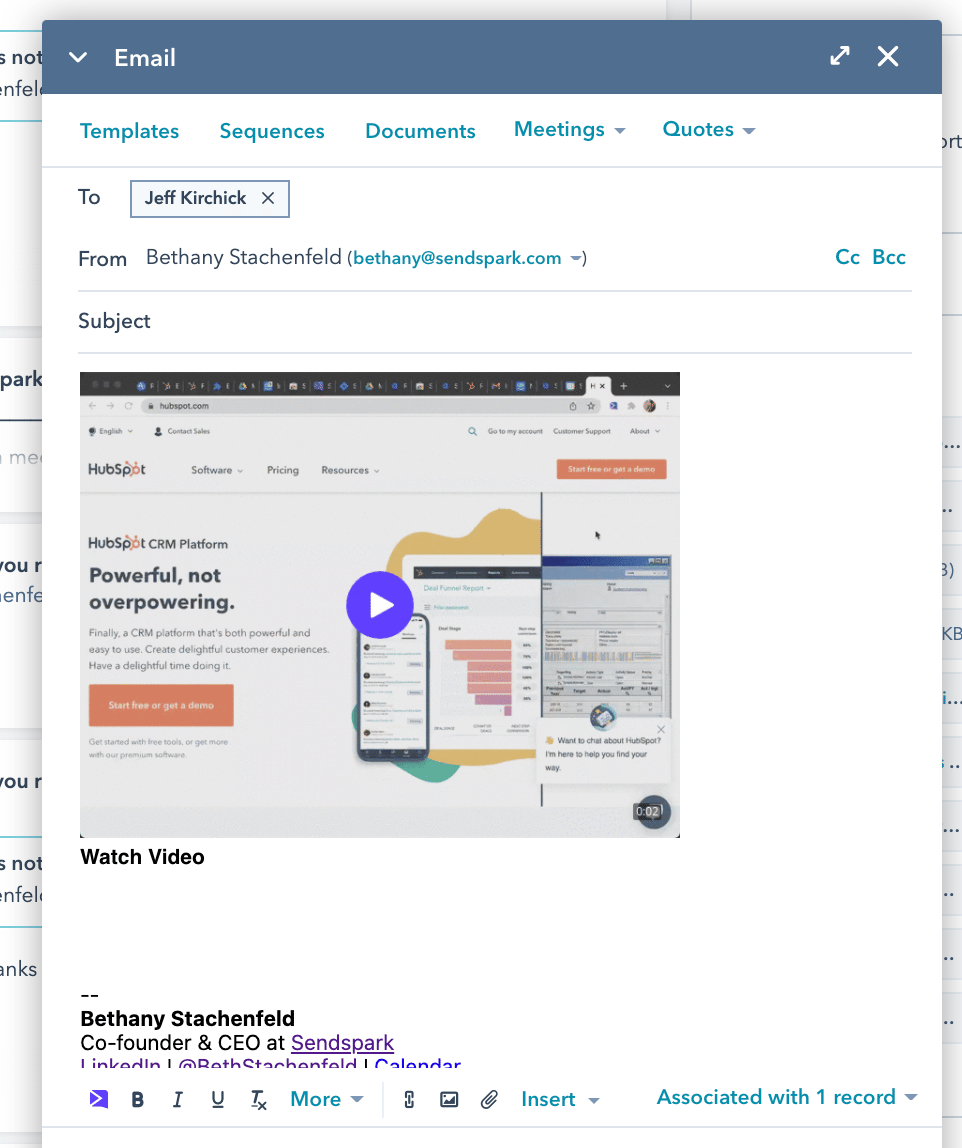
Happy Connecting!
Let us know how we can help you get started!Frequently asked questions
What do I need to use the HubSpot integration?
What do I need to use the HubSpot integration?
Install the Sendspark Chrome Extension and use a Chrome browser. As long as the extension is installed, you’ll automatically be able to access Sendspark from Hubspot.
How do I end a recording?
How do I end a recording?
Click the Sendspark Chrome Extension icon on the top right of your browser. This completes the recording and launches a modal to preview your video before sharing.
How do I add the video to my email?
How do I add the video to my email?
Click Linked GIF to copy the video preview to your clipboard, then paste directly into your Hubspot email. You’ll see a GIF preview linked to your video share page.
Can I edit the video before sending?
Can I edit the video before sending?
Yes. Click Edit Page / Thumbnail to customize the video landing page or thumbnail. Note that after editing the page you’ll need to copy and paste your video preview into Hubspot.