> ## Documentation Index
> Fetch the complete documentation index at: https://help.sendspark.com/llms.txt
> Use this file to discover all available pages before exploring further.
# Snov.io — Send Dynamic Videos (Template Method)
> Follow these steps to send your Snov.io Dynamic Video Campaign: Step By Step Tutorial Version 1) Start by creating a new Campaign: 2) Choose whether...
To send a Dynamic Video campaign through Snov.io, copy the Snov.io snippet code from your Sendspark campaign and paste it into a Snov.io email step to display the thumbnail. Then export Sendspark's clean CSV, duplicate the EMAIL column and rename the copy "email2," add a matching "email2" custom field on import, and launch the campaign.
## Key takeaways
* Copy the **Snov.io snippet** from your Sendspark Dynamic Video Campaign and paste it into the email step to display the thumbnail, then **save** the email.
* Export Sendspark's **clean CSV**, then **duplicate the EMAIL column** and rename the copy exactly **"email2."**
* In Snov.io, add a **custom field named "email2"** (lowercase, Text type) when importing prospects.
* Set your account and deliverability options, then **launch** the campaign from **All Campaigns**.
**Follow these steps to send your Snov.io Dynamic Video Campaign:**
***
## Step By Step Tutorial Version
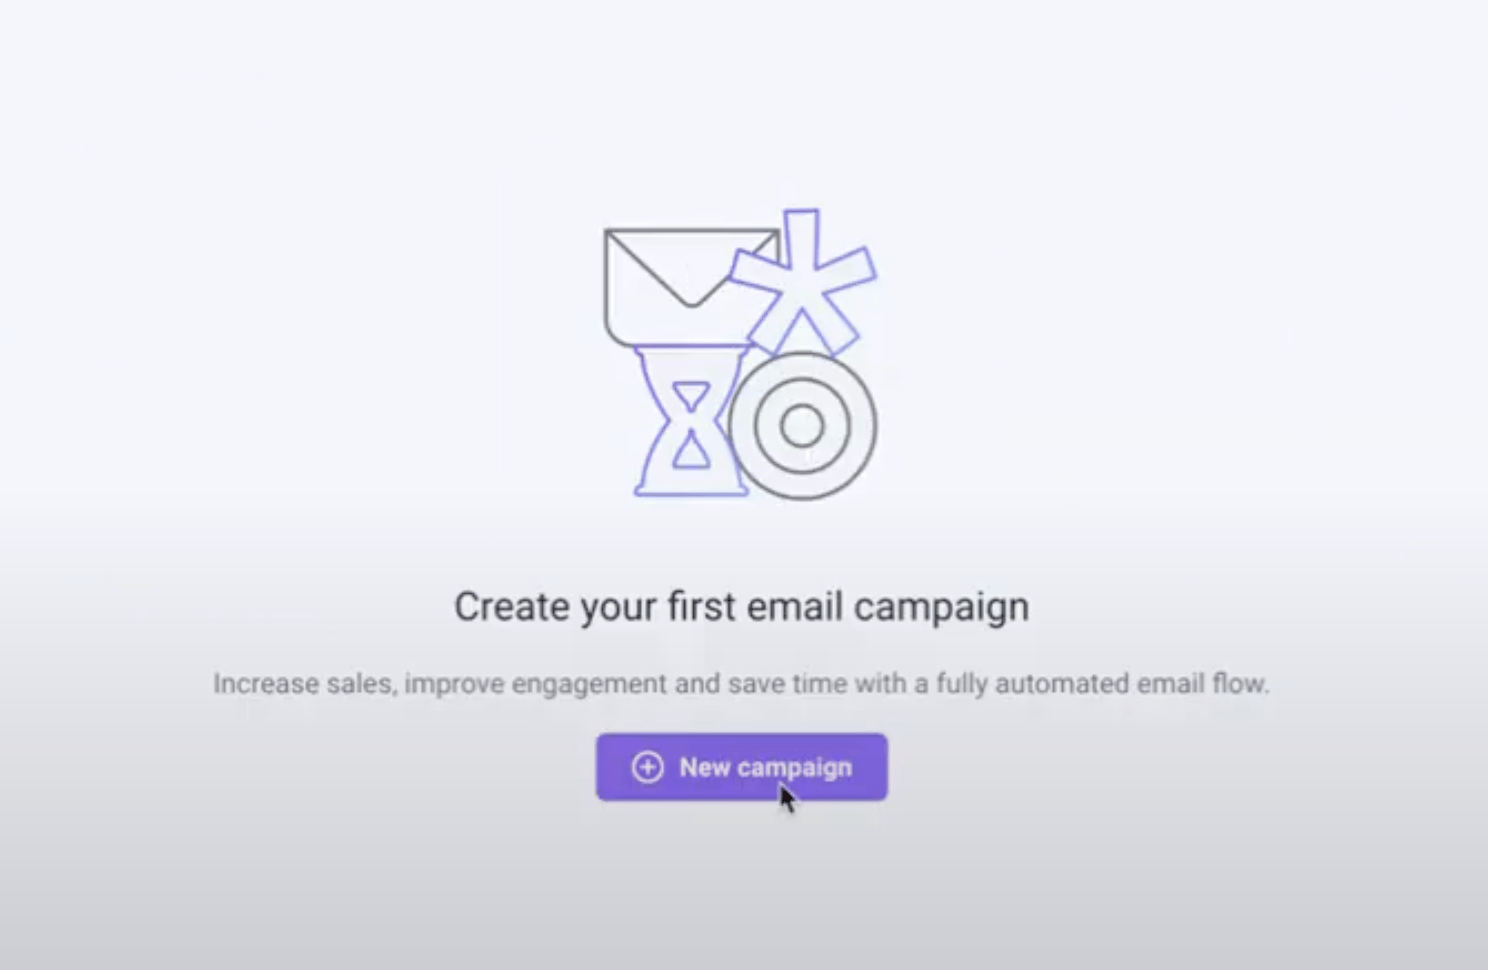
**1) Start by creating a new Campaign:**
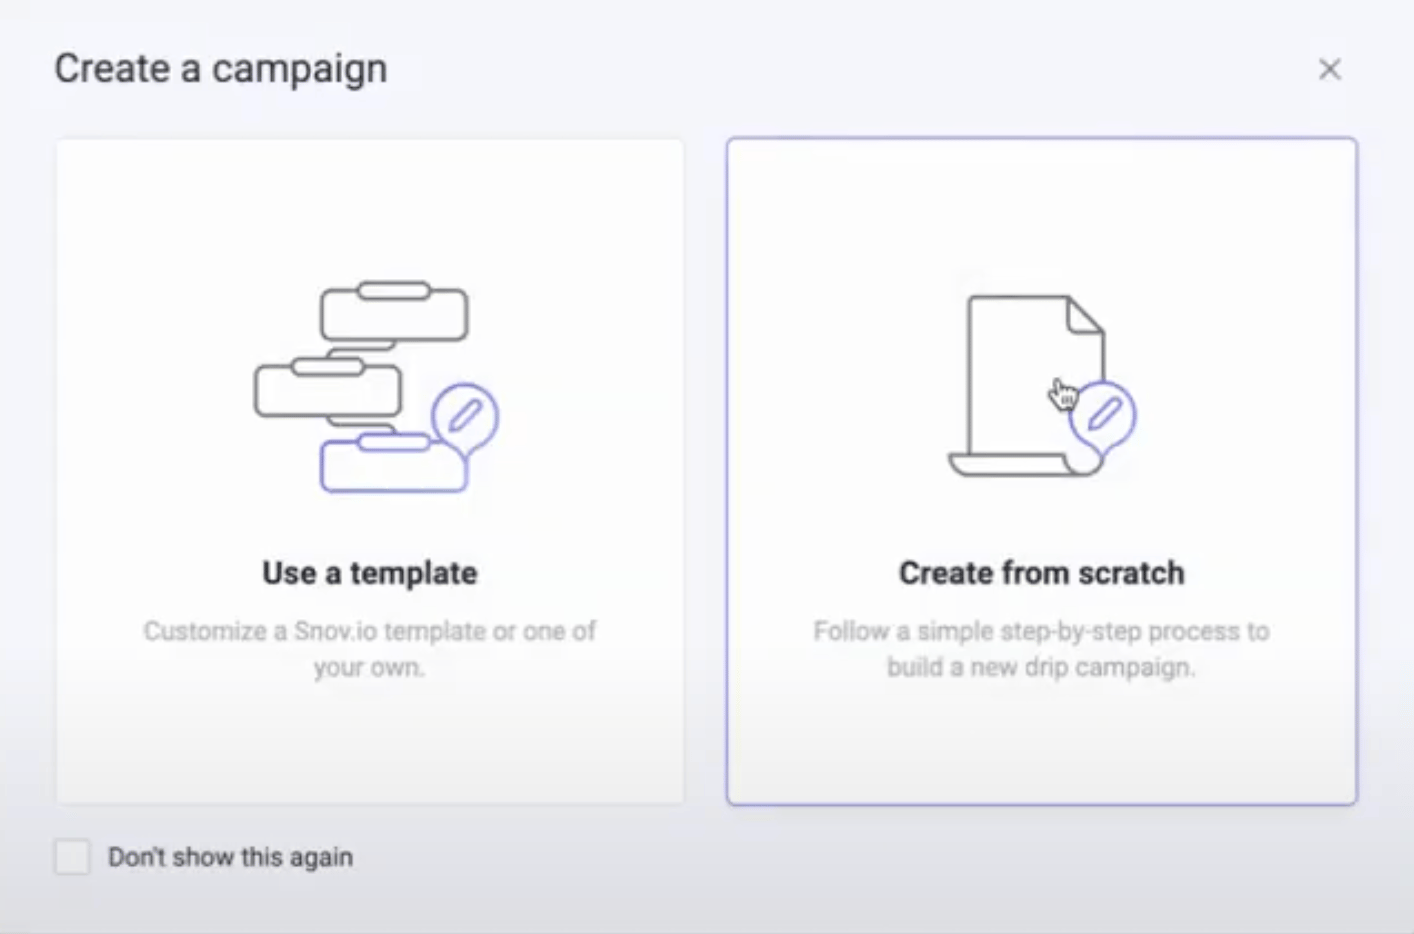
**2) Choose whether you want to use a Template or start from Scratch:**
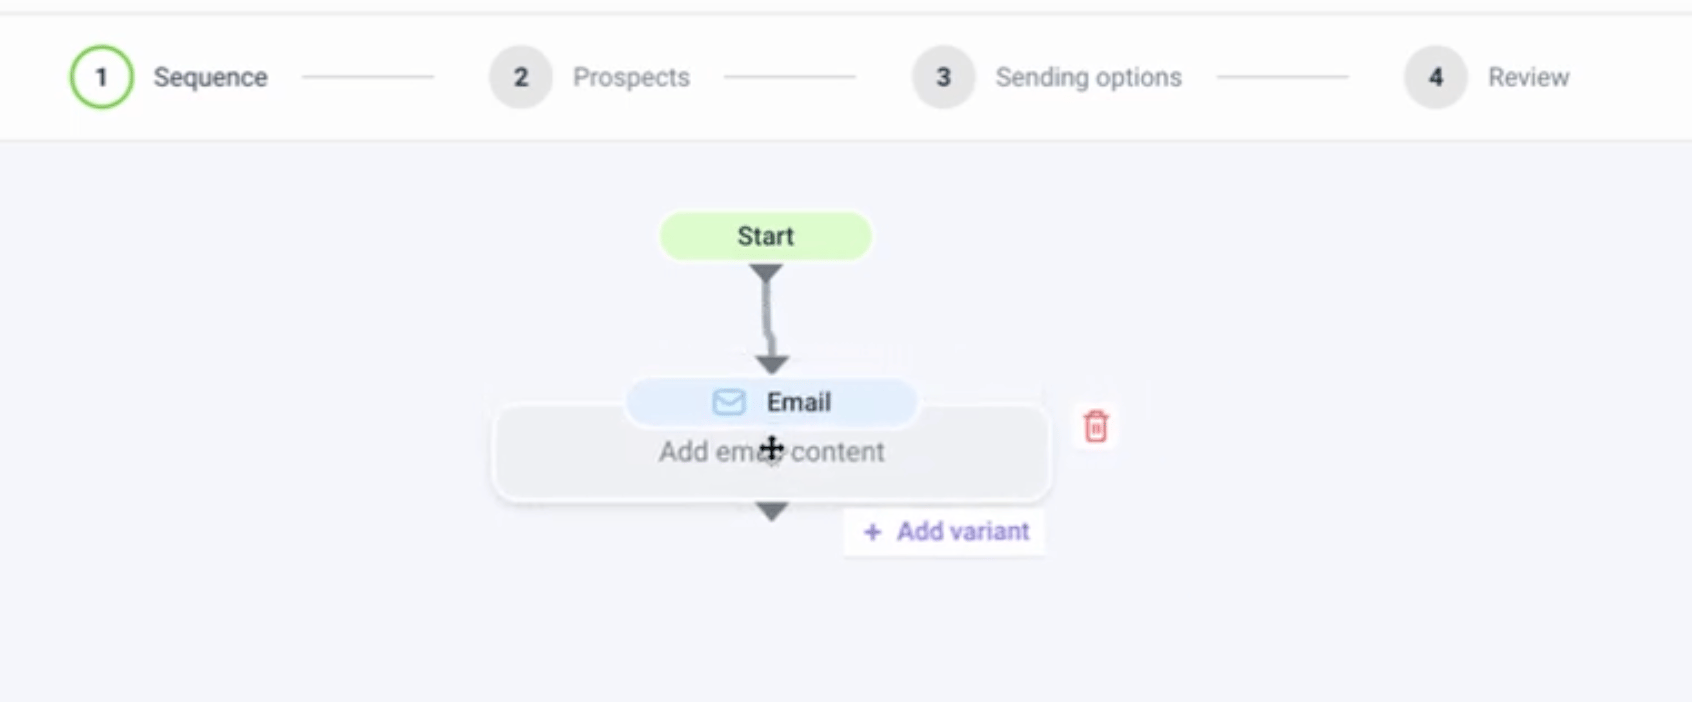
3. Add an email Step:
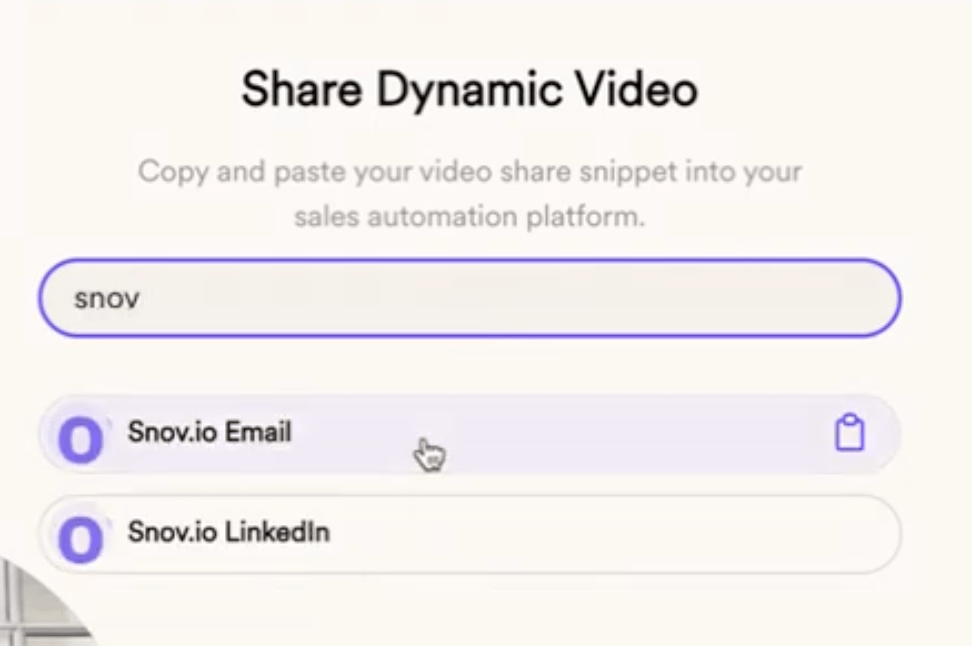
**4) Go to your Dynamic Video Campaign and search for Snov.iO and click on the email option to copy the Snippet Code:**
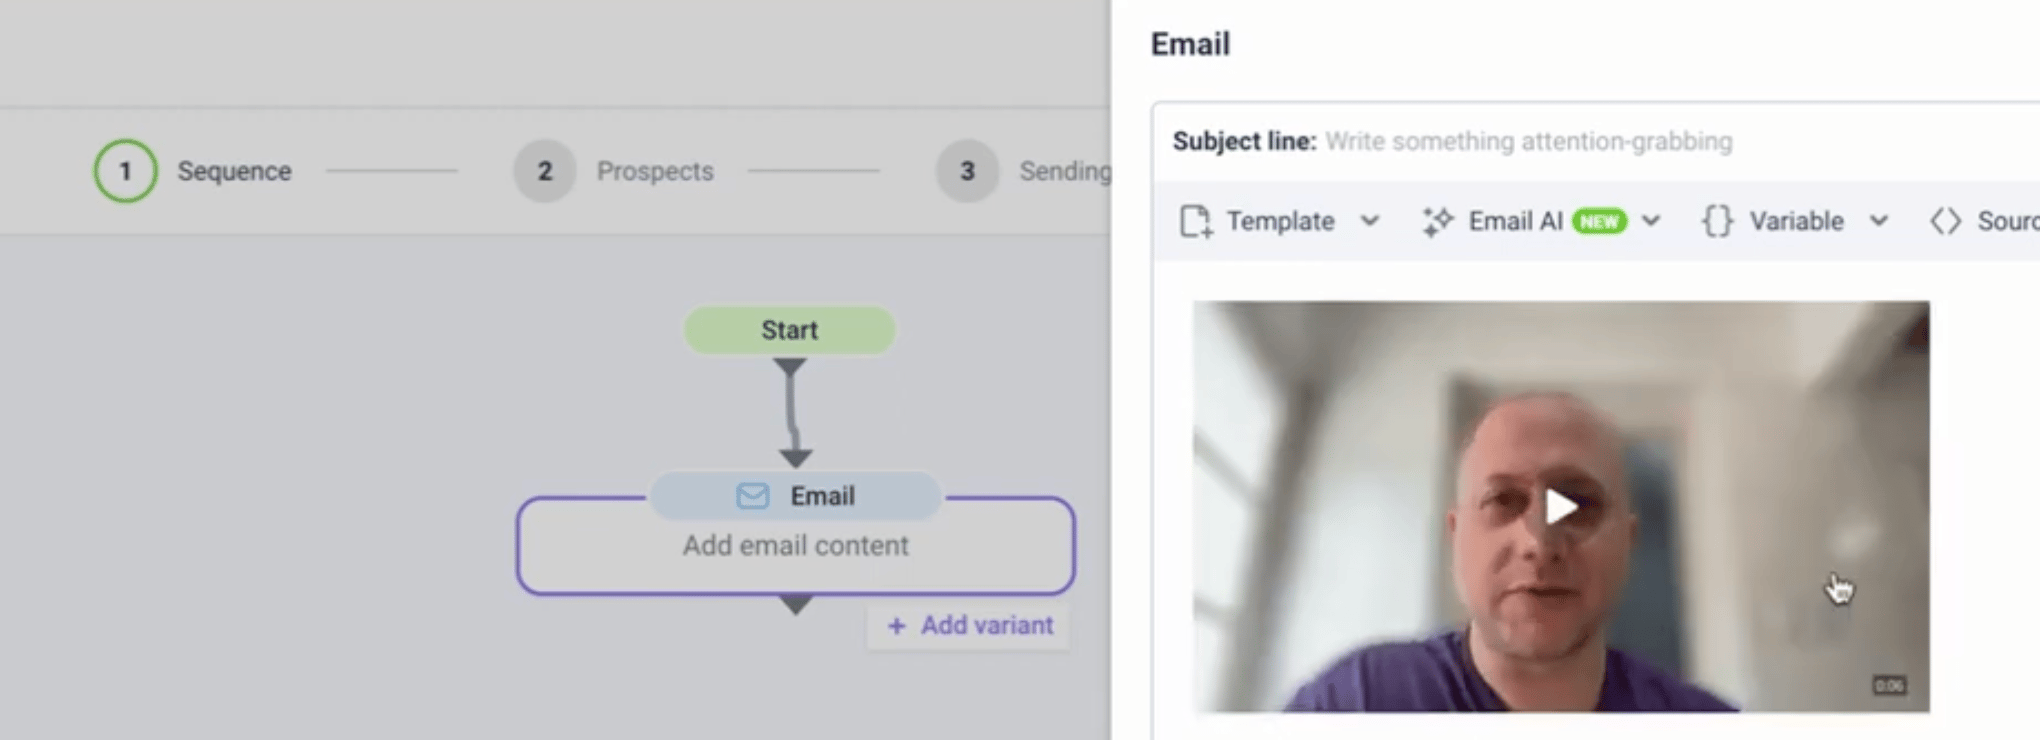
**5) Click on the Email Step and paste the Snippet Code straight into the email with CMD+V or CTRL+V to display the Thumbnail. Remember to SAVE the email afterward**s:
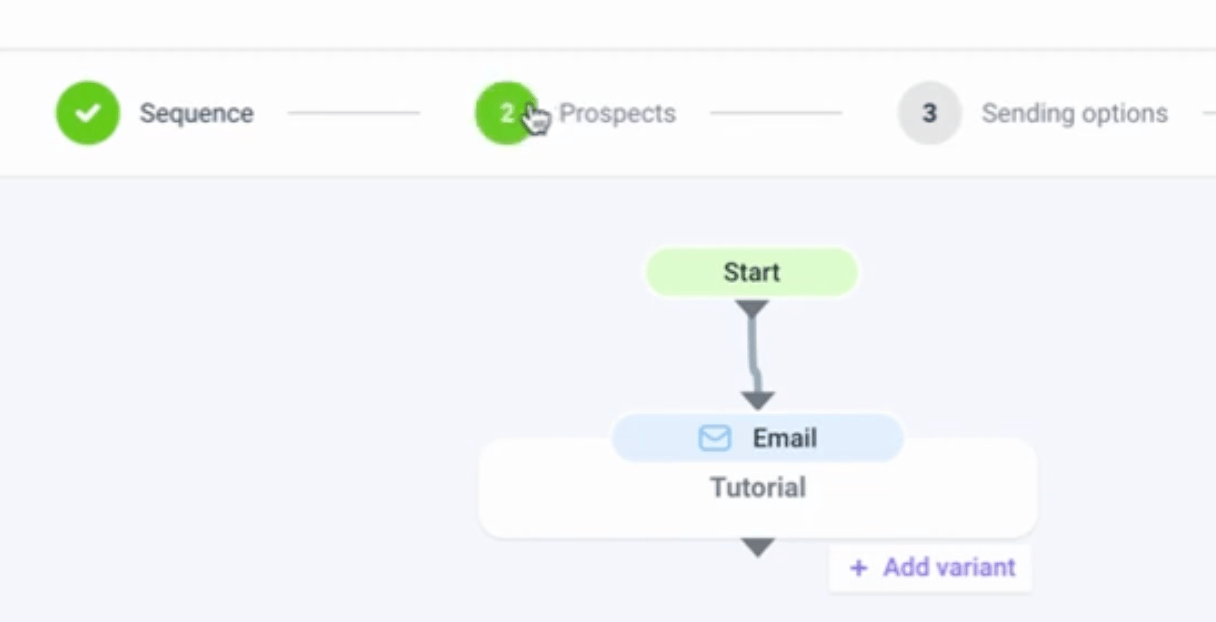
**6) Continue to the following step "Prospects":**
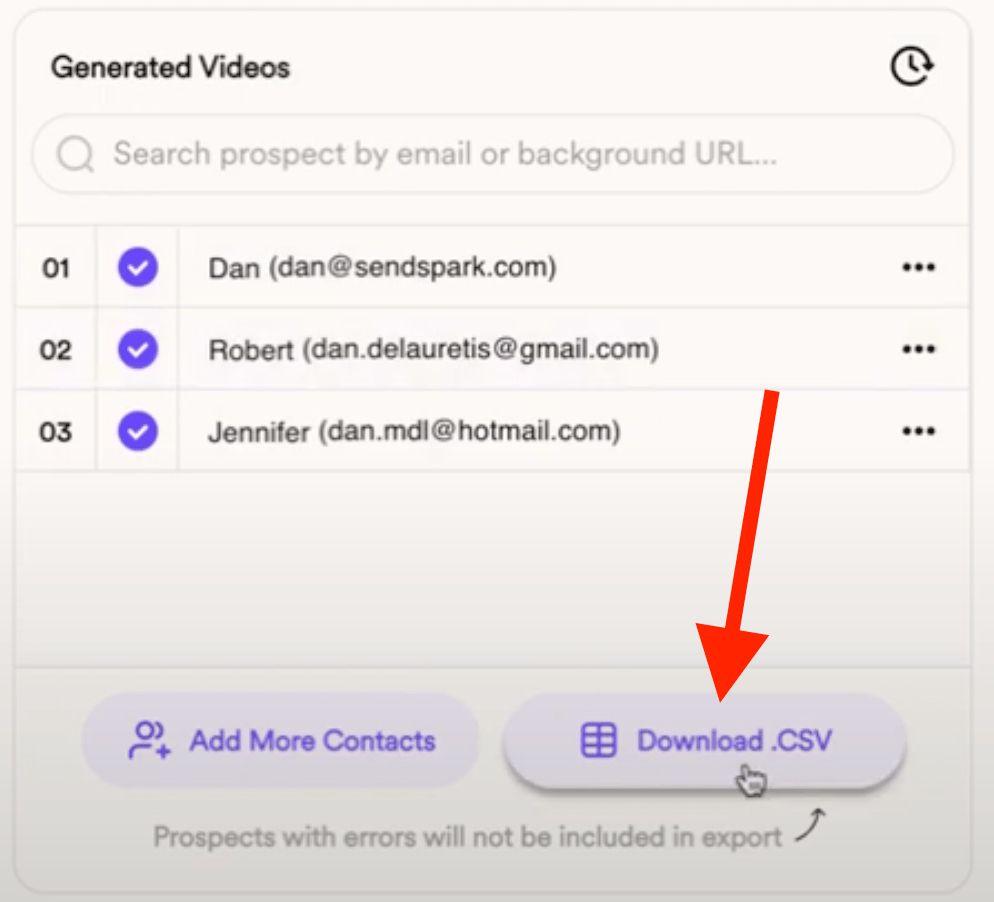
**7) Go back to Sendspark and export the clean CSV file:**
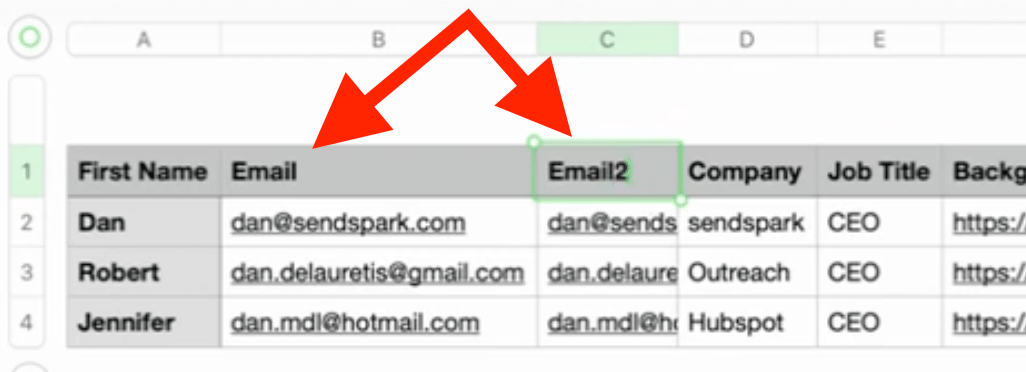
**8) Open the CSV file, and duplicate the EMAIL column, but rename the copy with "email2". The new header needs to be exactly that. If your sheet automatically turns the first letter into a capital letter, no need to worry. It will work anyway. Be sure to save it again maintaining the CSV format.**
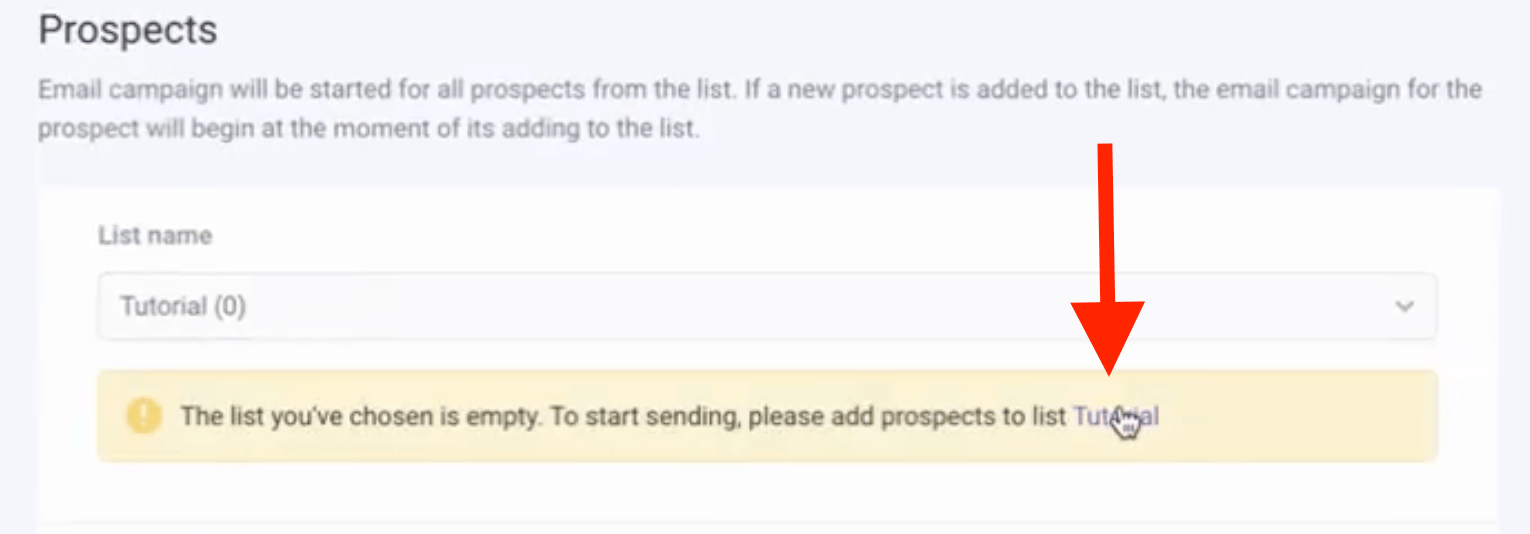
**9) Create a new list of prospects to use, and then click on the name entered to access the list:**
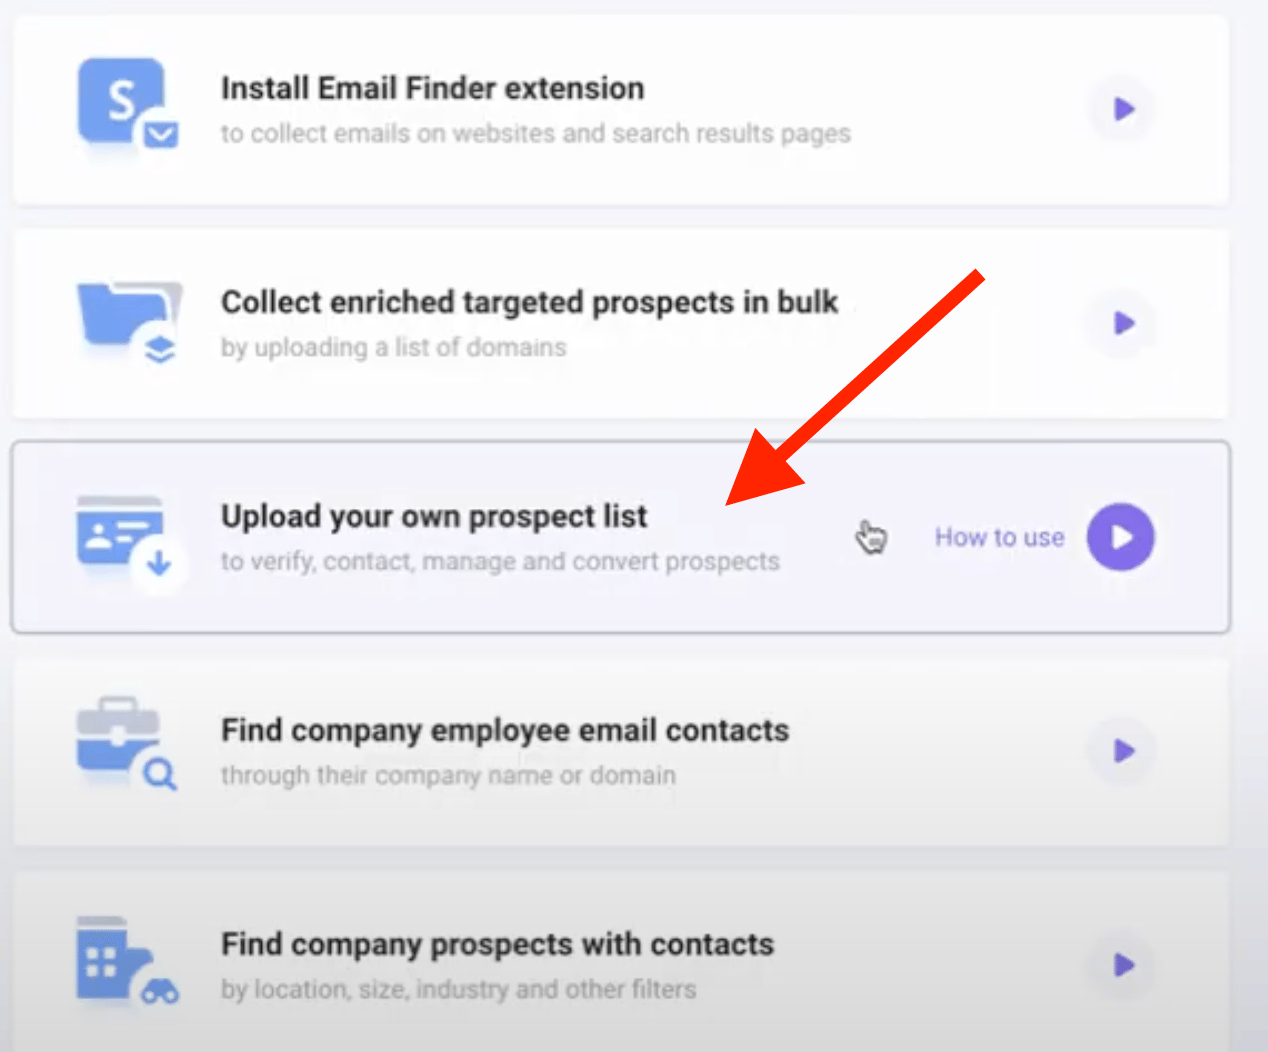
**10) Click on the option UPLOAD, and continue with the process:**
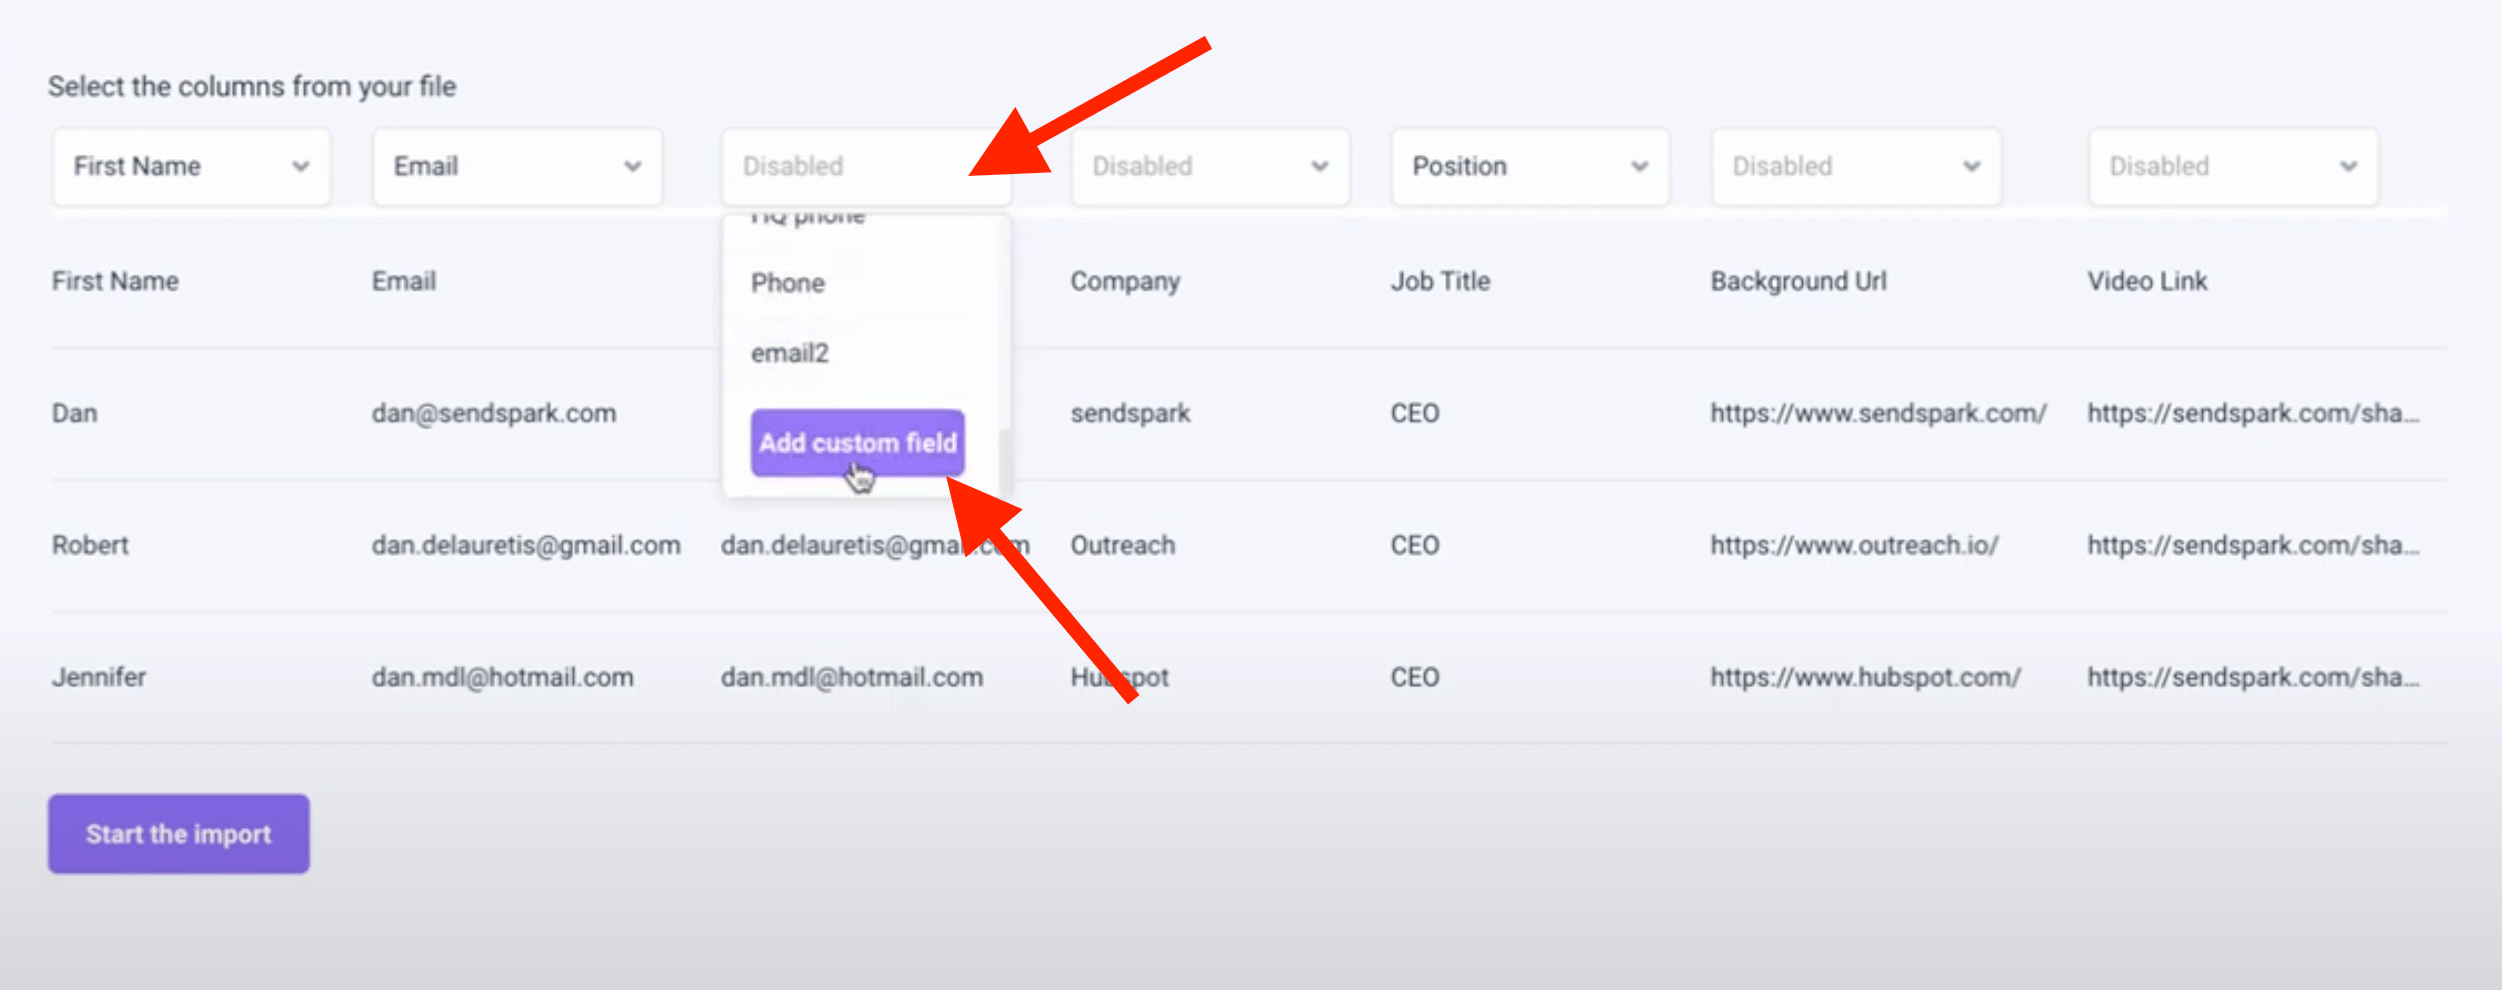
**11) After the contacts have been imported, expand the header of the duplicated email's column and click on ADD CUSTOM FIELD**
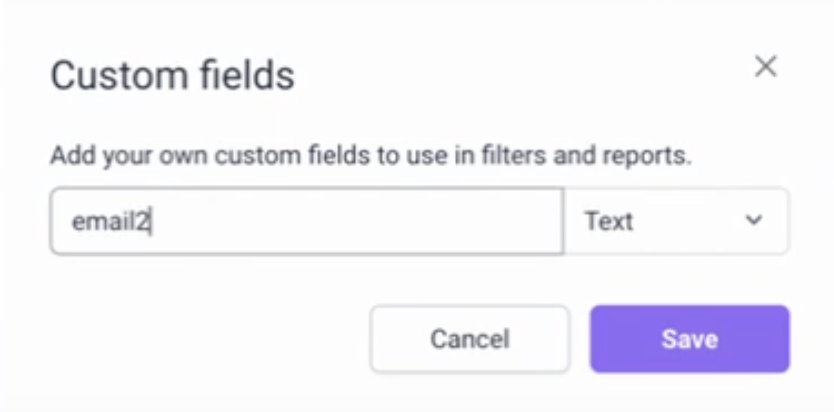
**12) Rename it as "email2" with no capital letter regardless of how your sheet software saved it before. Also, select Text on the right option:**
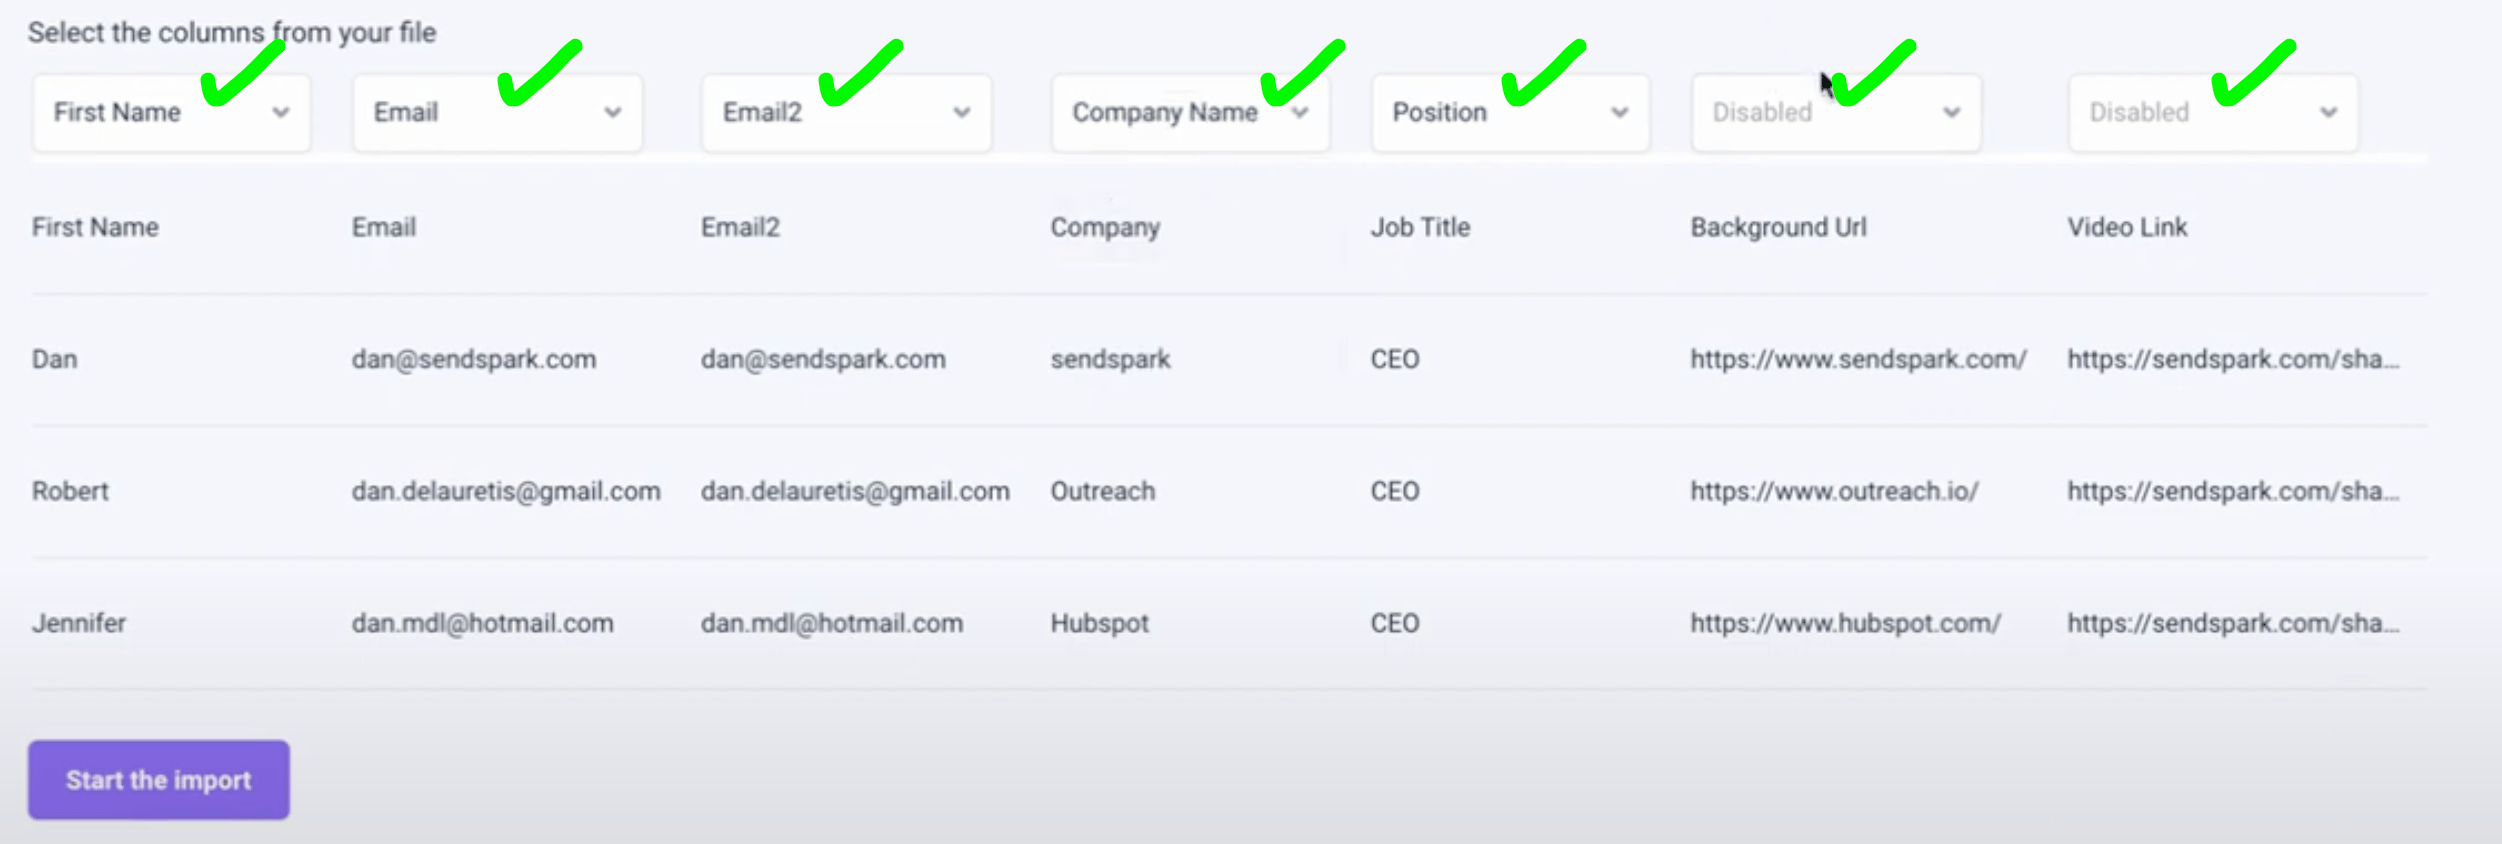
**13) This is how each column should look like. Note that the last 2 columns are DISABLED. You can now click on START THE IMPORT:**
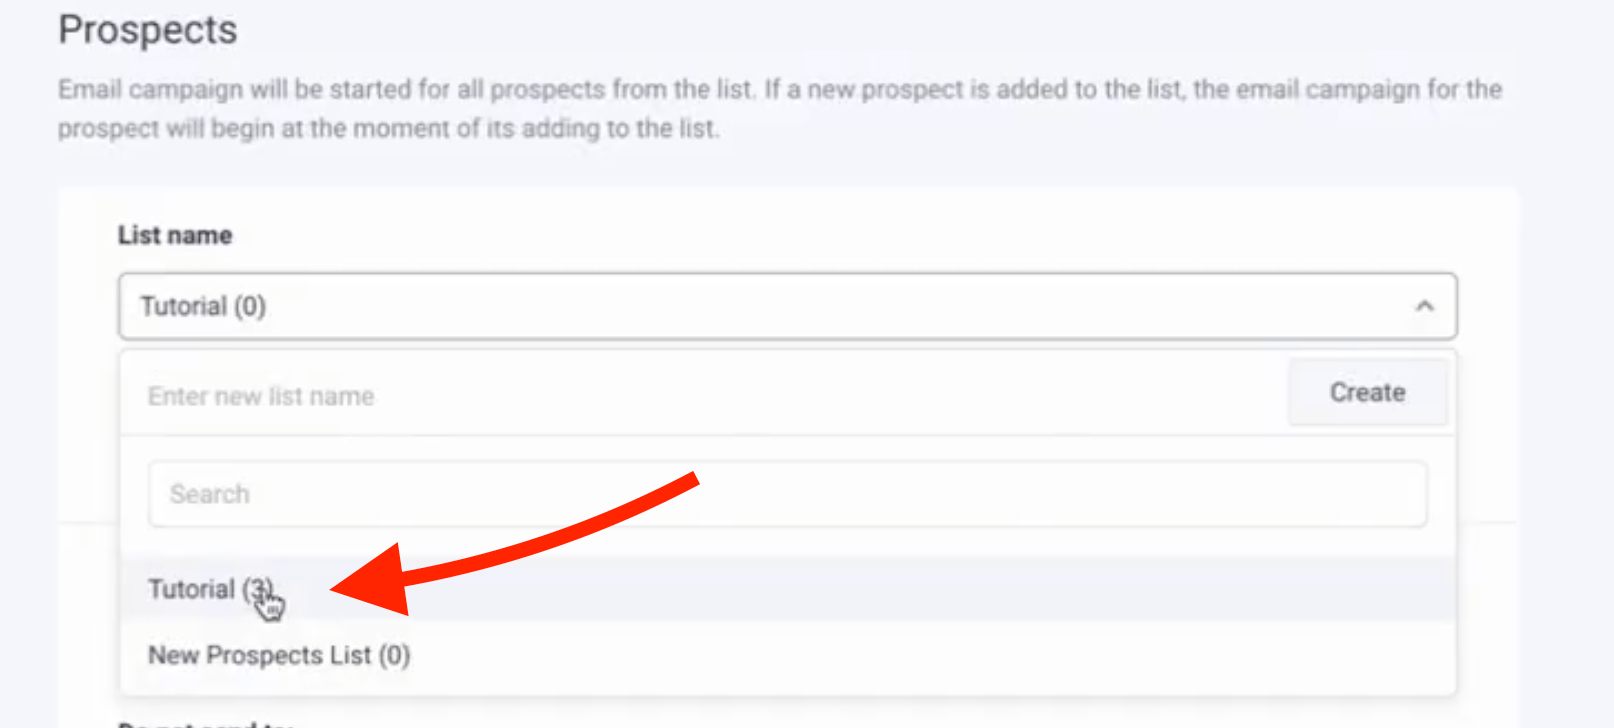
**14) Back to Prospects, be sure to select the List we just created with the number of prospects now included:**
**15) Jump to Sending Options:**
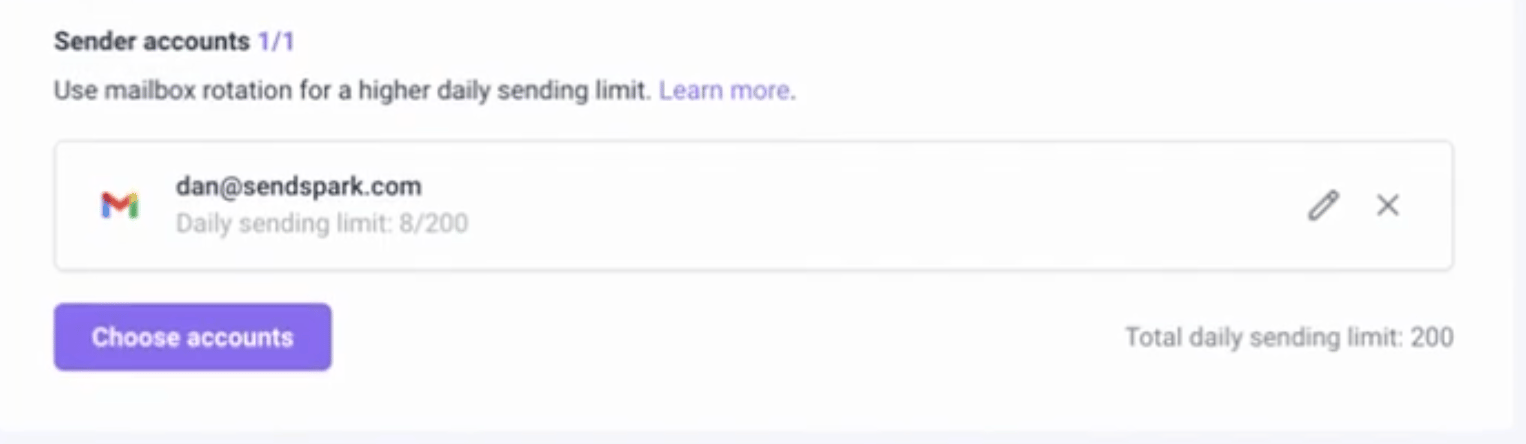
16. Choose your account, and then move to review to confirm that everything is set the way you want.
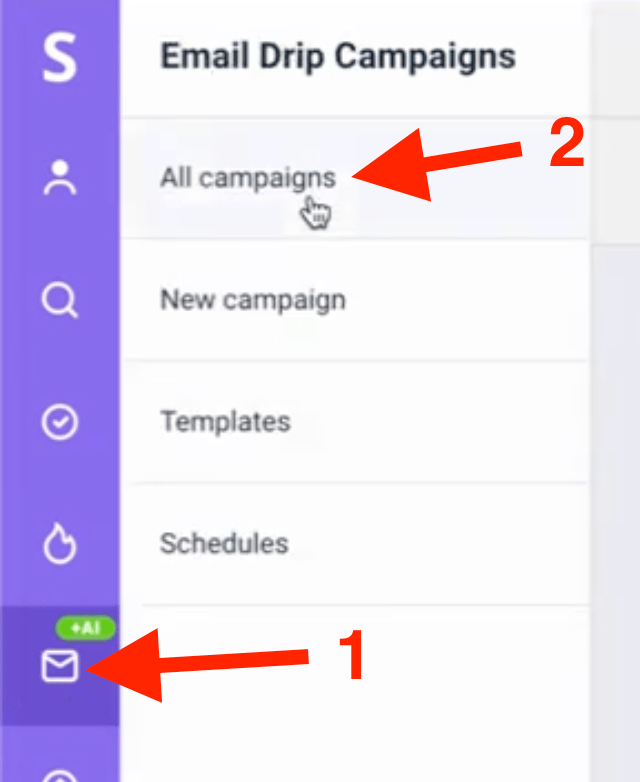
**17) Once you have selected all your deliverability options, head to the left-hand side panel and access All Campaigns.**
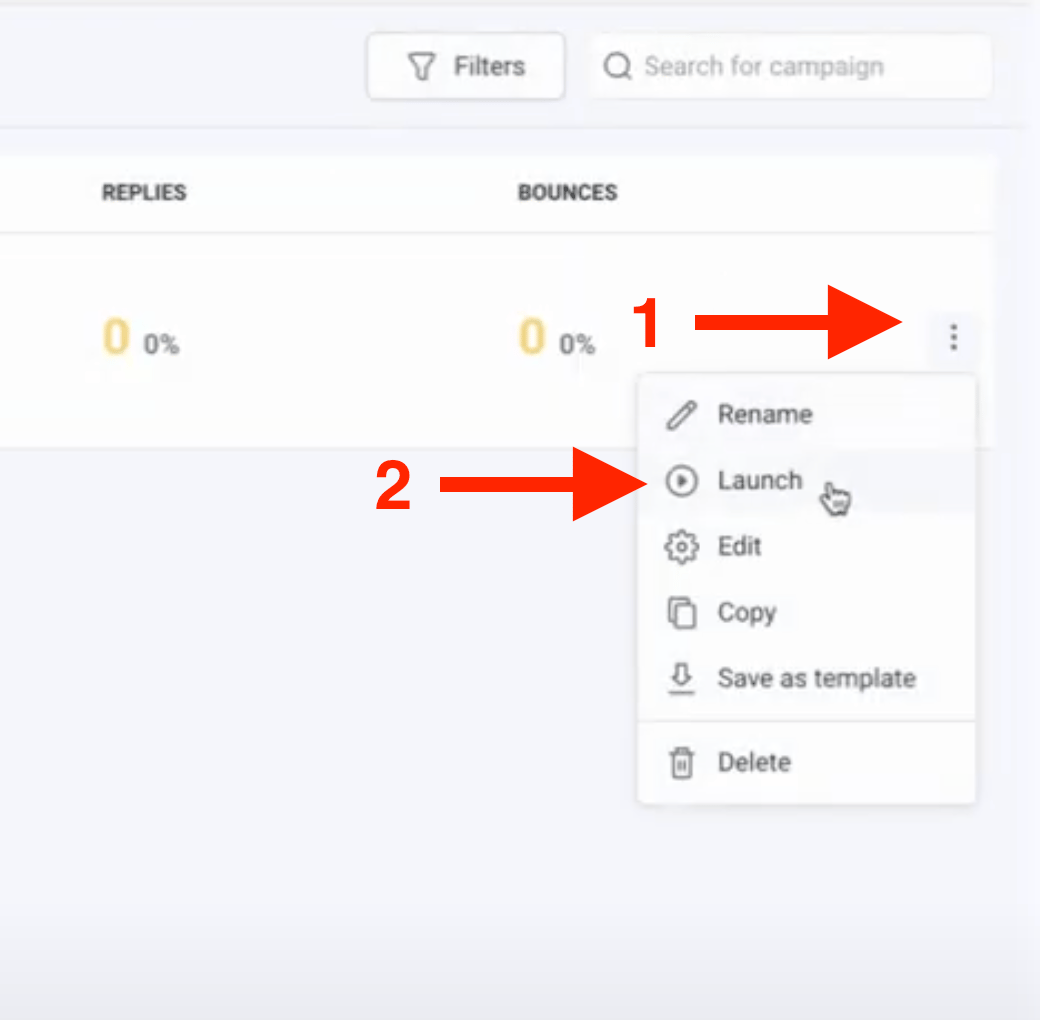
**18) And now head to the three dots on the right to launch the campaign:**
## YOU ARE ALL SET!
## Frequently asked questions
In Sendspark, go to your Dynamic Video Campaign, search for Snov.io, and click the email option to copy the snippet code.
After exporting Sendspark's clean CSV, duplicate the EMAIL column and rename the copy exactly "email2." Then add a matching custom field named "email2" (Text type) when importing prospects in Snov.io.
If your spreadsheet software auto-capitalizes the first letter in the CSV header, it will still work. But when you create the custom field in Snov.io, name it "email2" with no capital letter.
Export the clean CSV file from Sendspark and use that. It contains the contacts prepared for your campaign.
Open All Campaigns from the left-hand panel, then click the three dots on the right of your campaign and launch it.
*Updated July 2026.*
 **2) Choose whether you want to use a Template or start from Scratch:**
 3. Add an email Step:
 **4) Go to your Dynamic Video Campaign and search for Snov.iO and click on the email option to copy the Snippet Code:**
 **5) Click on the Email Step and paste the Snippet Code straight into the email with CMD+V or CTRL+V to display the Thumbnail. Remember to SAVE the email afterward**s:
 **6) Continue to the following step "Prospects":**
 **7) Go back to Sendspark and export the clean CSV file:**
 **8) Open the CSV file, and duplicate the EMAIL column, but rename the copy with "email2". The new header needs to be exactly that. If your sheet automatically turns the first letter into a capital letter, no need to worry. It will work anyway. Be sure to save it again maintaining the CSV format.**
 **9) Create a new list of prospects to use, and then click on the name entered to access the list:**
 **10) Click on the option UPLOAD, and continue with the process:**
 **11) After the contacts have been imported, expand the header of the duplicated email's column and click on ADD CUSTOM FIELD**
 **12) Rename it as "email2" with no capital letter regardless of how your sheet software saved it before. Also, select Text on the right option:**
 **13) This is how each column should look like. Note that the last 2 columns are DISABLED. You can now click on START THE IMPORT:**
 **14) Back to Prospects, be sure to select the List we just created with the number of prospects now included:**
 **15) Jump to Sending Options:**
 16. Choose your account, and then move to review to confirm that everything is set the way you want.
 **17) Once you have selected all your deliverability options, head to the left-hand side panel and access All Campaigns.**
 **18) And now head to the three dots on the right to launch the campaign:**
 ## YOU ARE ALL SET!
## Frequently asked questions
## YOU ARE ALL SET!
## Frequently asked questions