> ## Documentation Index
> Fetch the complete documentation index at: https://help.sendspark.com/llms.txt
> Use this file to discover all available pages before exploring further.
# GHL - Create Video on Meeting Booking
> Create automated videos in HighLevel when someone schedules a meeting using Sendspark workflow integration. Send personalized booking confirmation videos.
You can automatically create a personalized Sendspark video whenever someone submits a form or books a meeting in HighLevel (GHL). Connect the two with your HighLevel API key, build a Sendspark automation that catches a webhook from a HighLevel workflow, then add a Create a Dynamic Video action and map the contact fields. This example uses the Form Submission trigger.
## Key takeaways
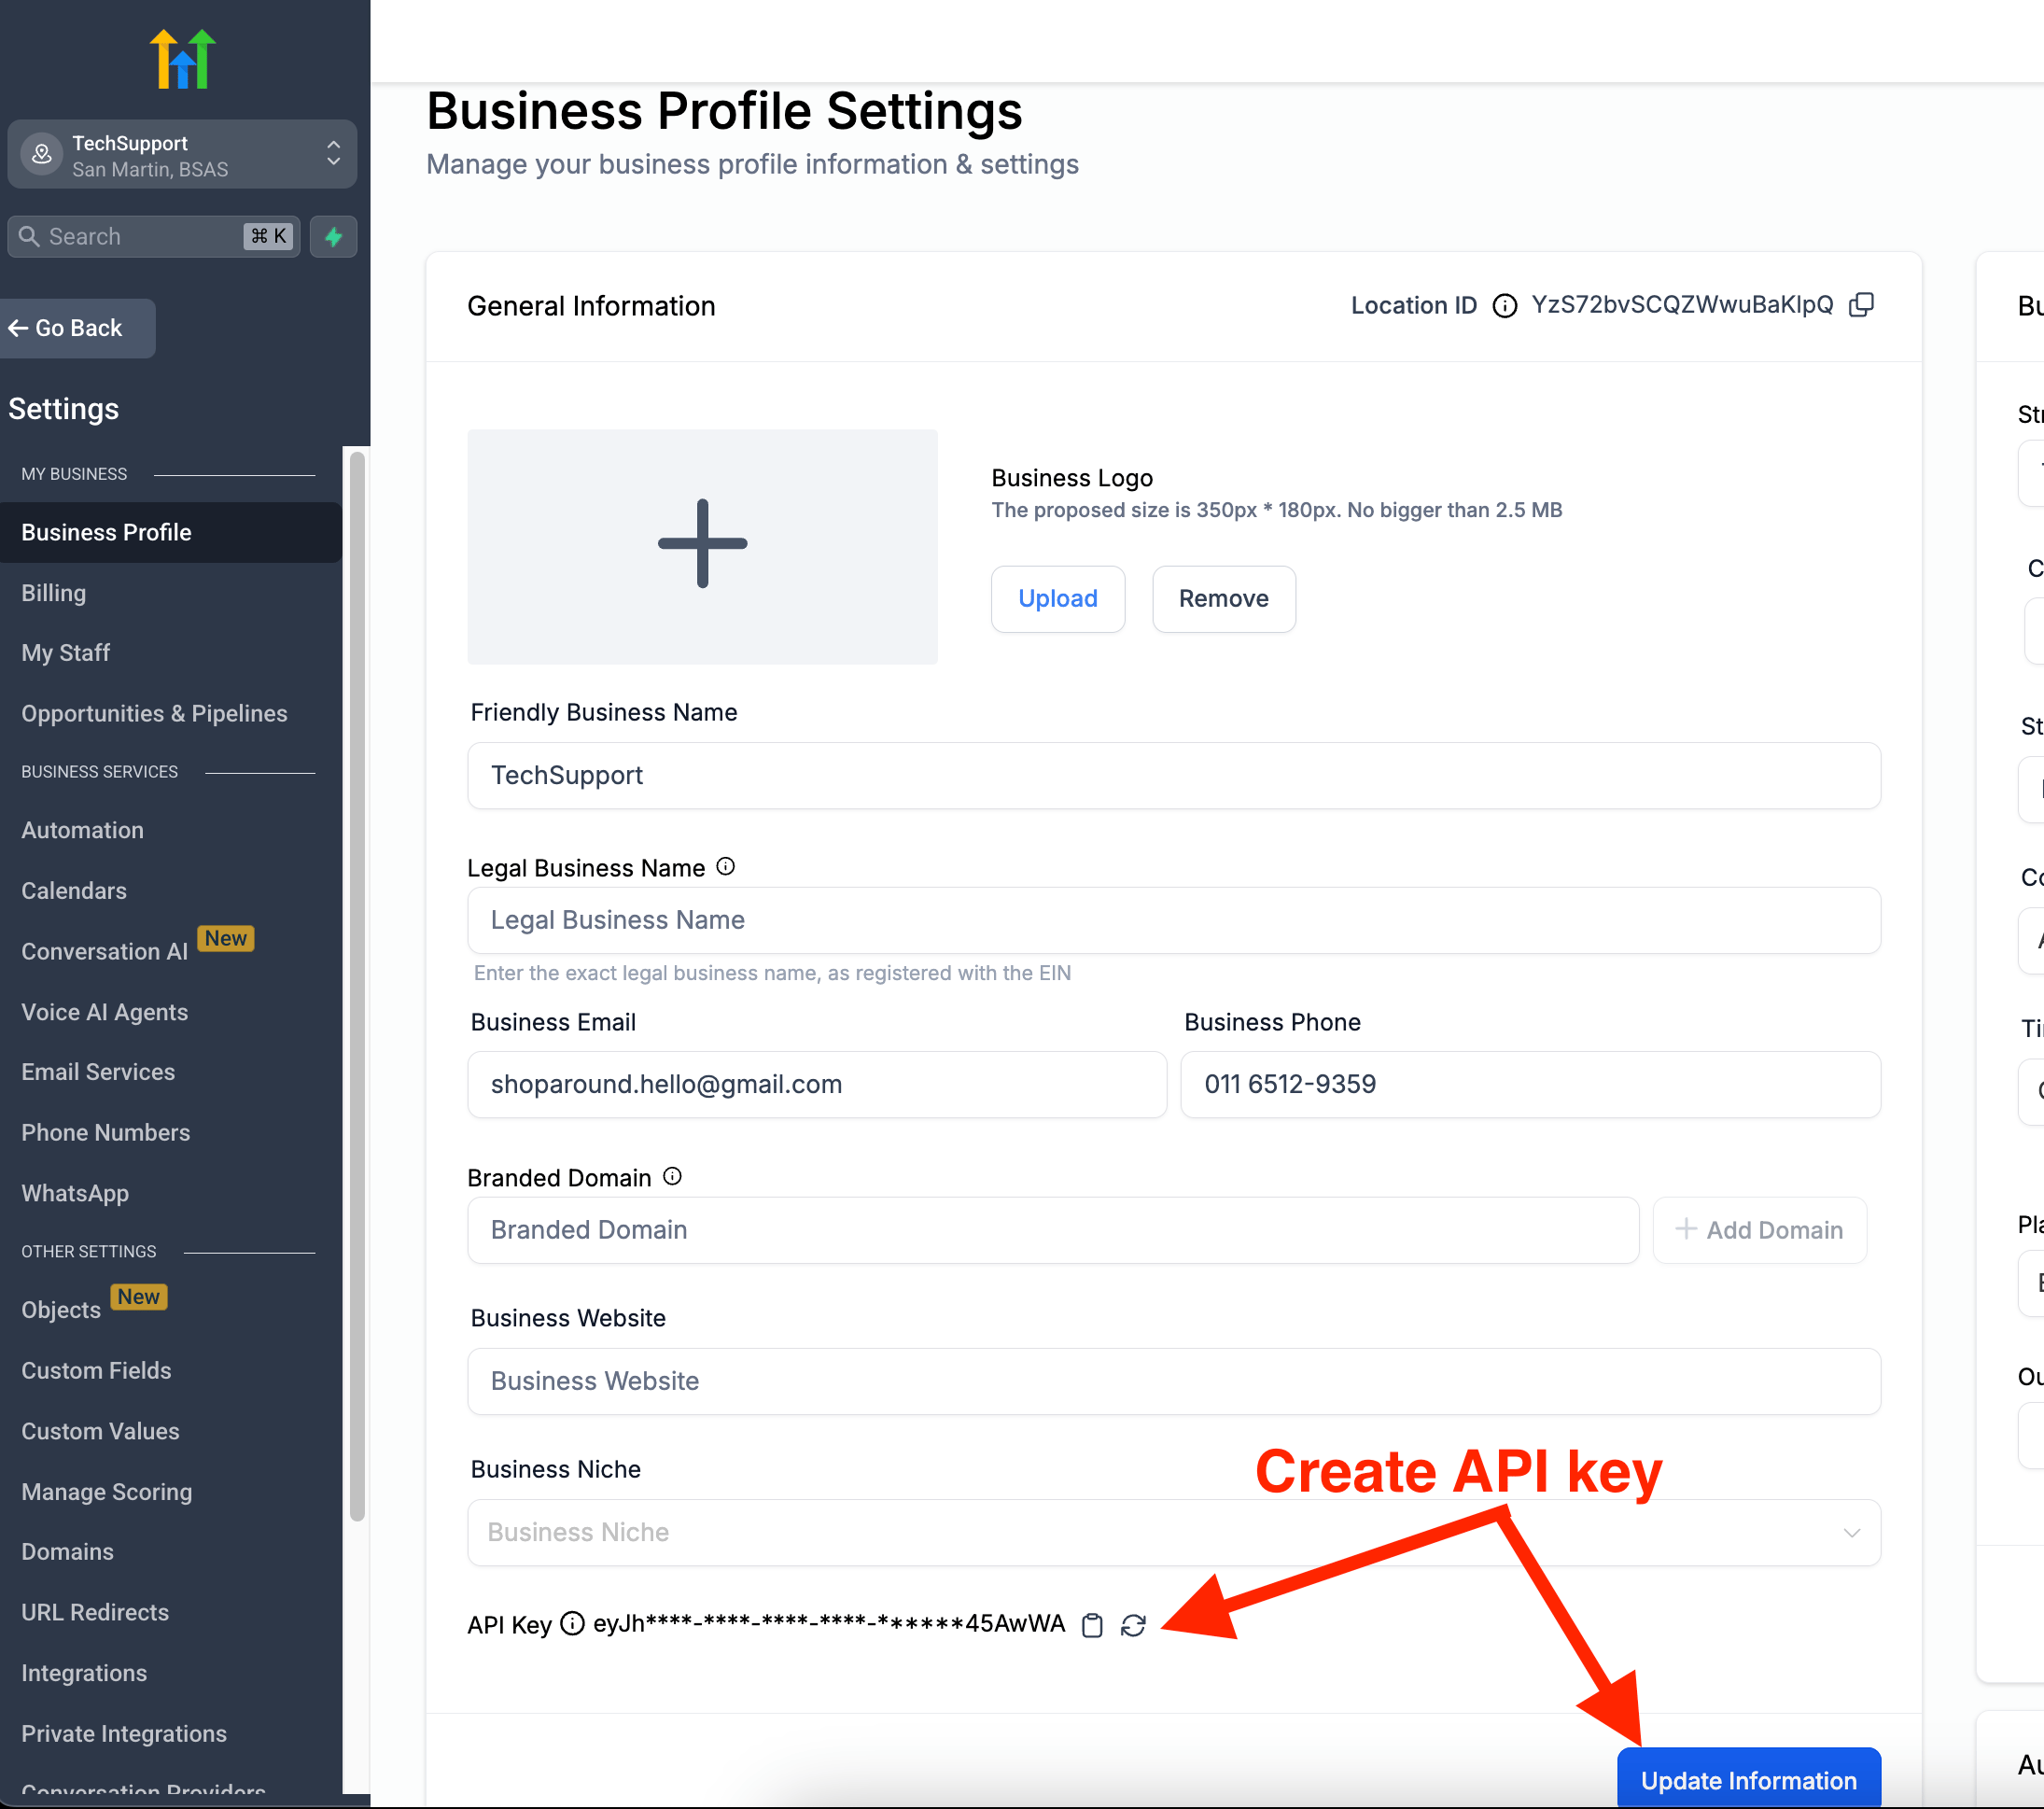
* Connect HighLevel to Sendspark using your HighLevel sub-account API key (Settings → create API below Business Profile Settings).
* The flow relies on a webhook: Sendspark provides a WebHook Catcher URL that you add as a POST webhook step in your HighLevel workflow.
* In HighLevel, this example uses Form Submission as the trigger, plus Create Contact and Webhook steps in the workflow.
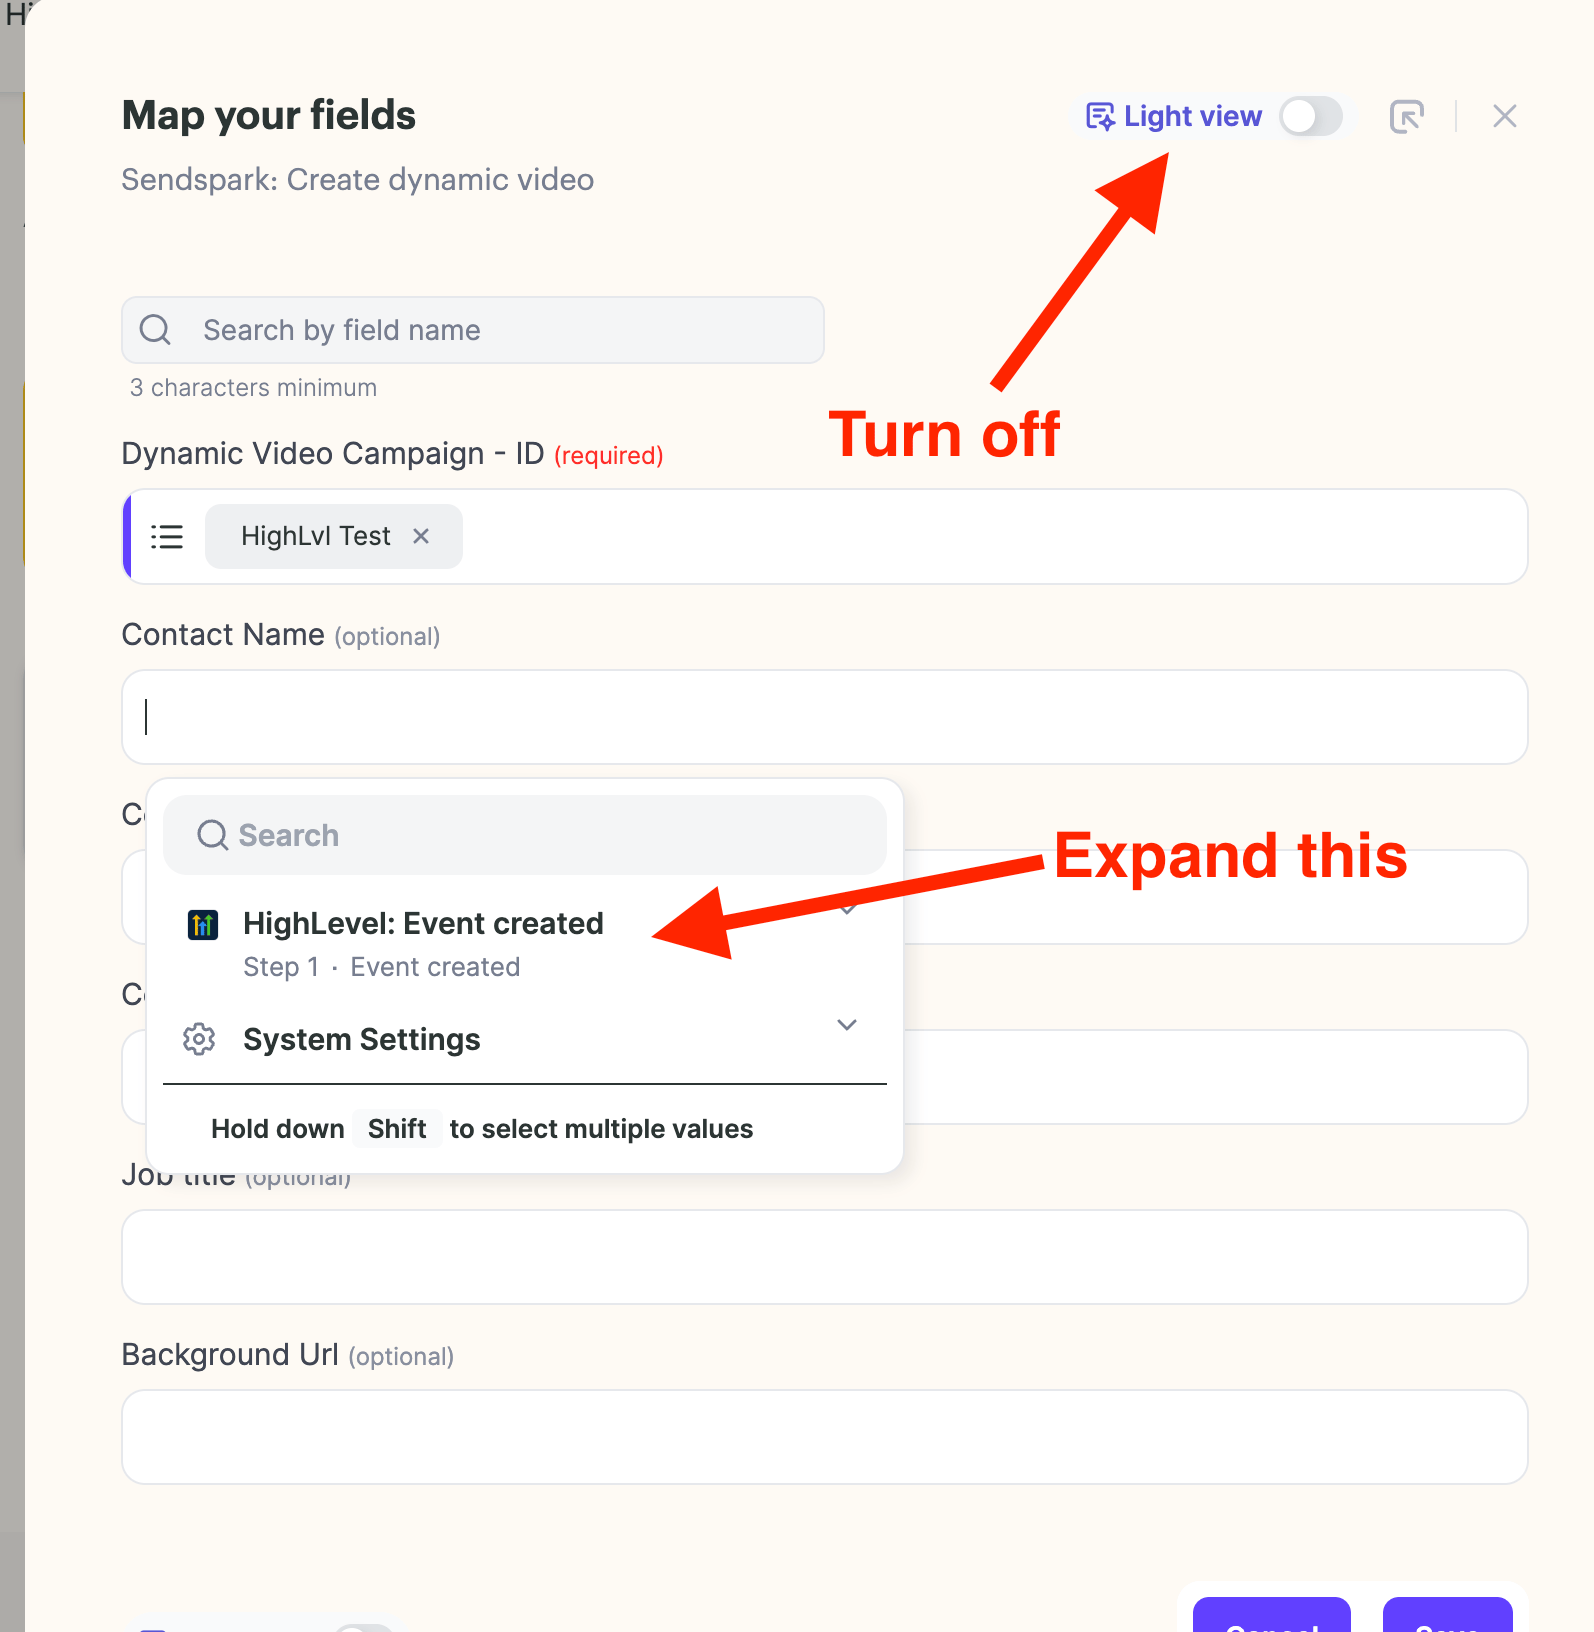
* In Sendspark's Action step, choose Create a Dynamic Video, paste your Campaign ID (found in the campaign URL), turn off Light View, and map each field.
In this article, we'll help you get started with your Sendspark-Highlevel workflow automation. As an example, we'll use the Form Submission method to create a workflow
First, we'll retrieve your API key from HighLevel to connect your account to Sendspark:
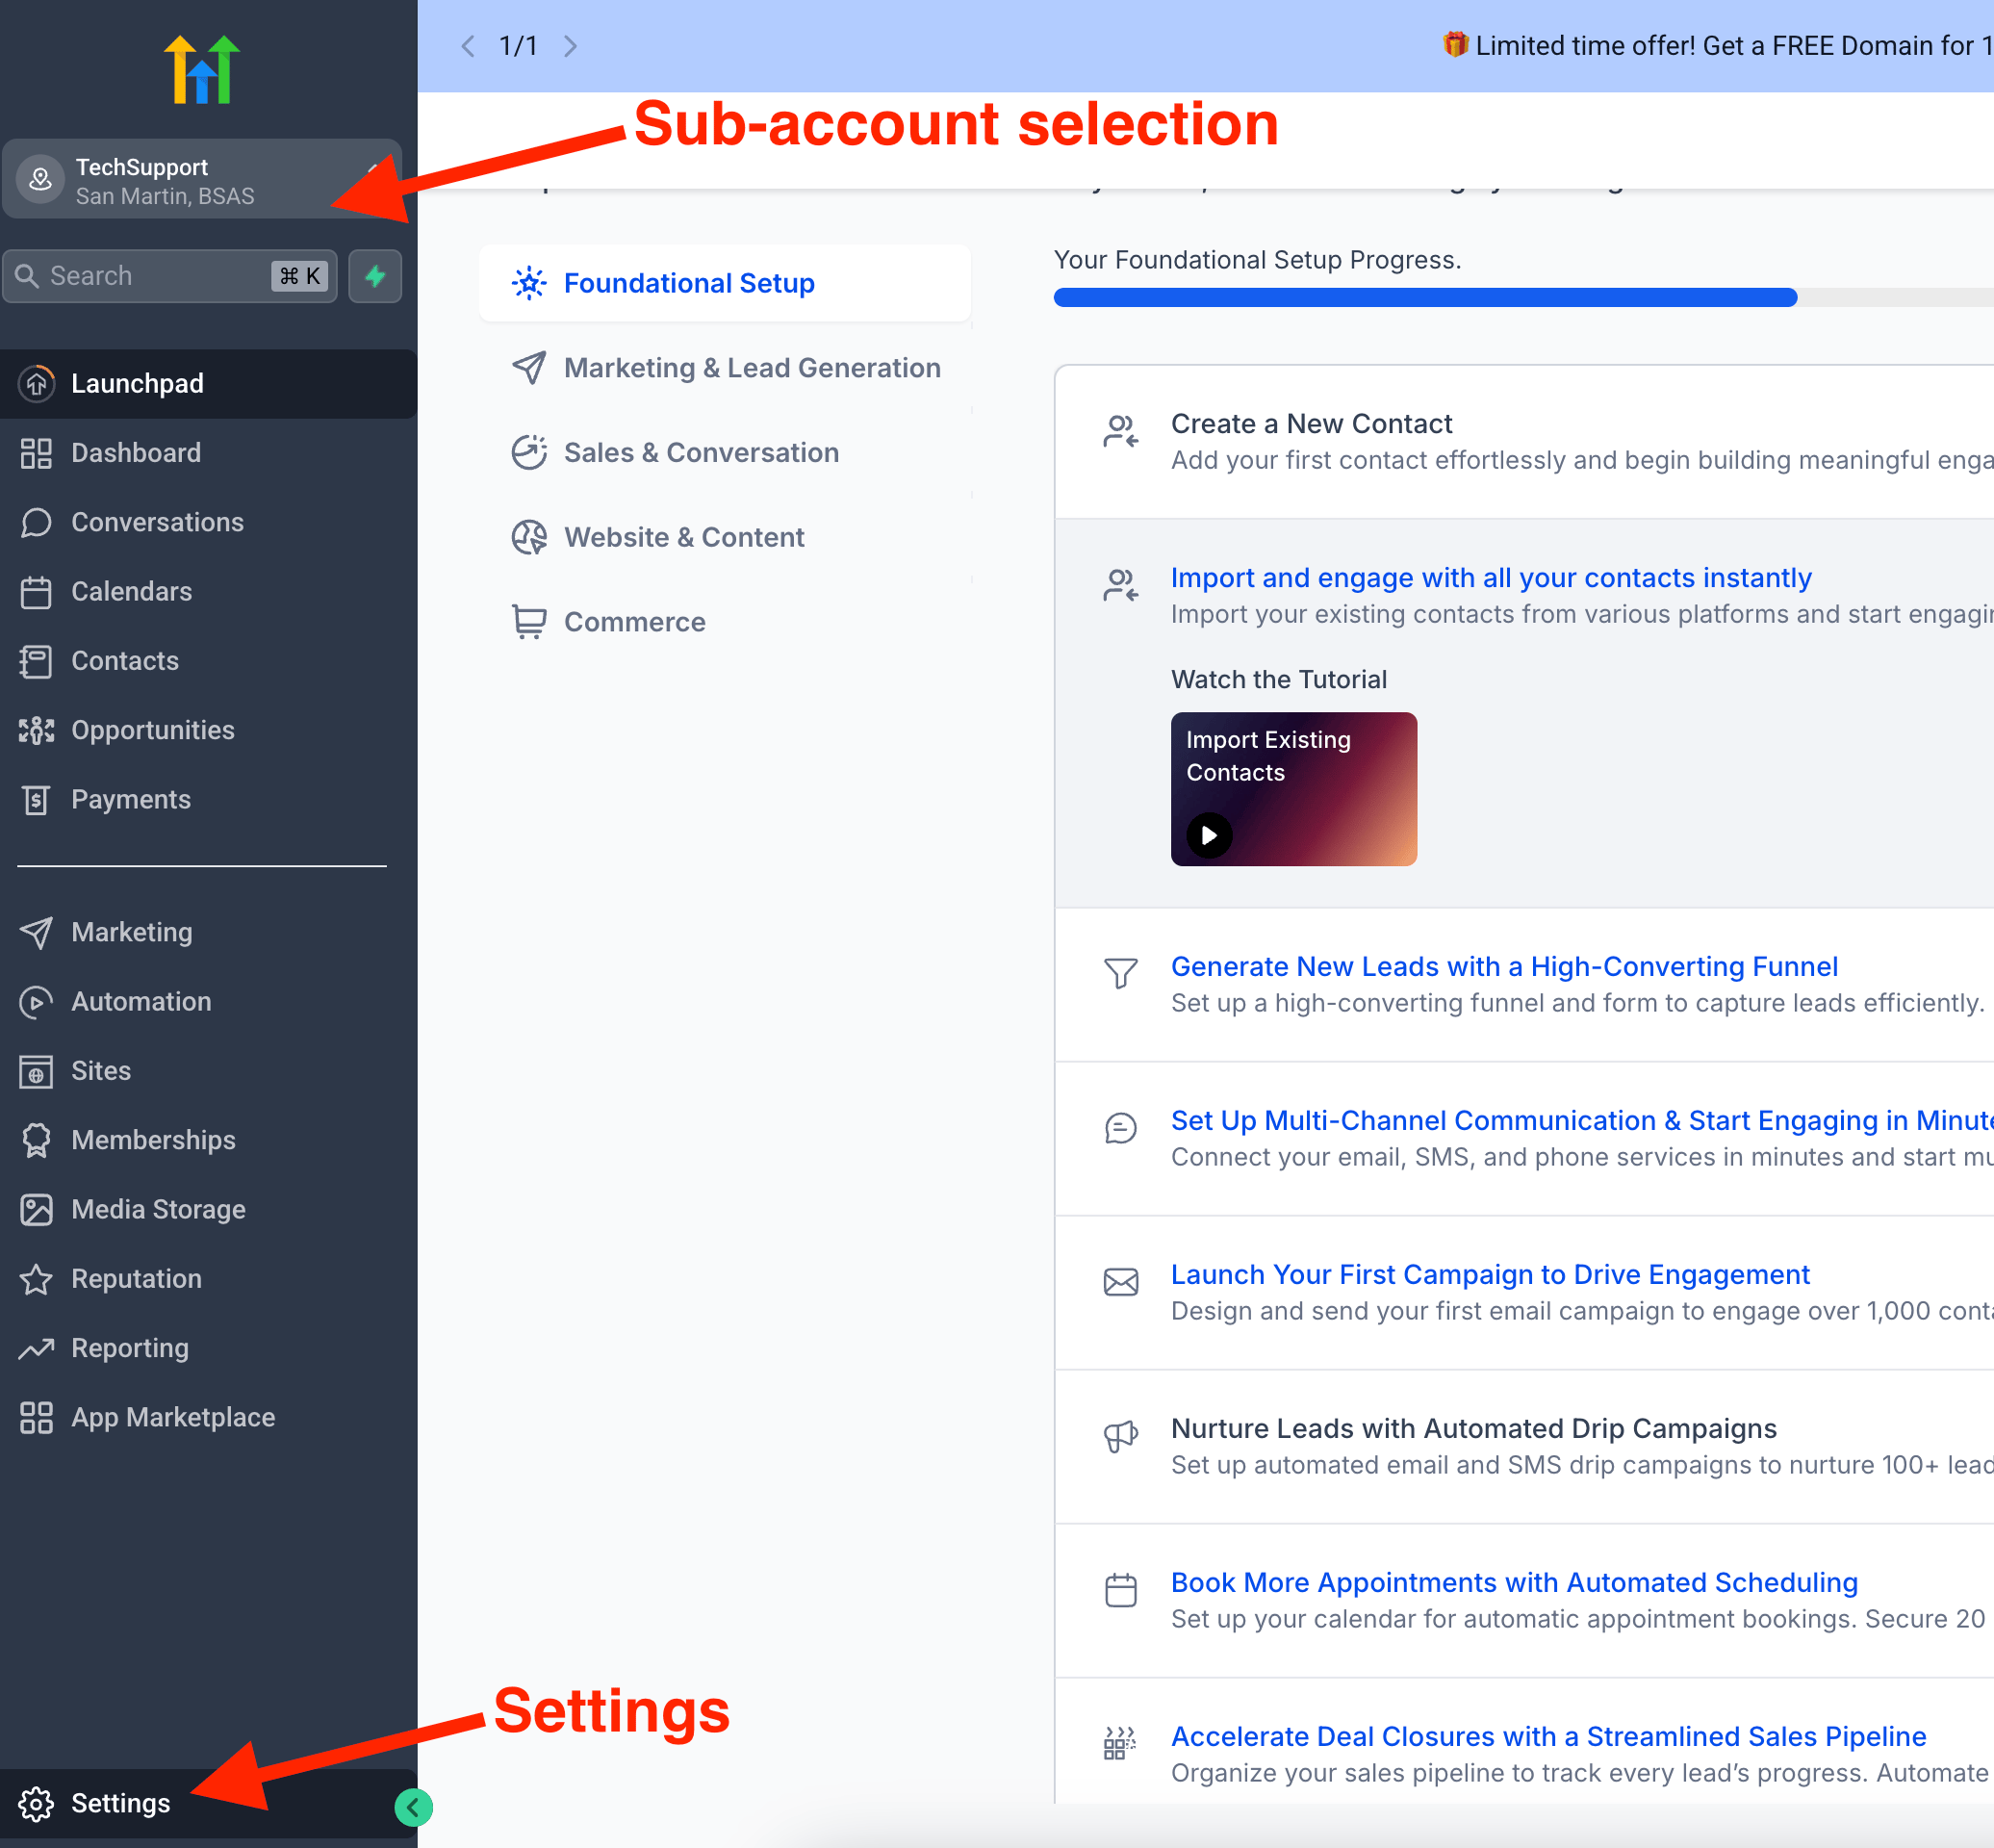
Select your Sub-Account and click on Settings:
 Create your API with the blue button right below the BUSINESS PROFILE SETTINGS and copy the API key
 Now, let's head to Sendspark Automated-Workflows section and click on CREATE A NEW AUTOMATION: [https://sendspark.com/automated-workflows](https://sendspark.com/automated-workflows)
In the TRIGGER step, we'll make these selections and then we'll hit continue
Now, let's head to Sendspark Automated-Workflows section and click on CREATE A NEW AUTOMATION: [https://sendspark.com/automated-workflows](https://sendspark.com/automated-workflows)
In the TRIGGER step, we'll make these selections and then we'll hit continue
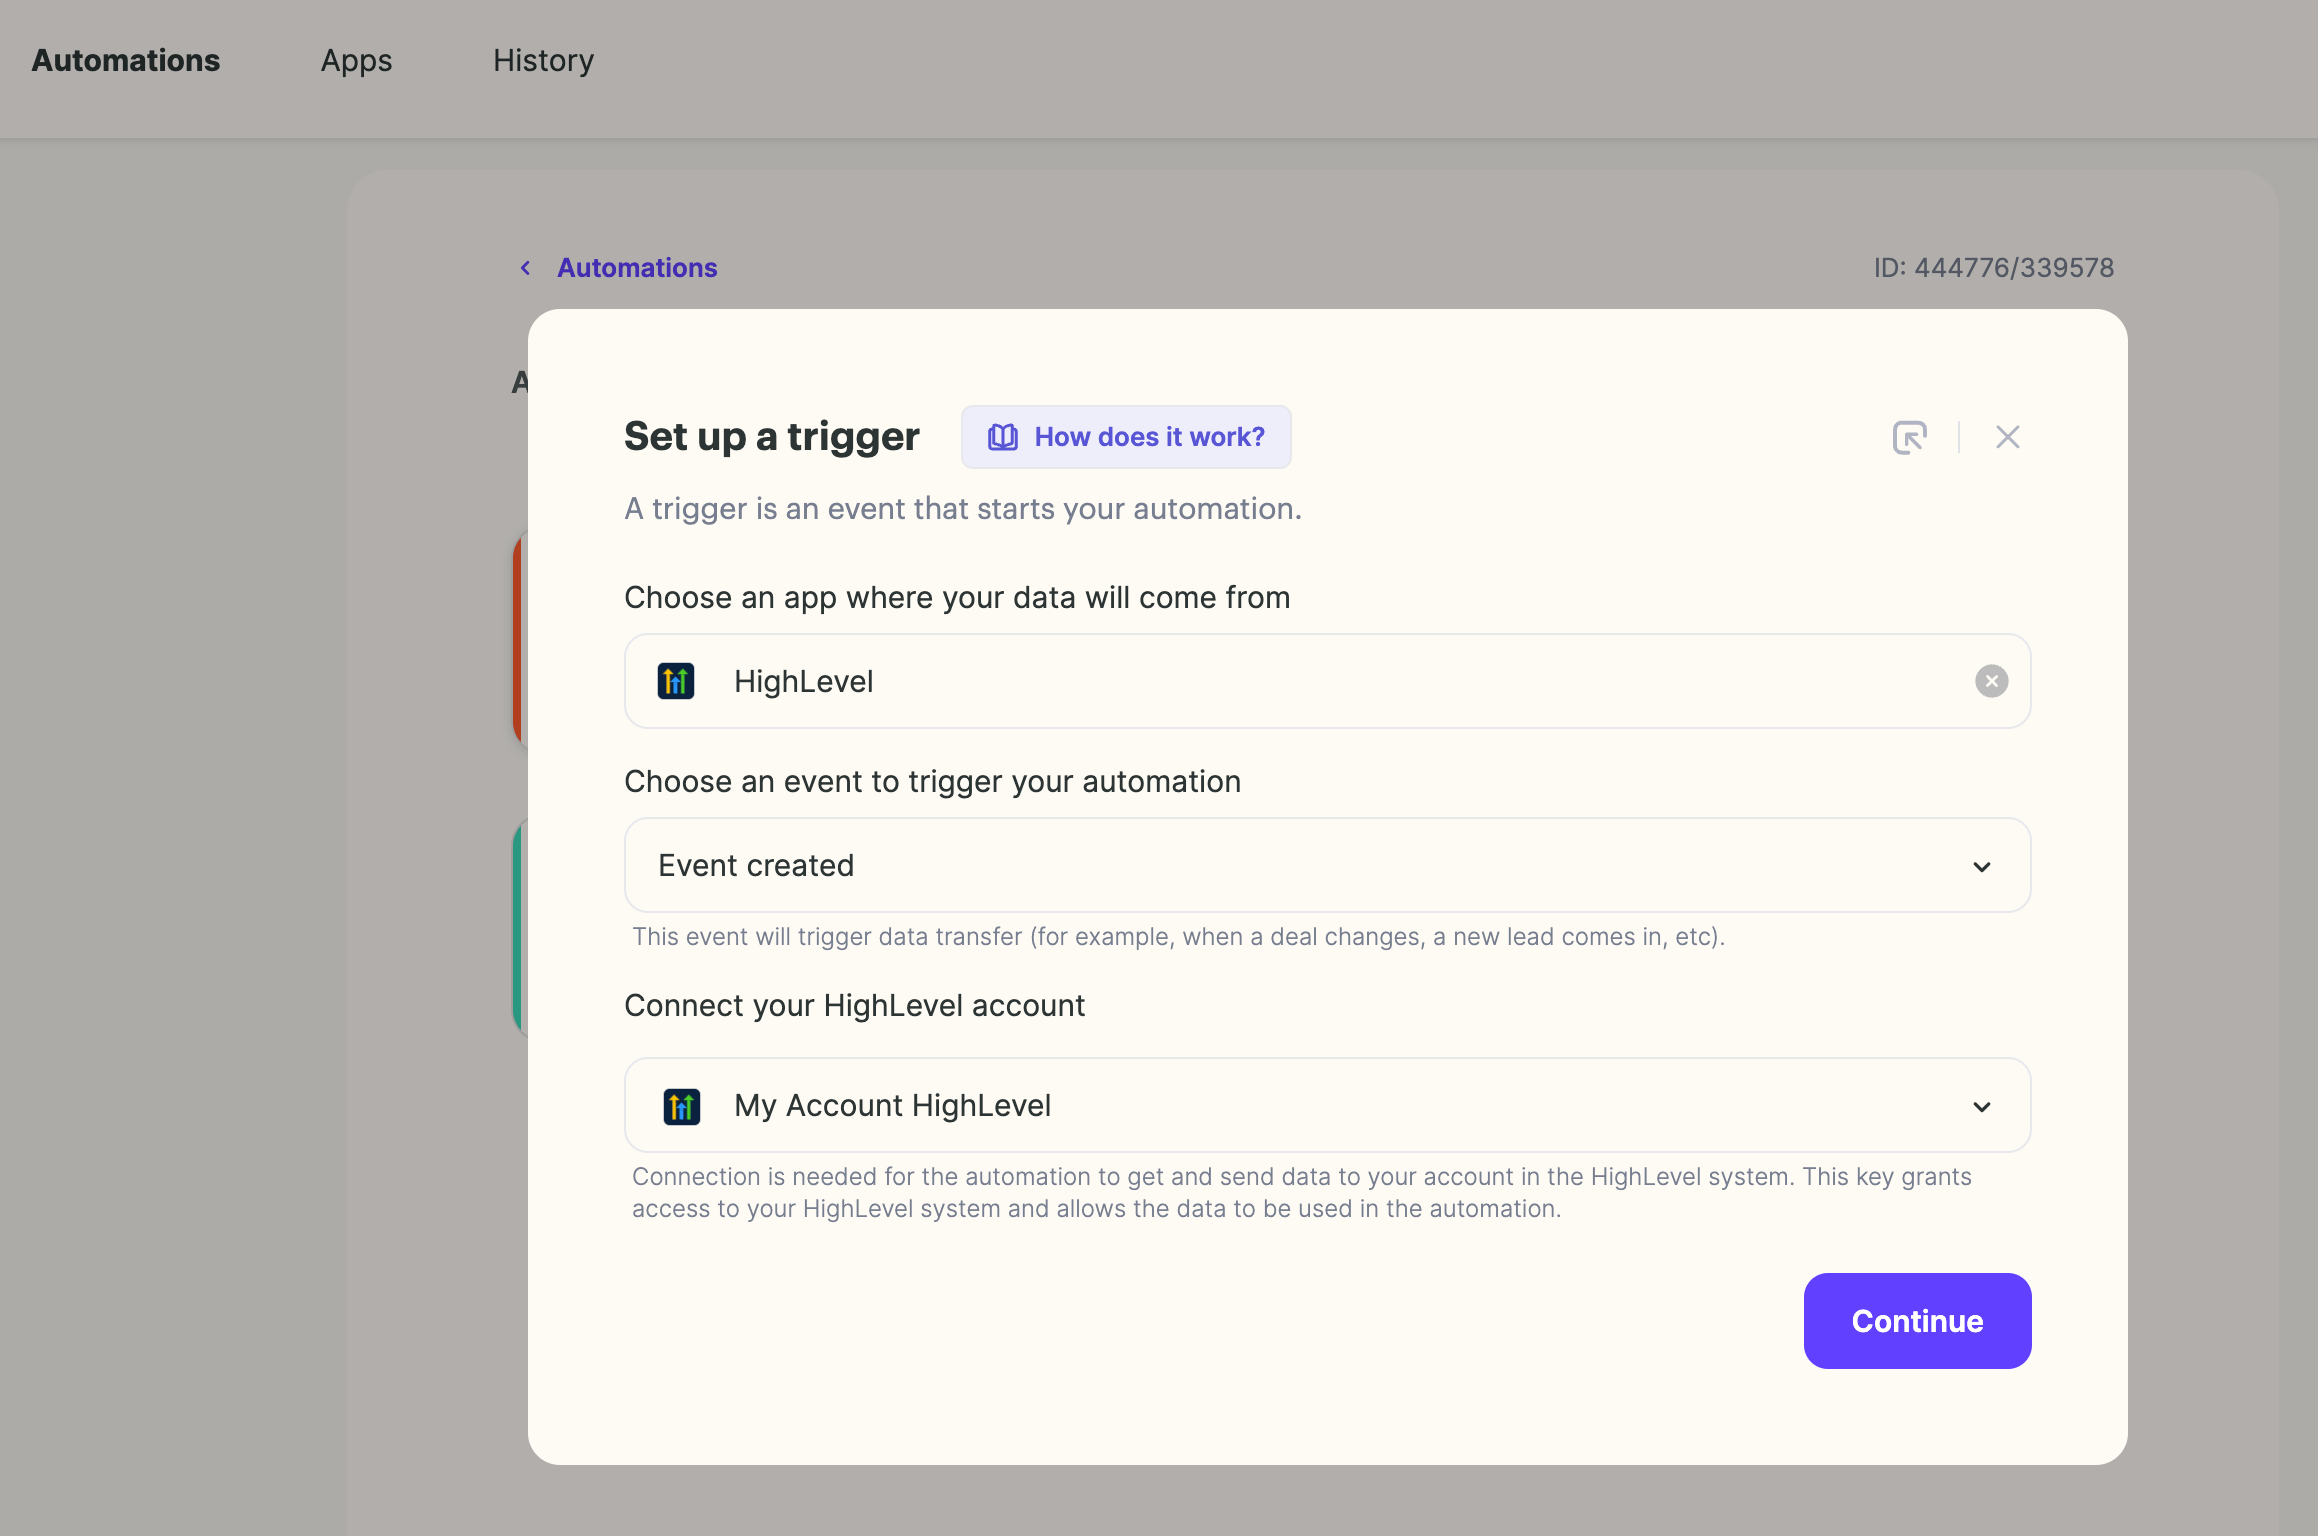 If you are connecting HighLevel for the first time, you'll be asked to provide that API key we just copied before:
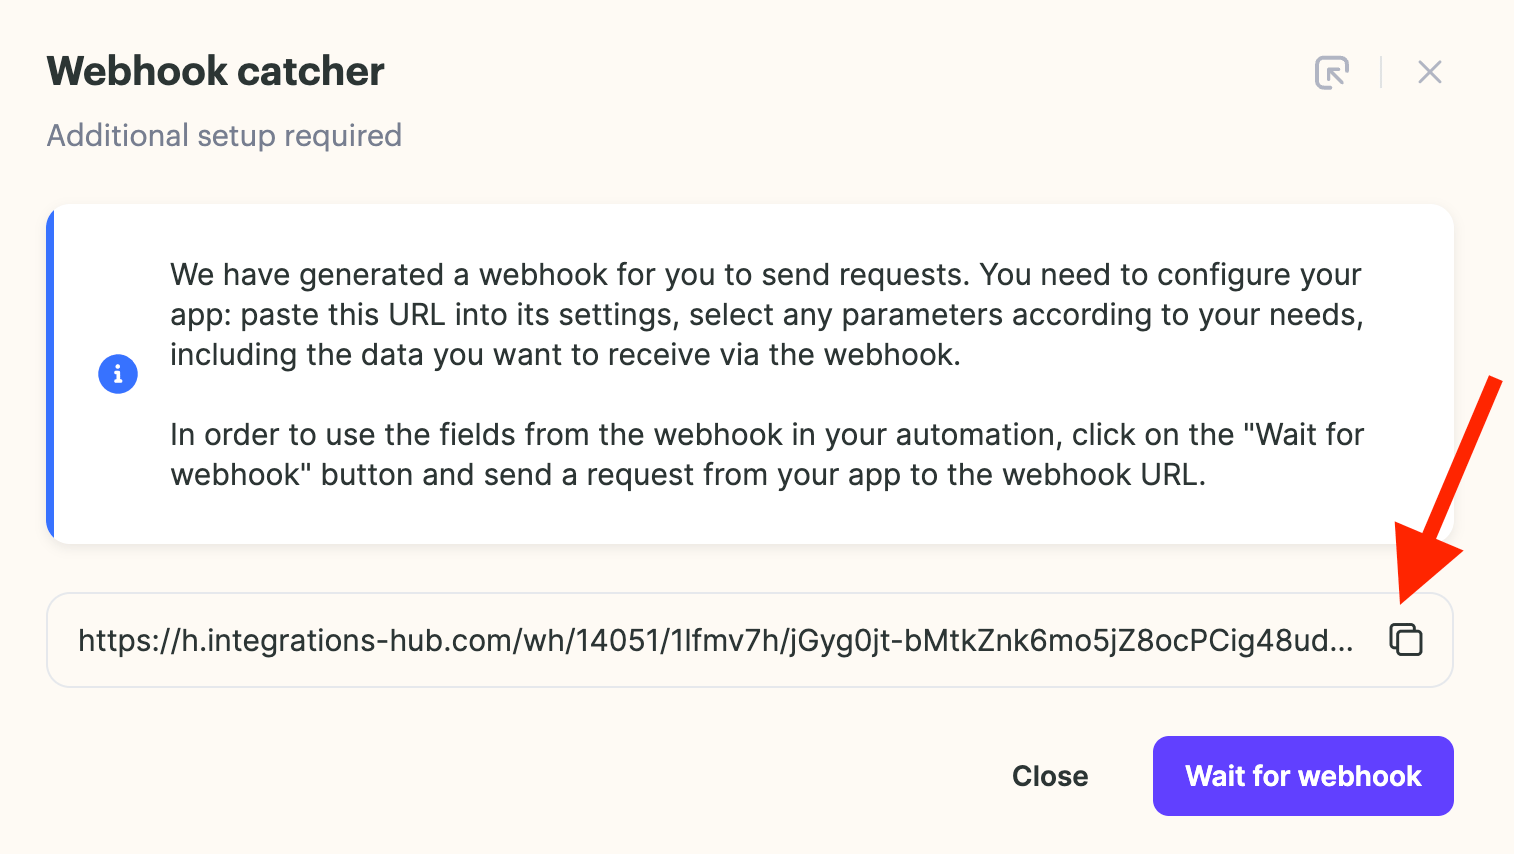
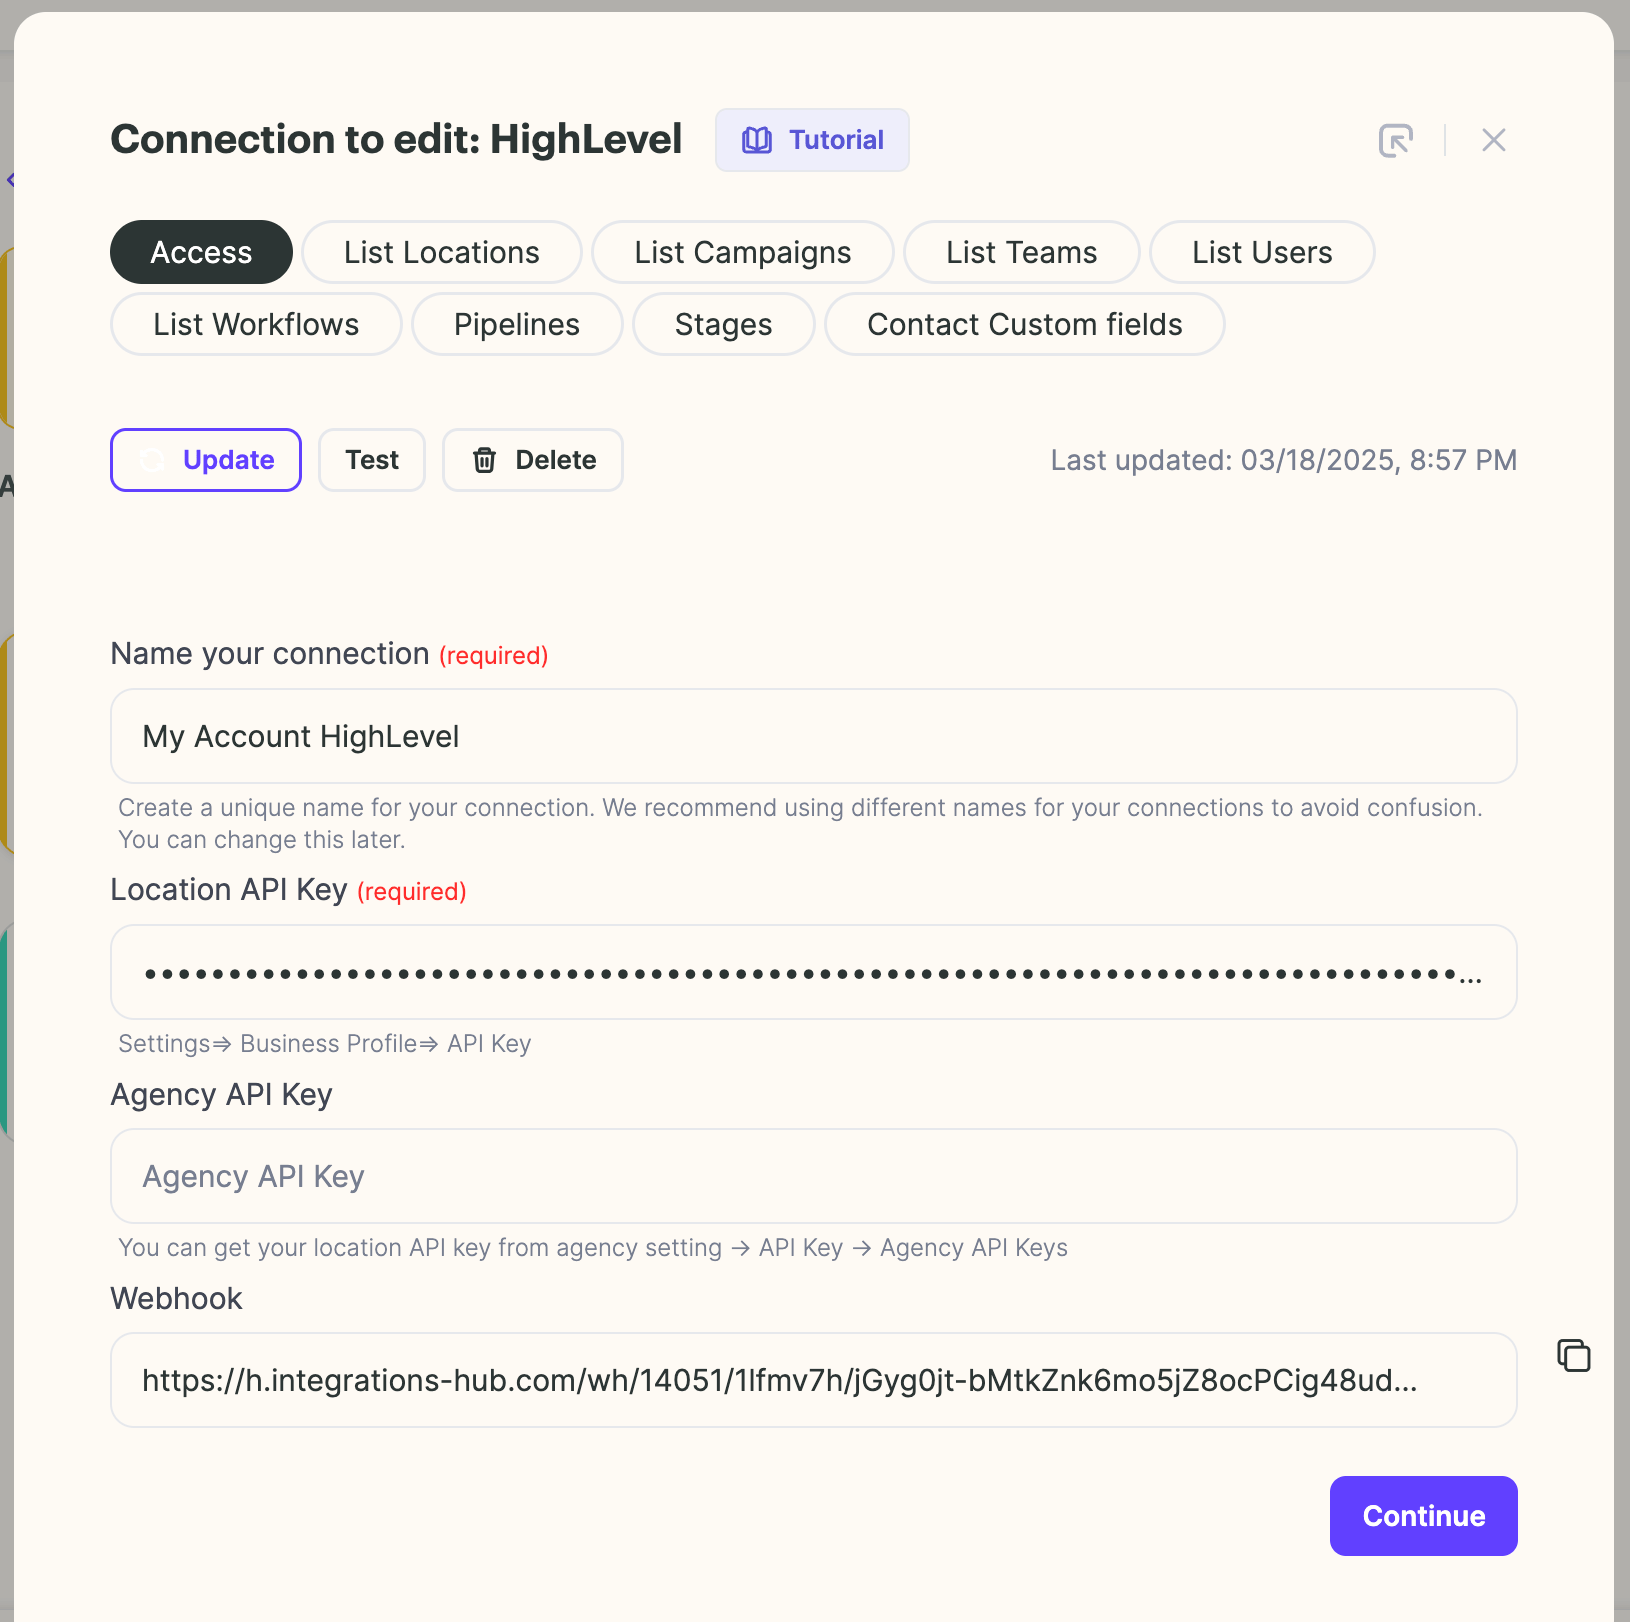 The system will now provide a WebHook Catcher. Please copy the URL
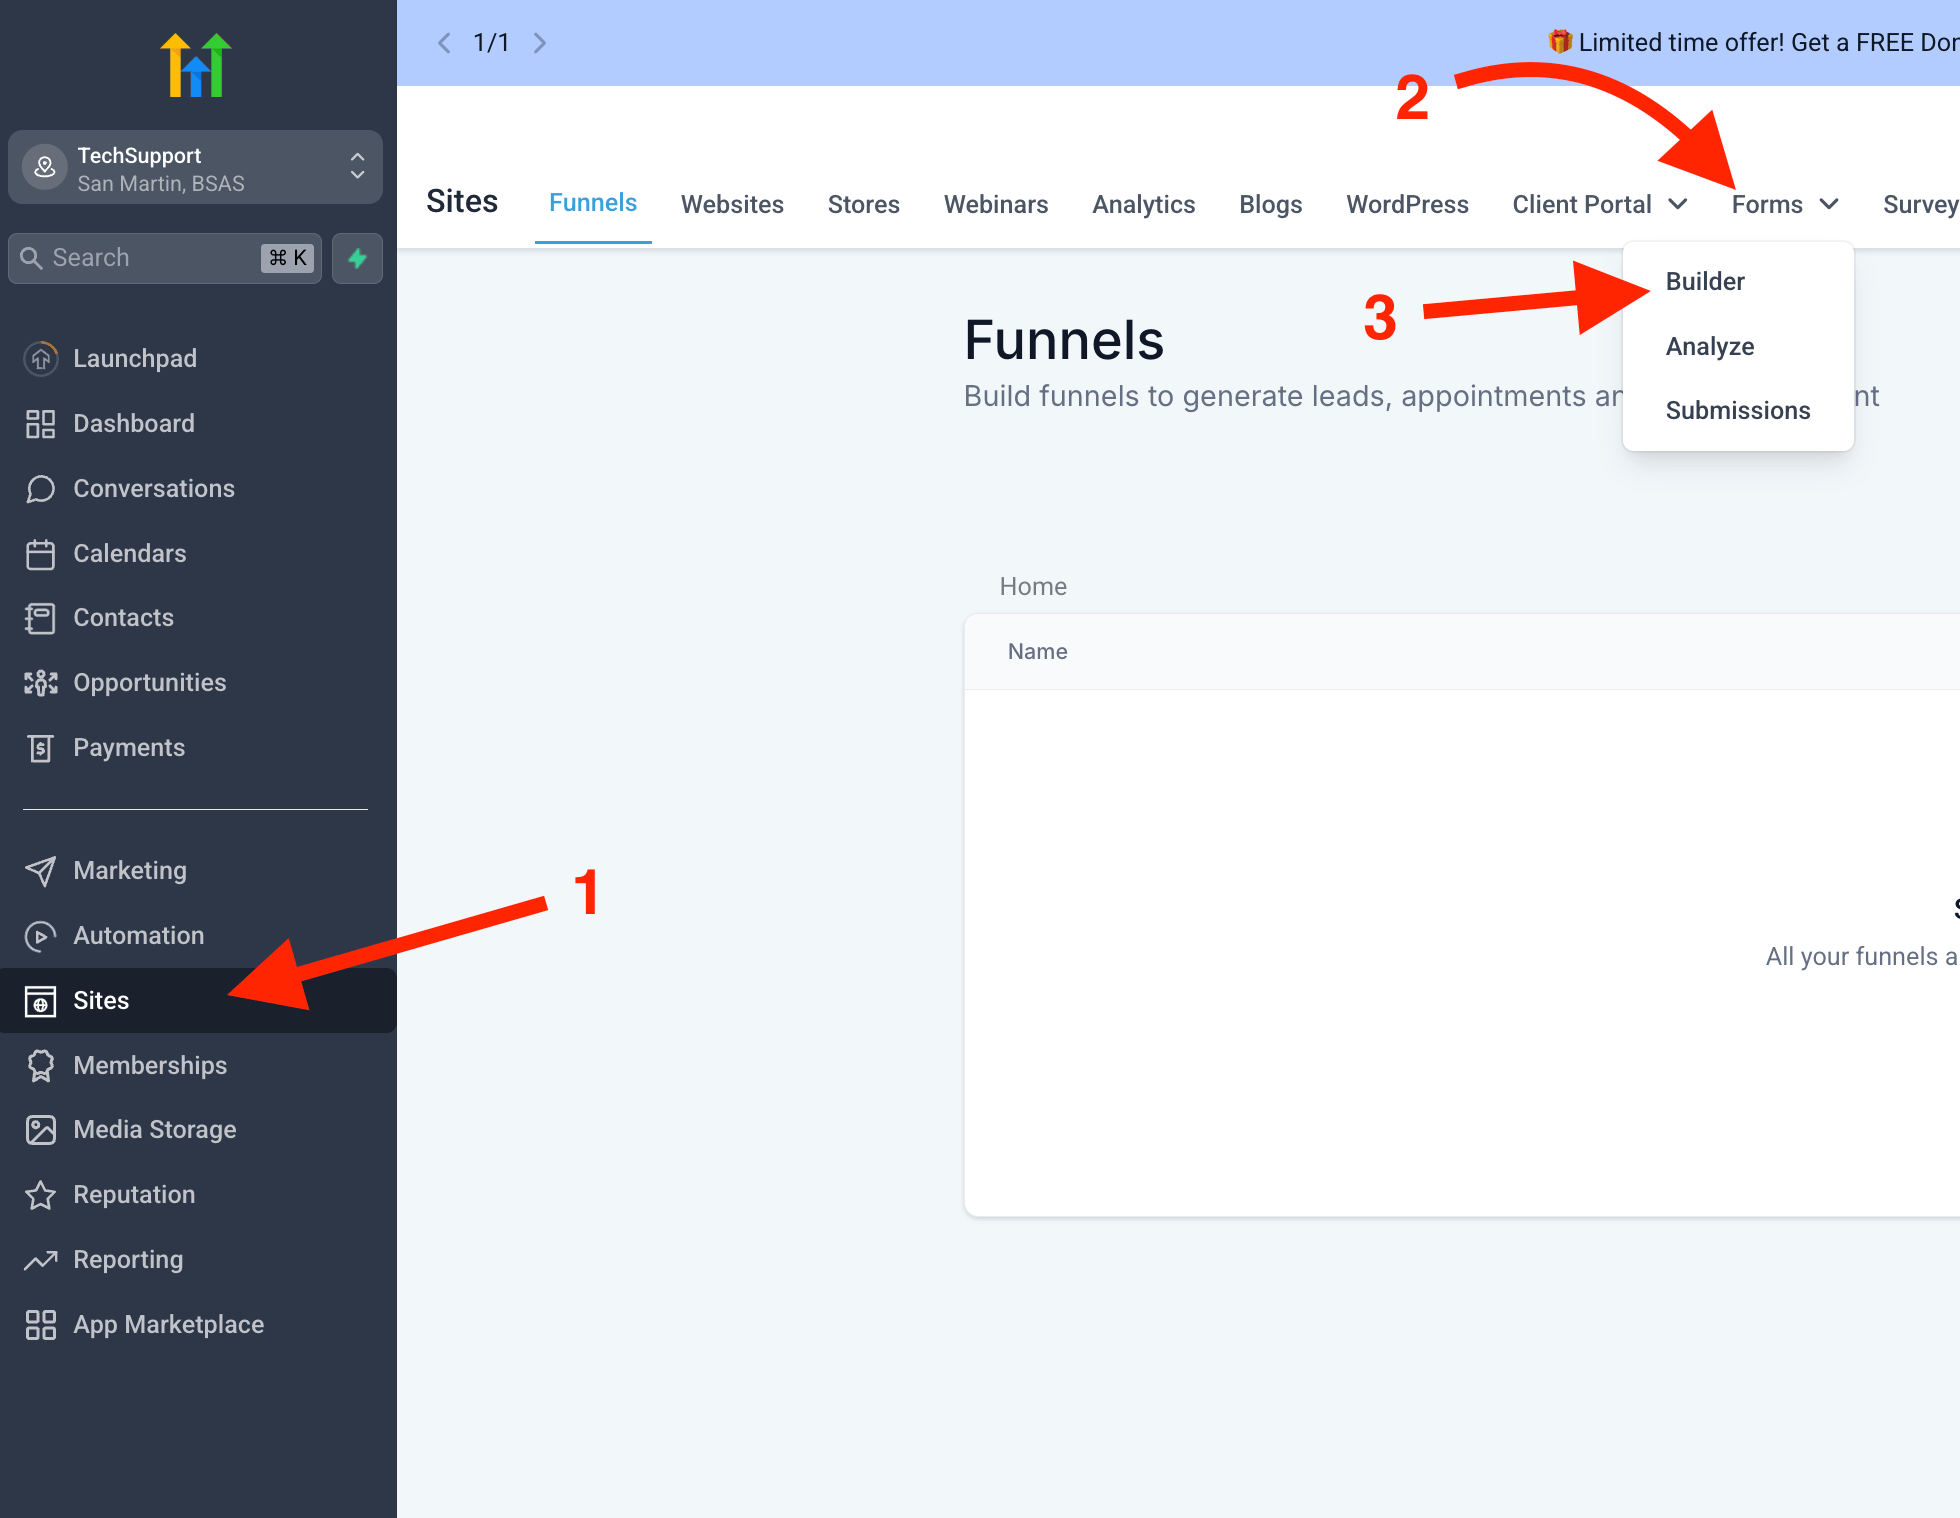
 Back in HighLevel, Click on SITES -- > Forms --> Form Builder:
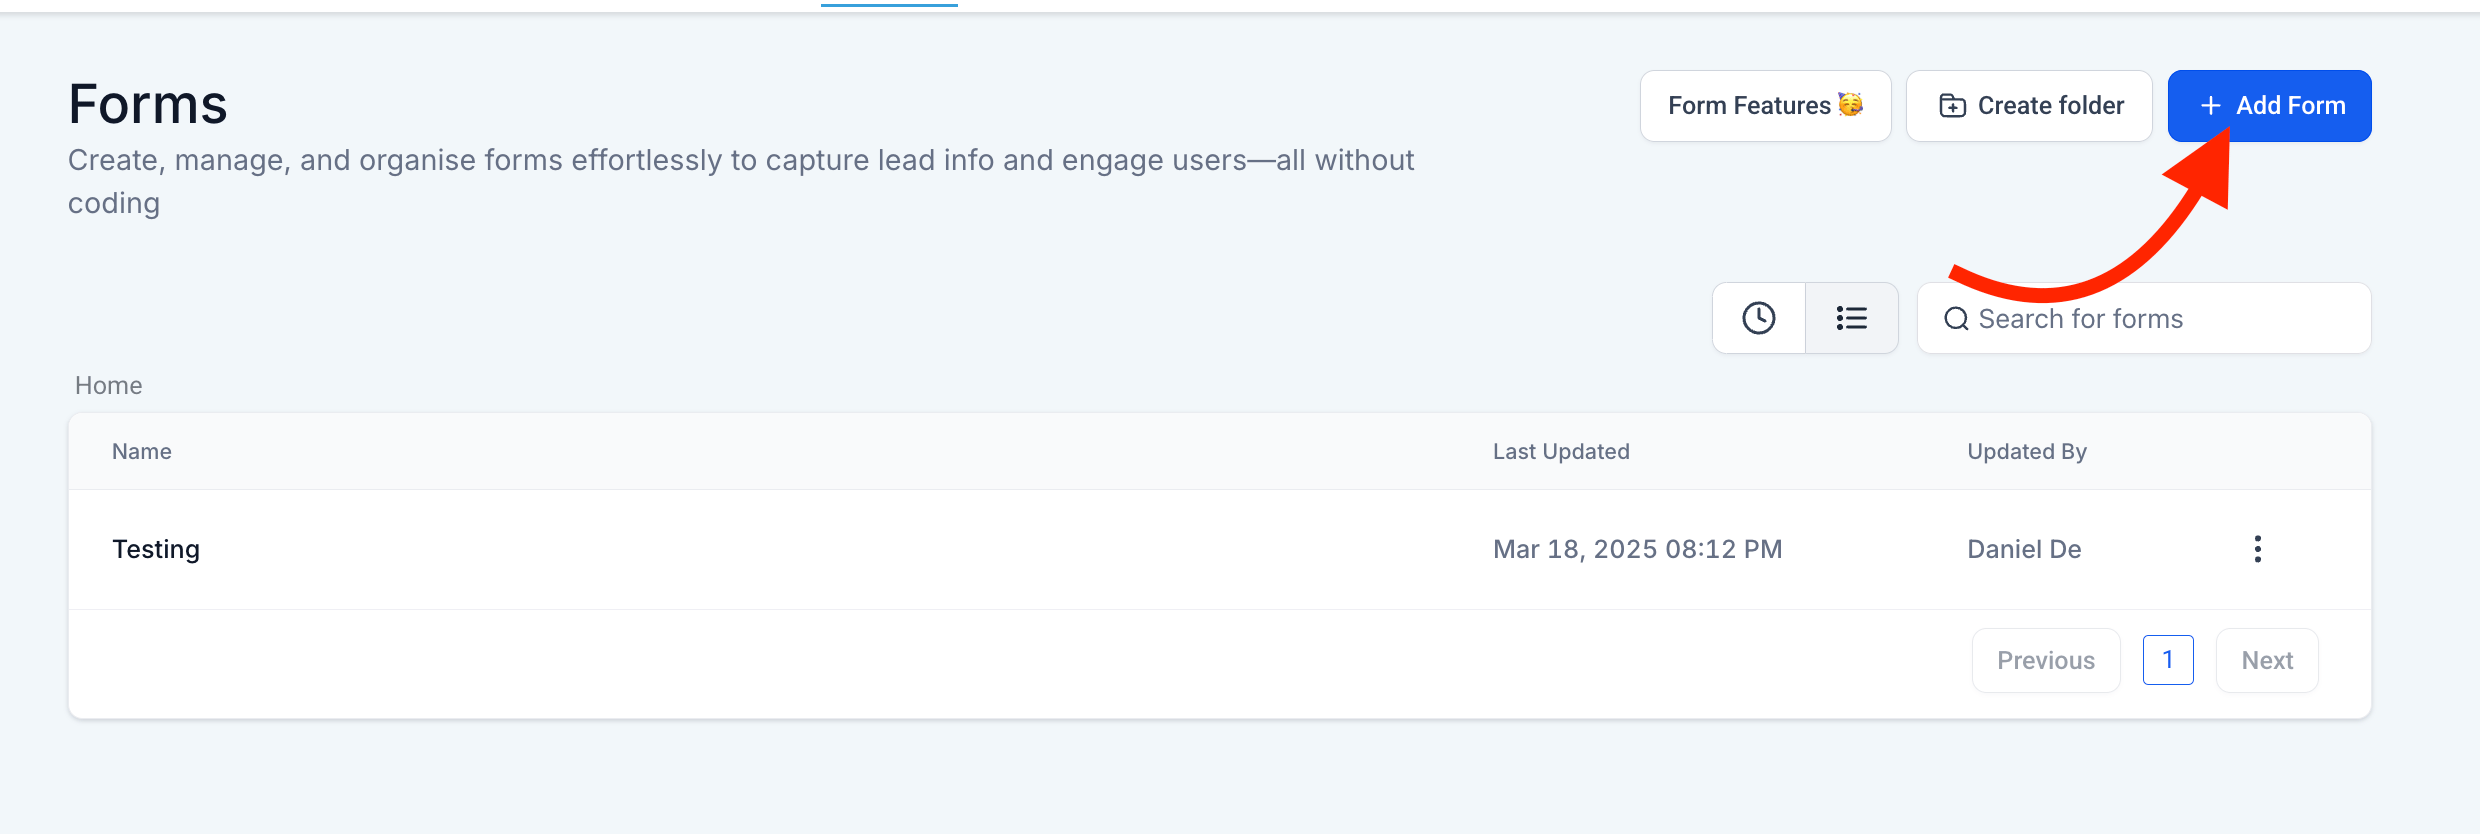
 Add a new Form:
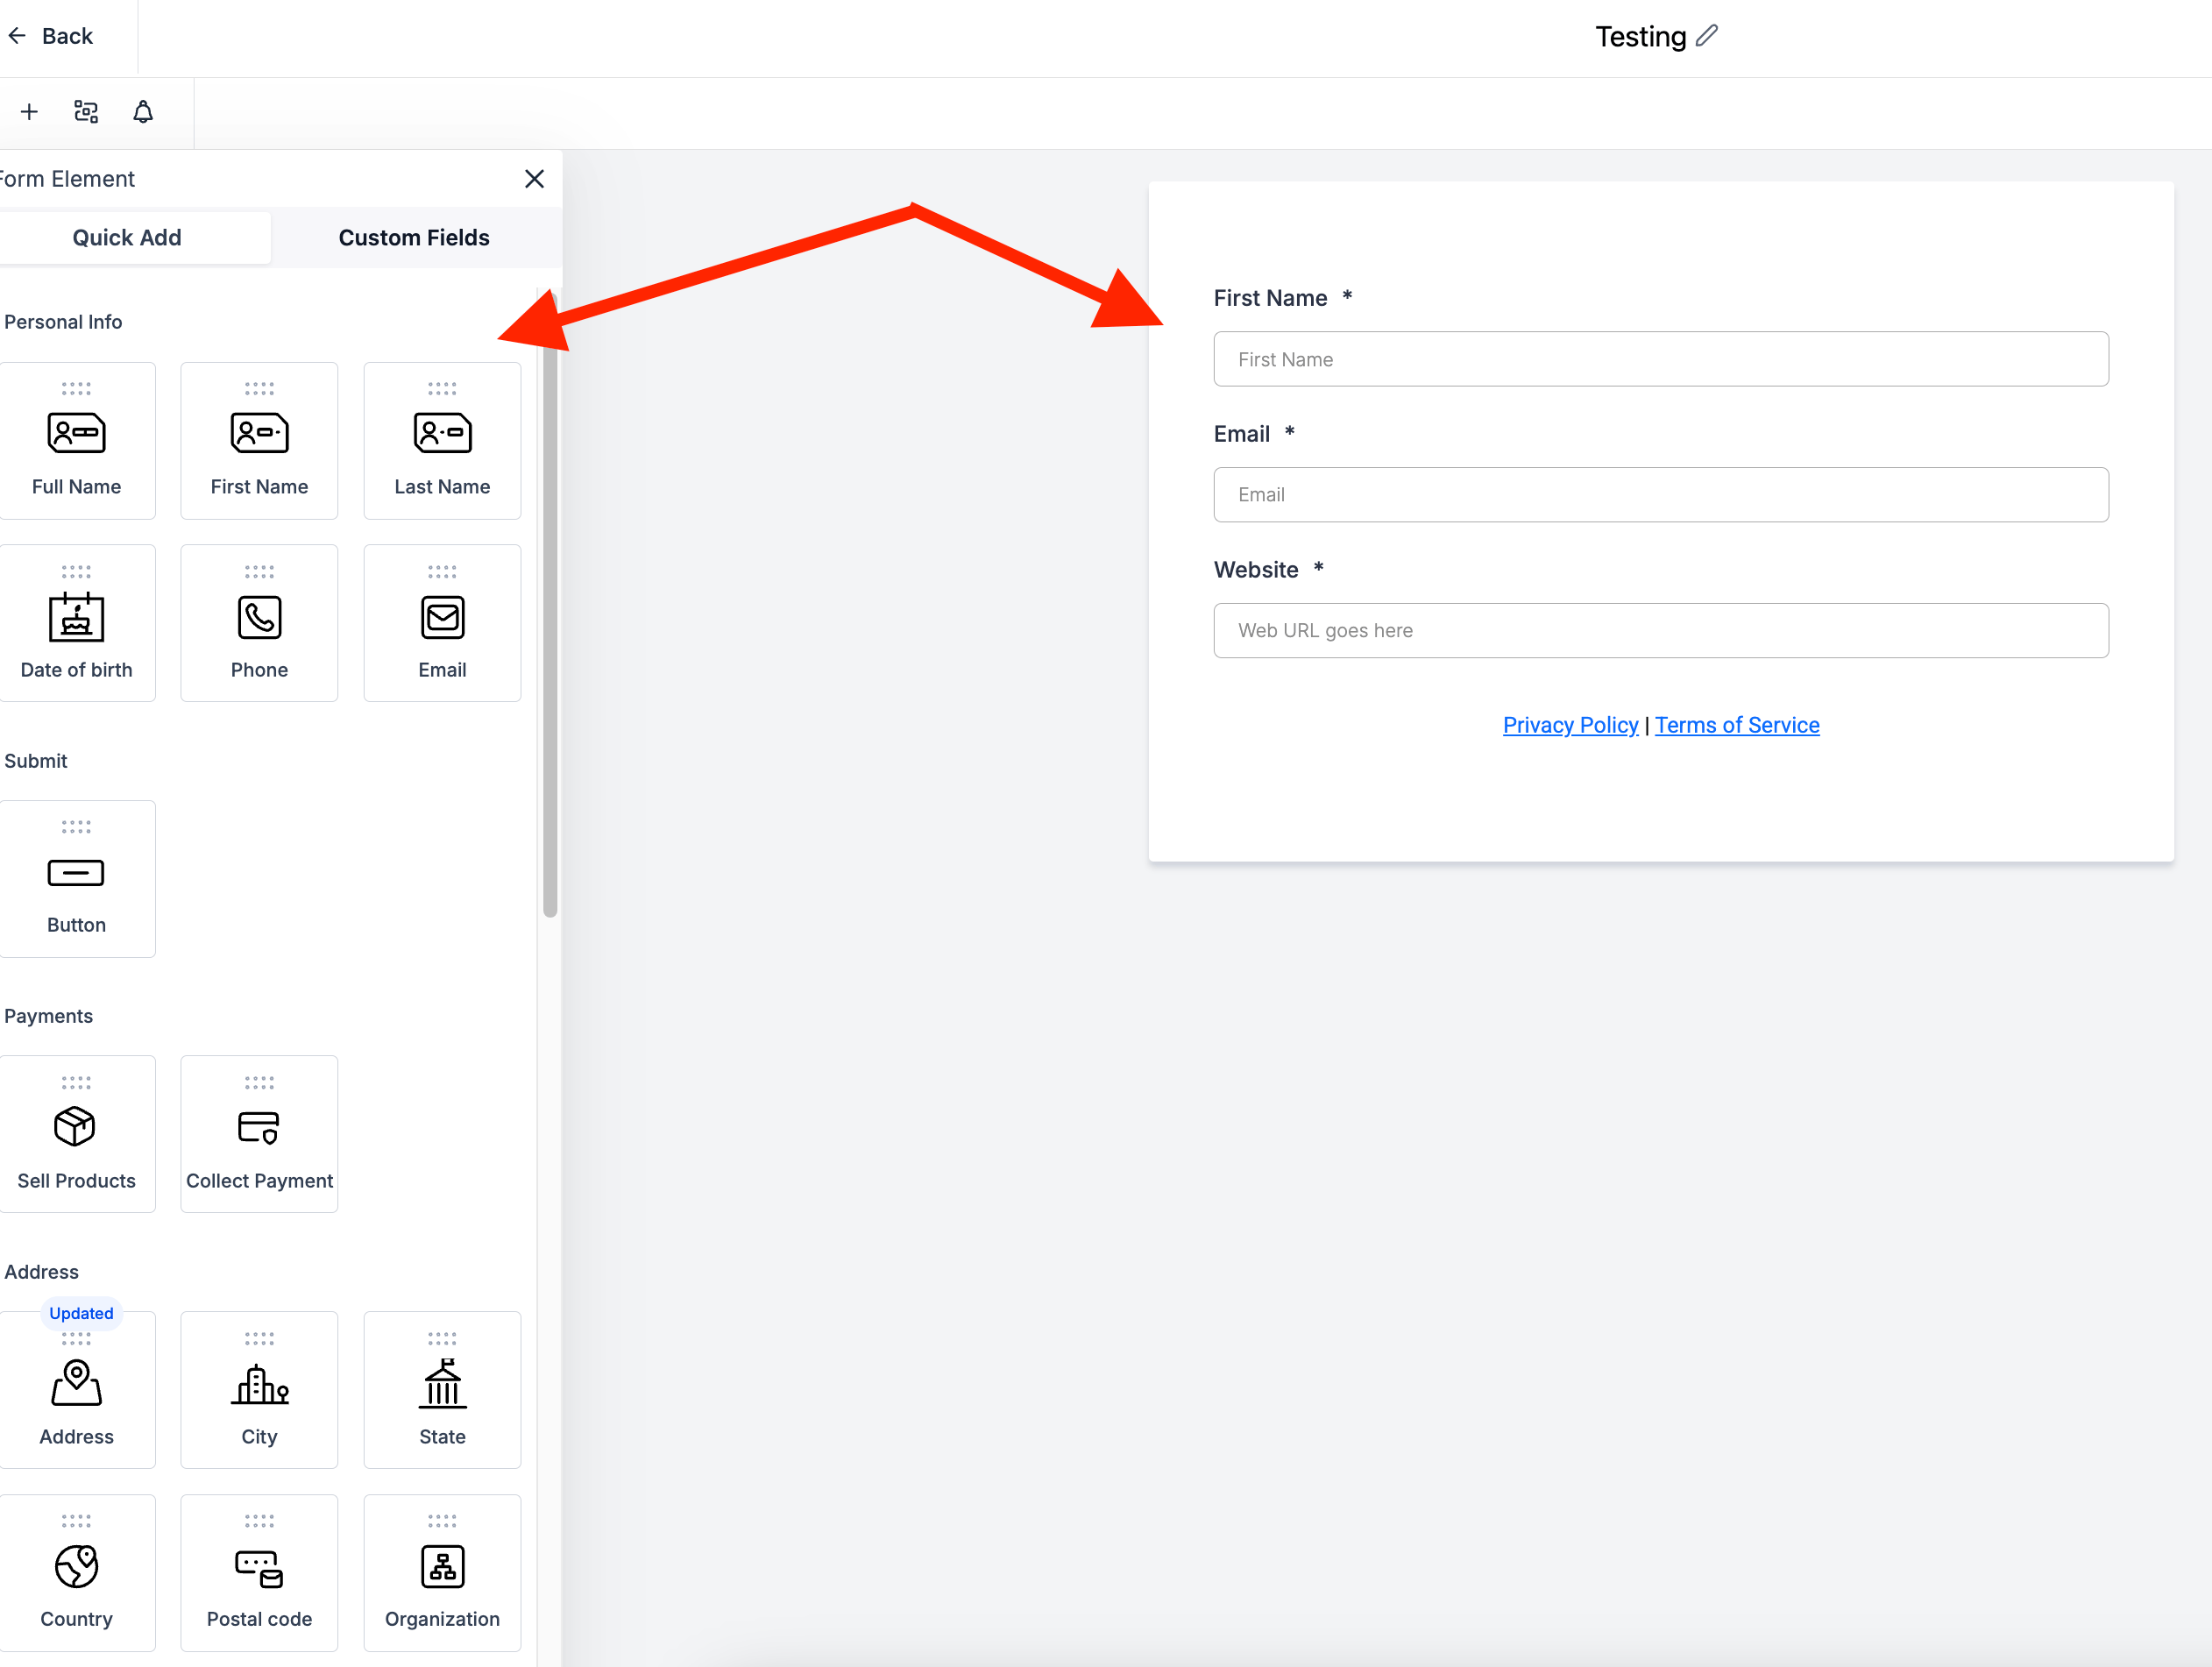
 By dragging and dropping the options given on the left panel, we'll be able to create a simple form:
 After hitting the SAVE button on the top right-hand side corner, go back, head to AUTOMATION, and click on CREATE WORKFLOW:
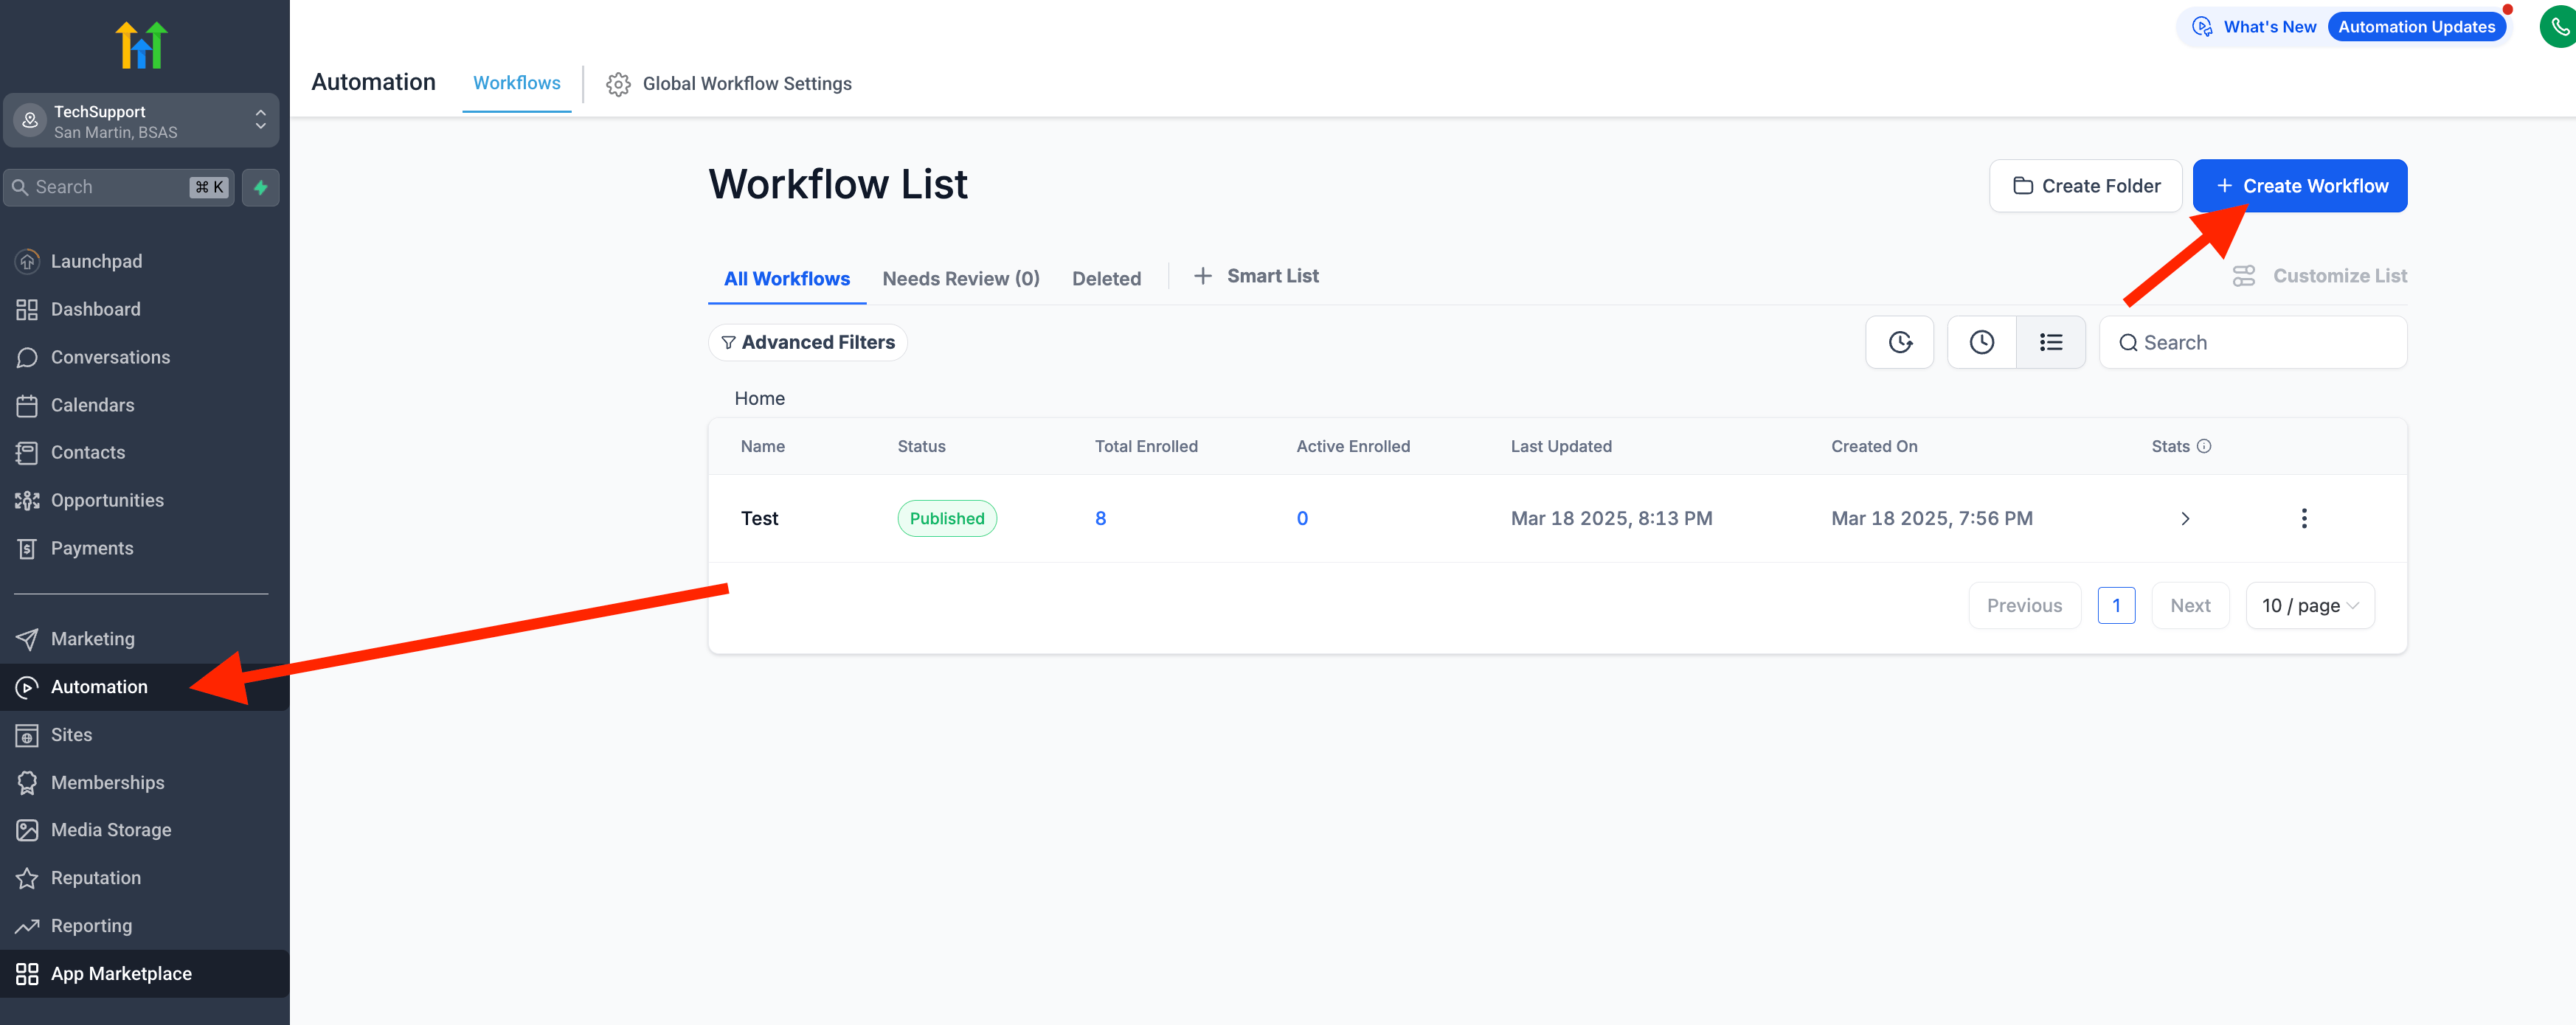 Double-click on ADD NEW TRIGGER to open the list of options to the right:
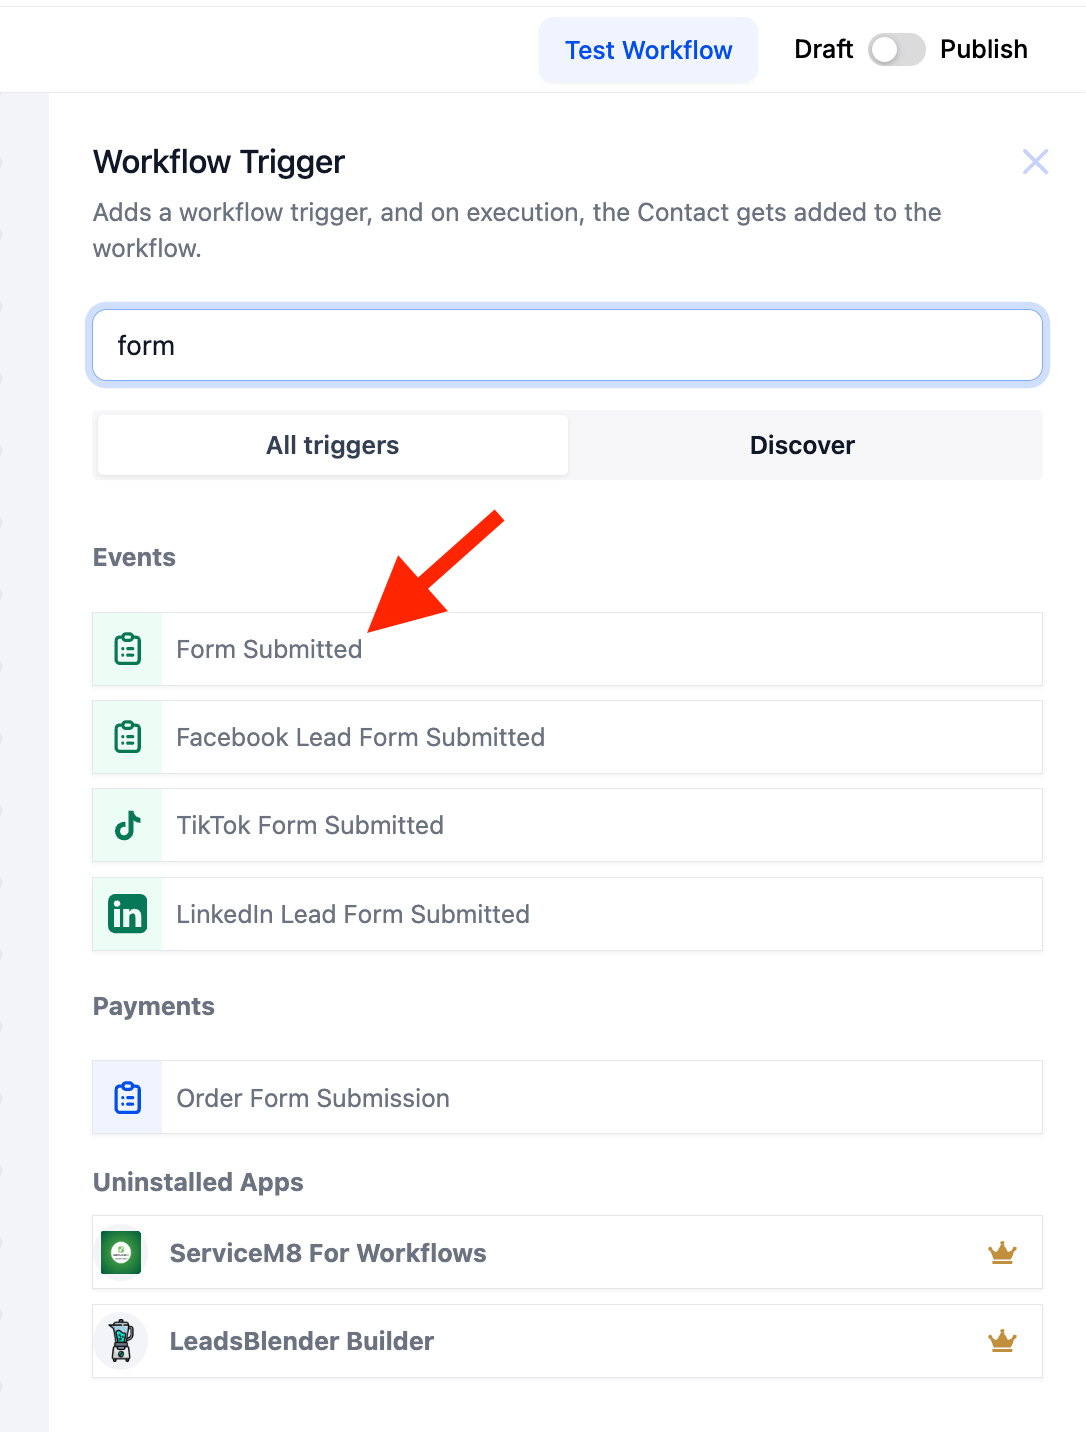
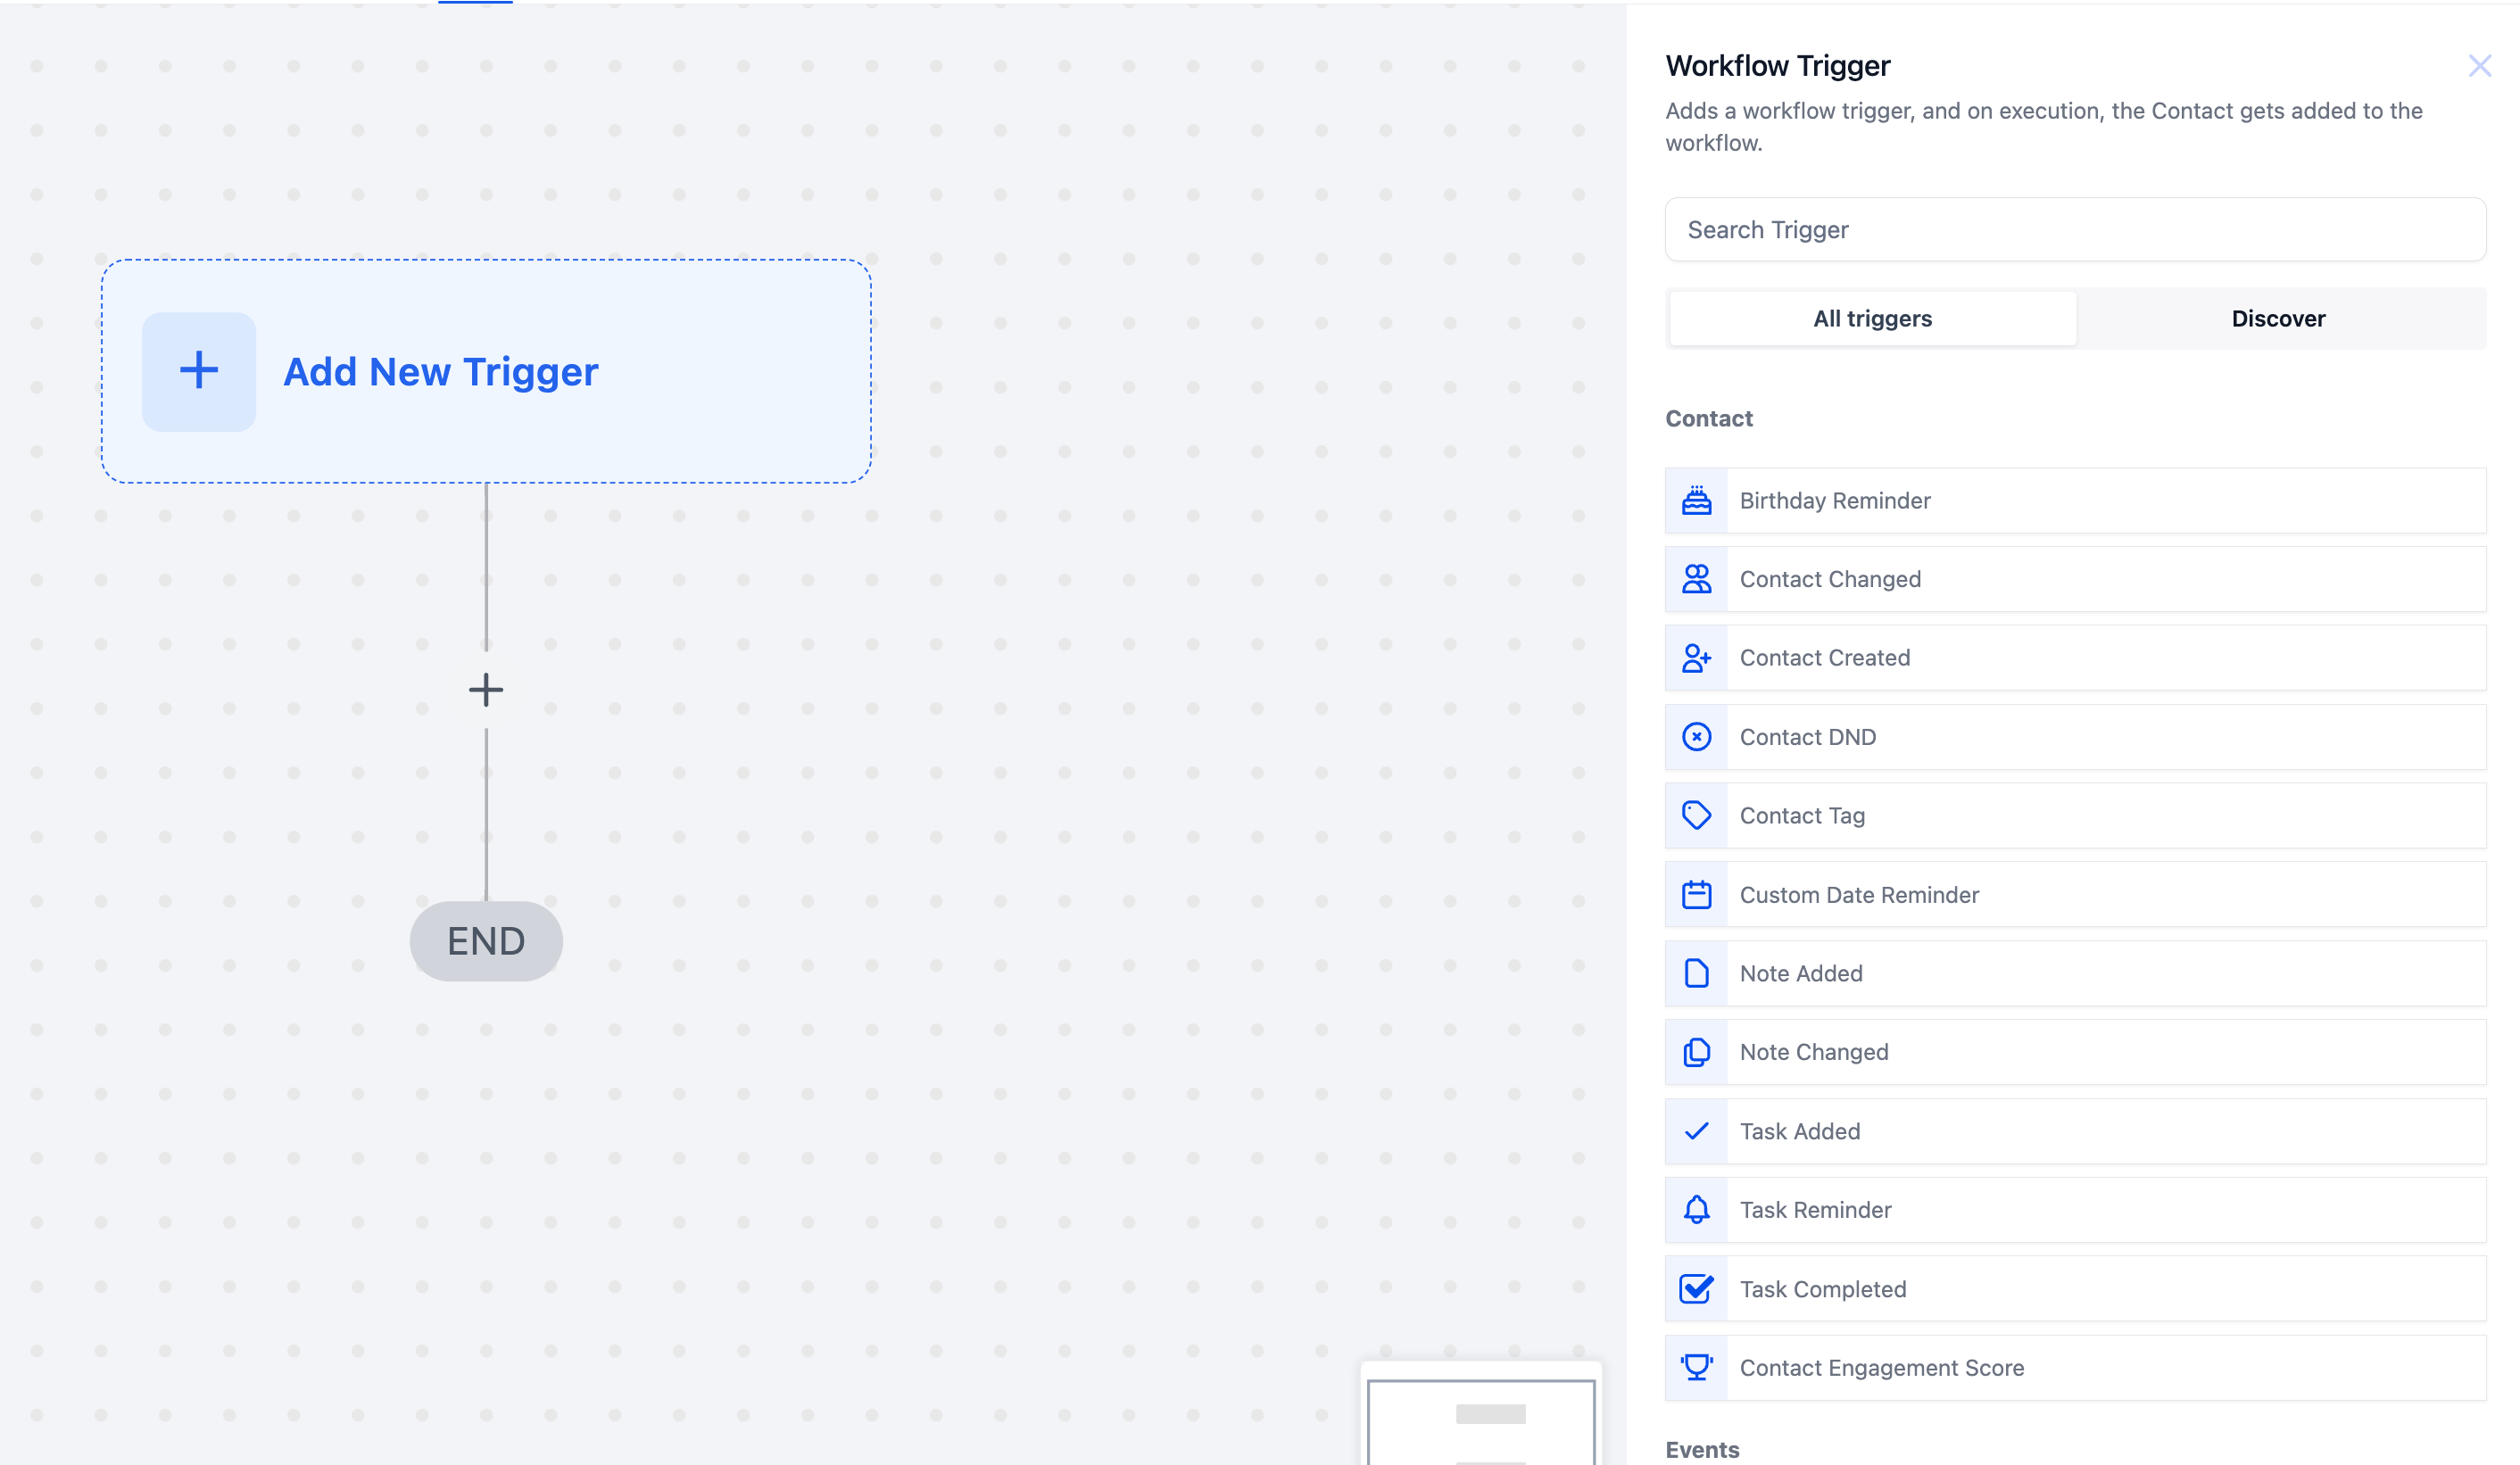 There are a number of different ways to go, but we'll follow the FORM SUBMISSION in this example. Please click this option
 Then click on ADD FILTER:
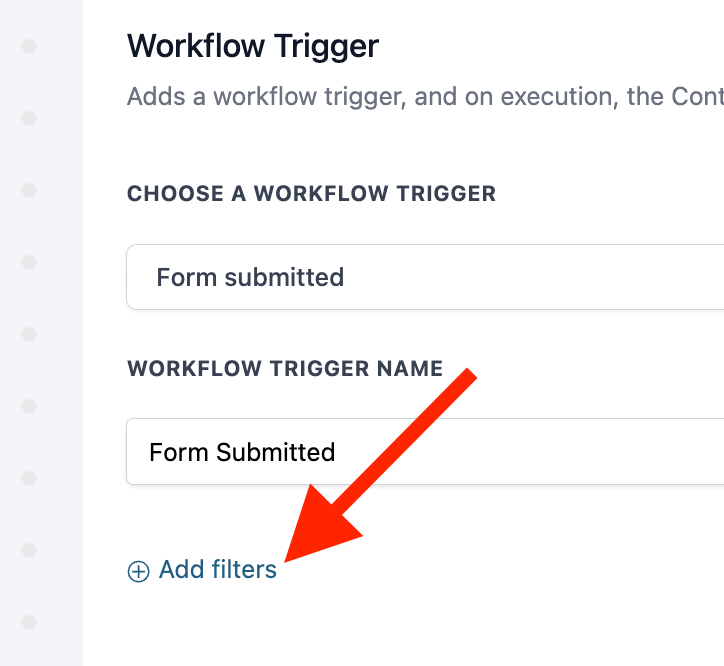 Select the name of the form you just created:
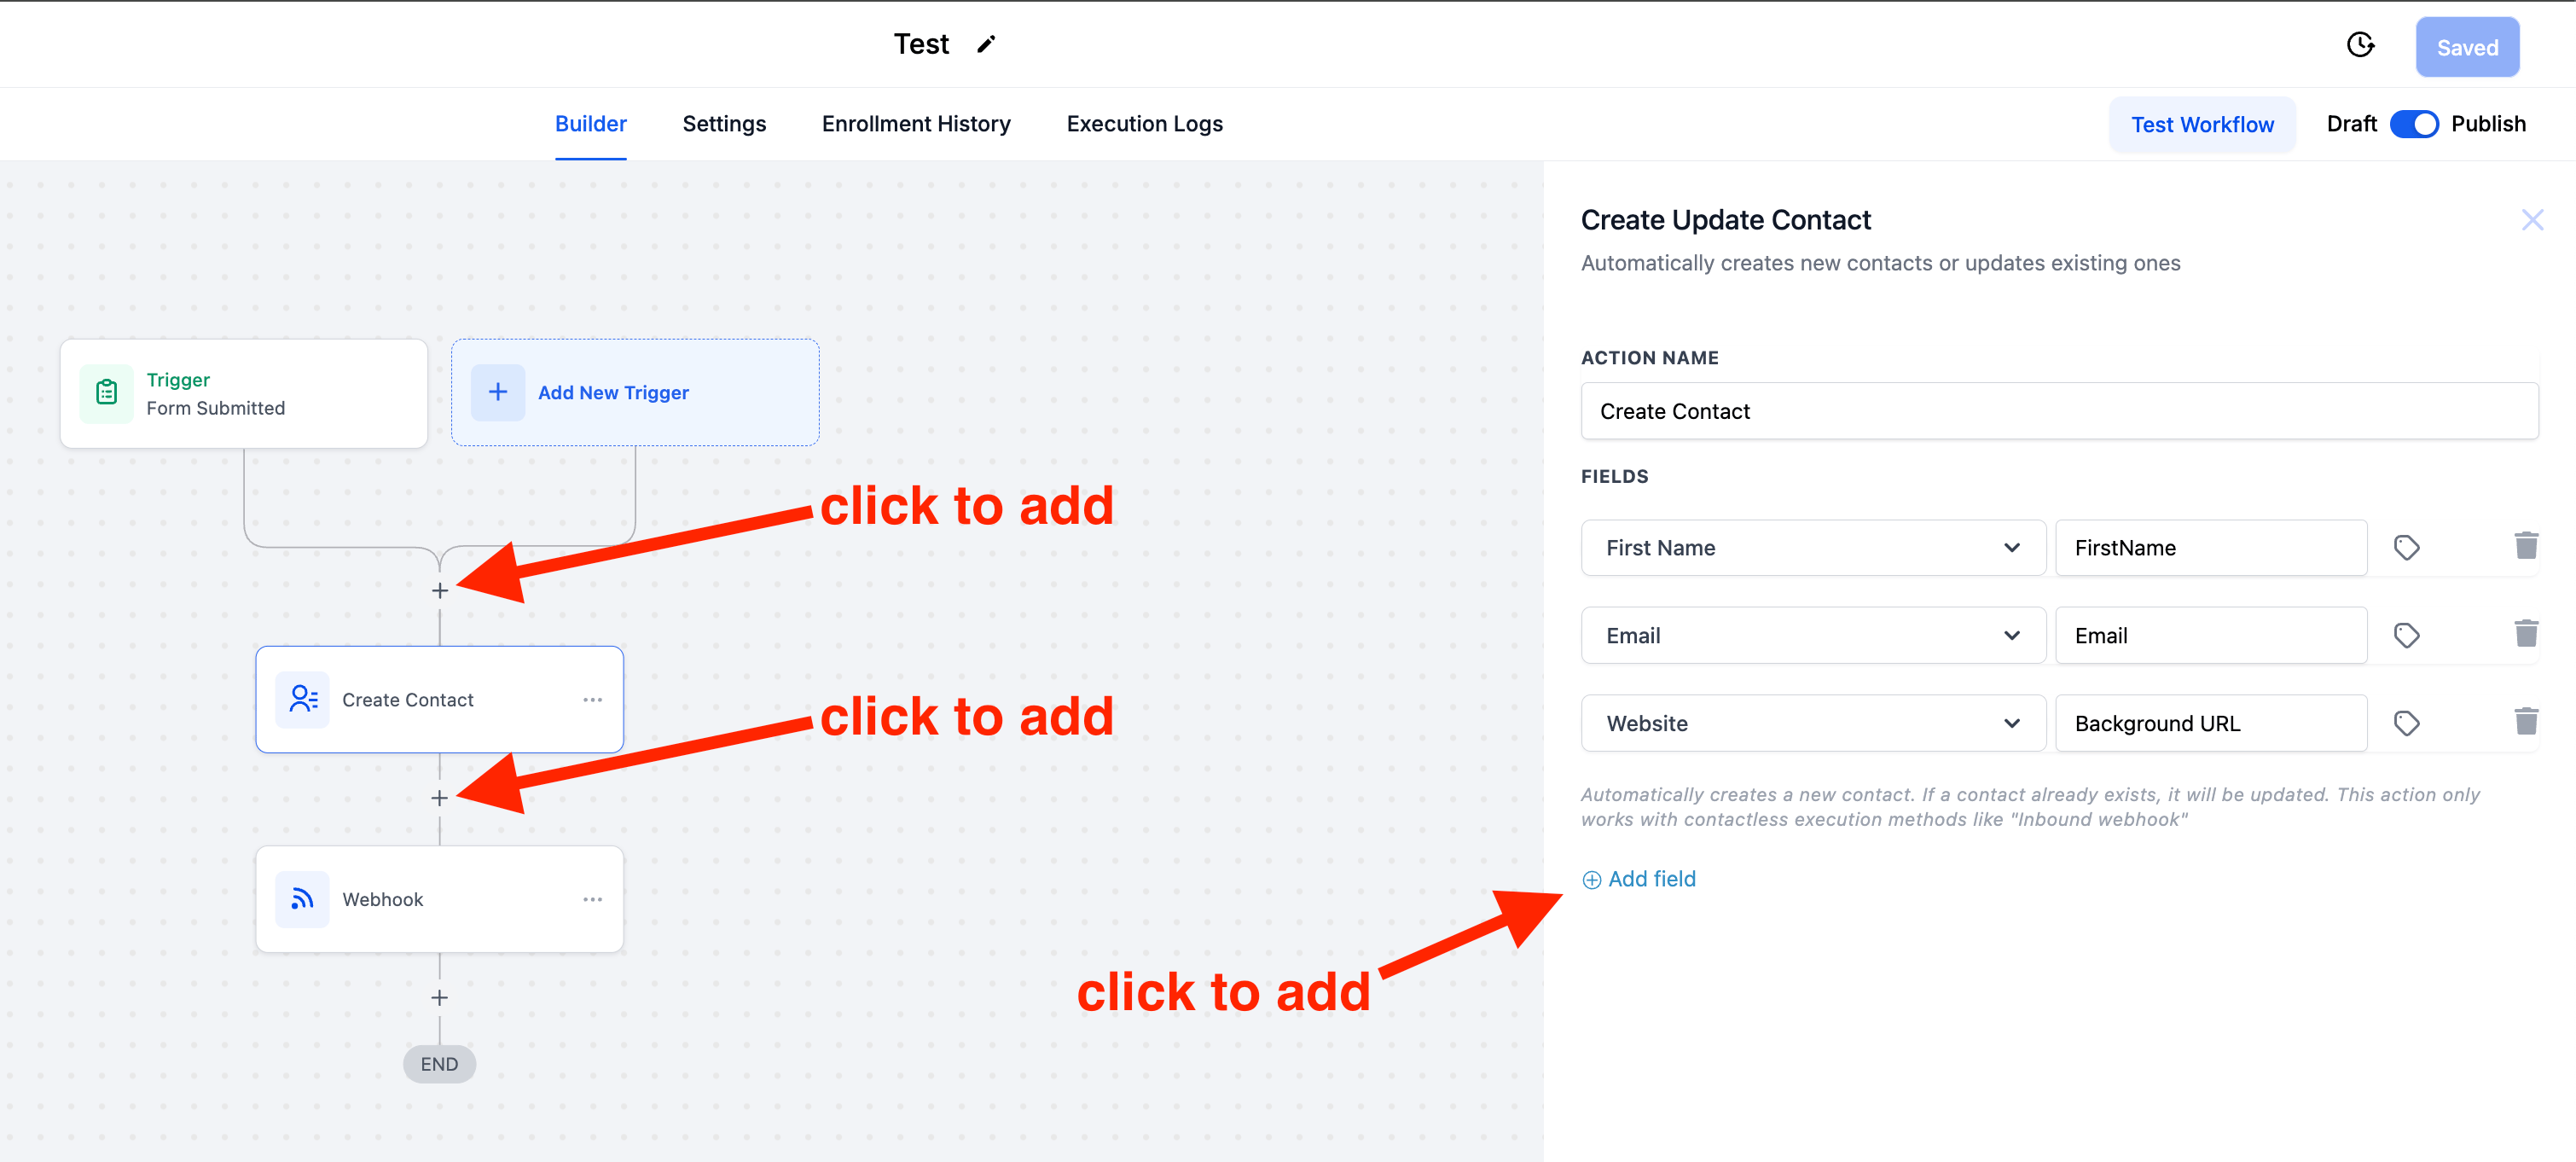
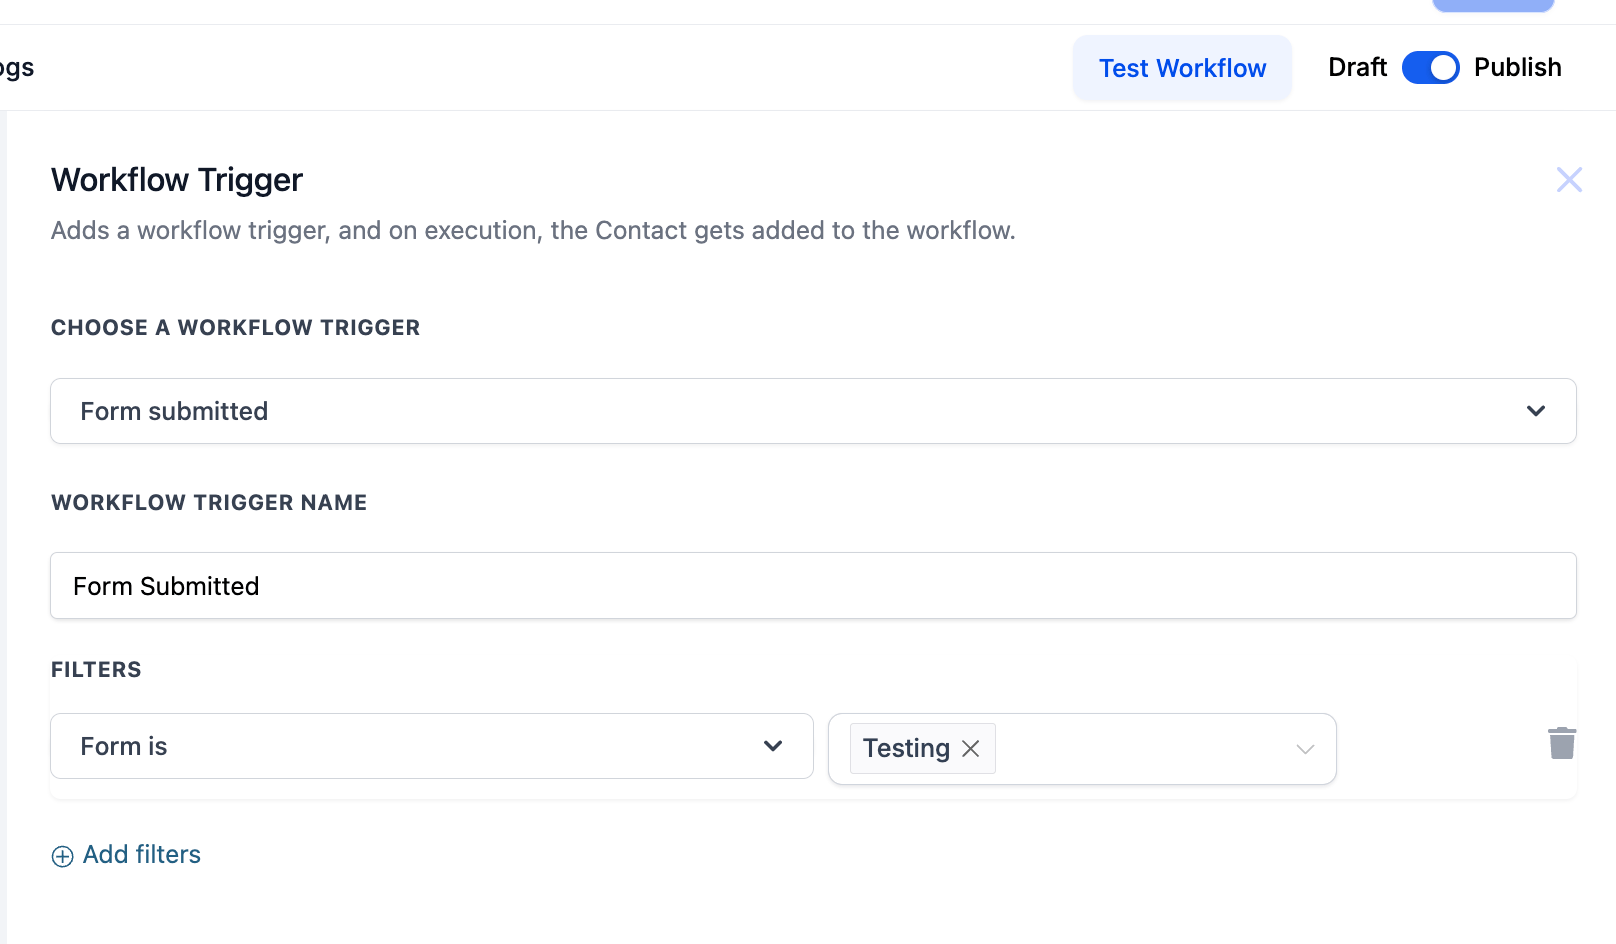 We'll complete the workflow with these steps: CREATE CONTACT and WEBHOOK.
The Create Contact step will have the same fields we used in the form so we can map it and retain the same details:
We'll complete the workflow with these steps: CREATE CONTACT and WEBHOOK.
The Create Contact step will have the same fields we used in the form so we can map it and retain the same details:
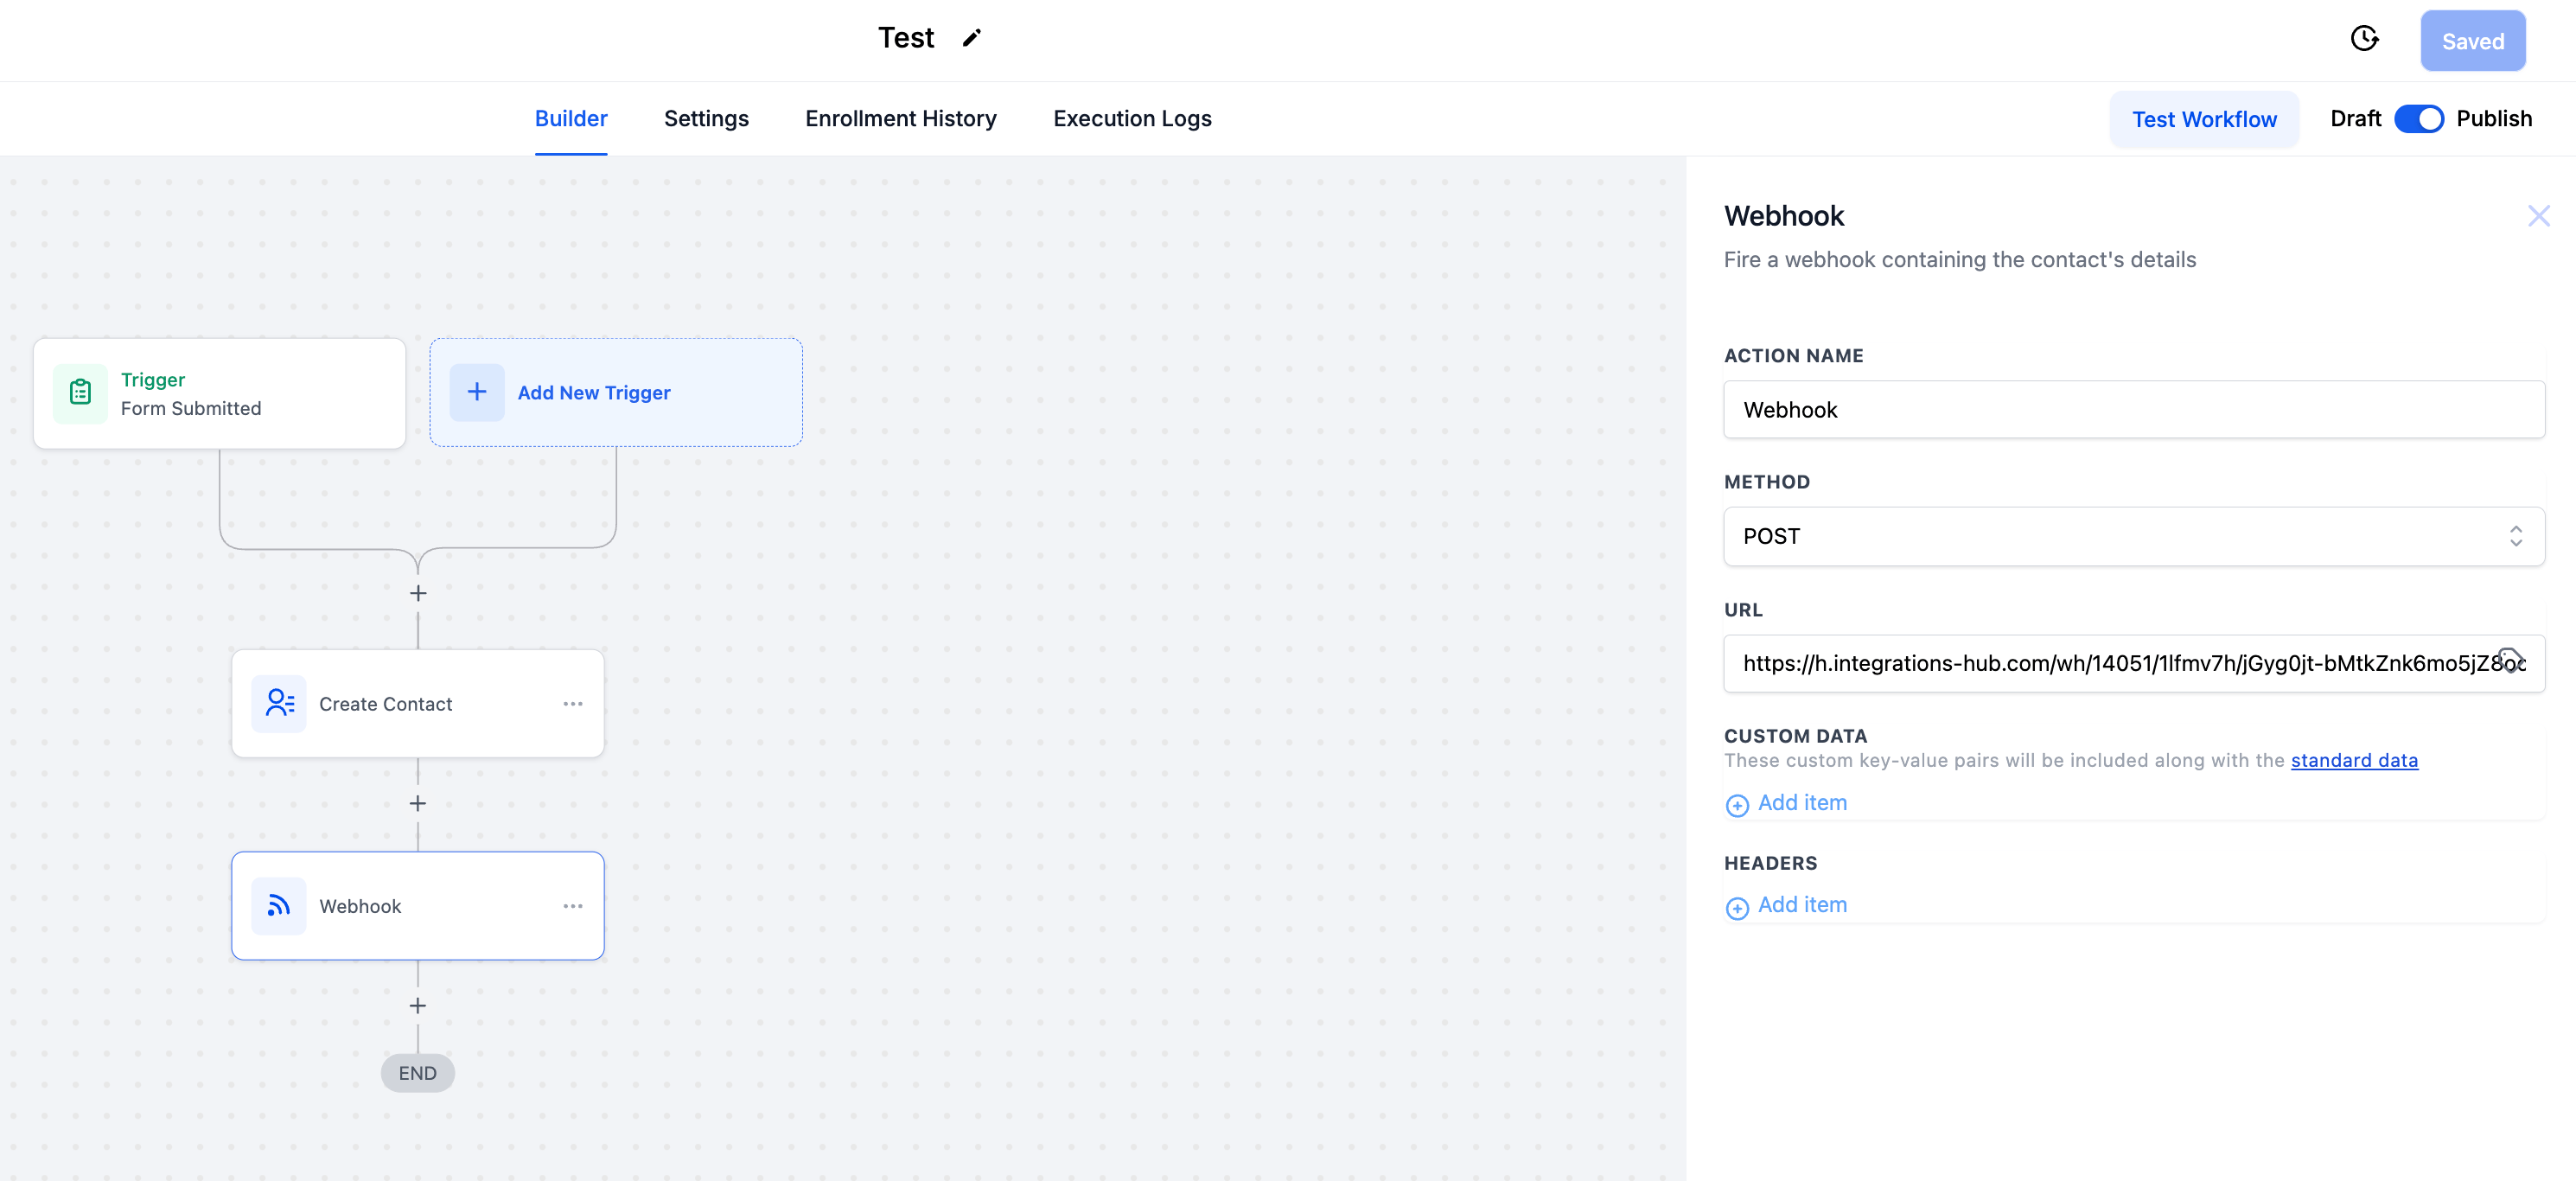
 The WEBHOOK step will need the POST method and the URL we copied from Sendspark
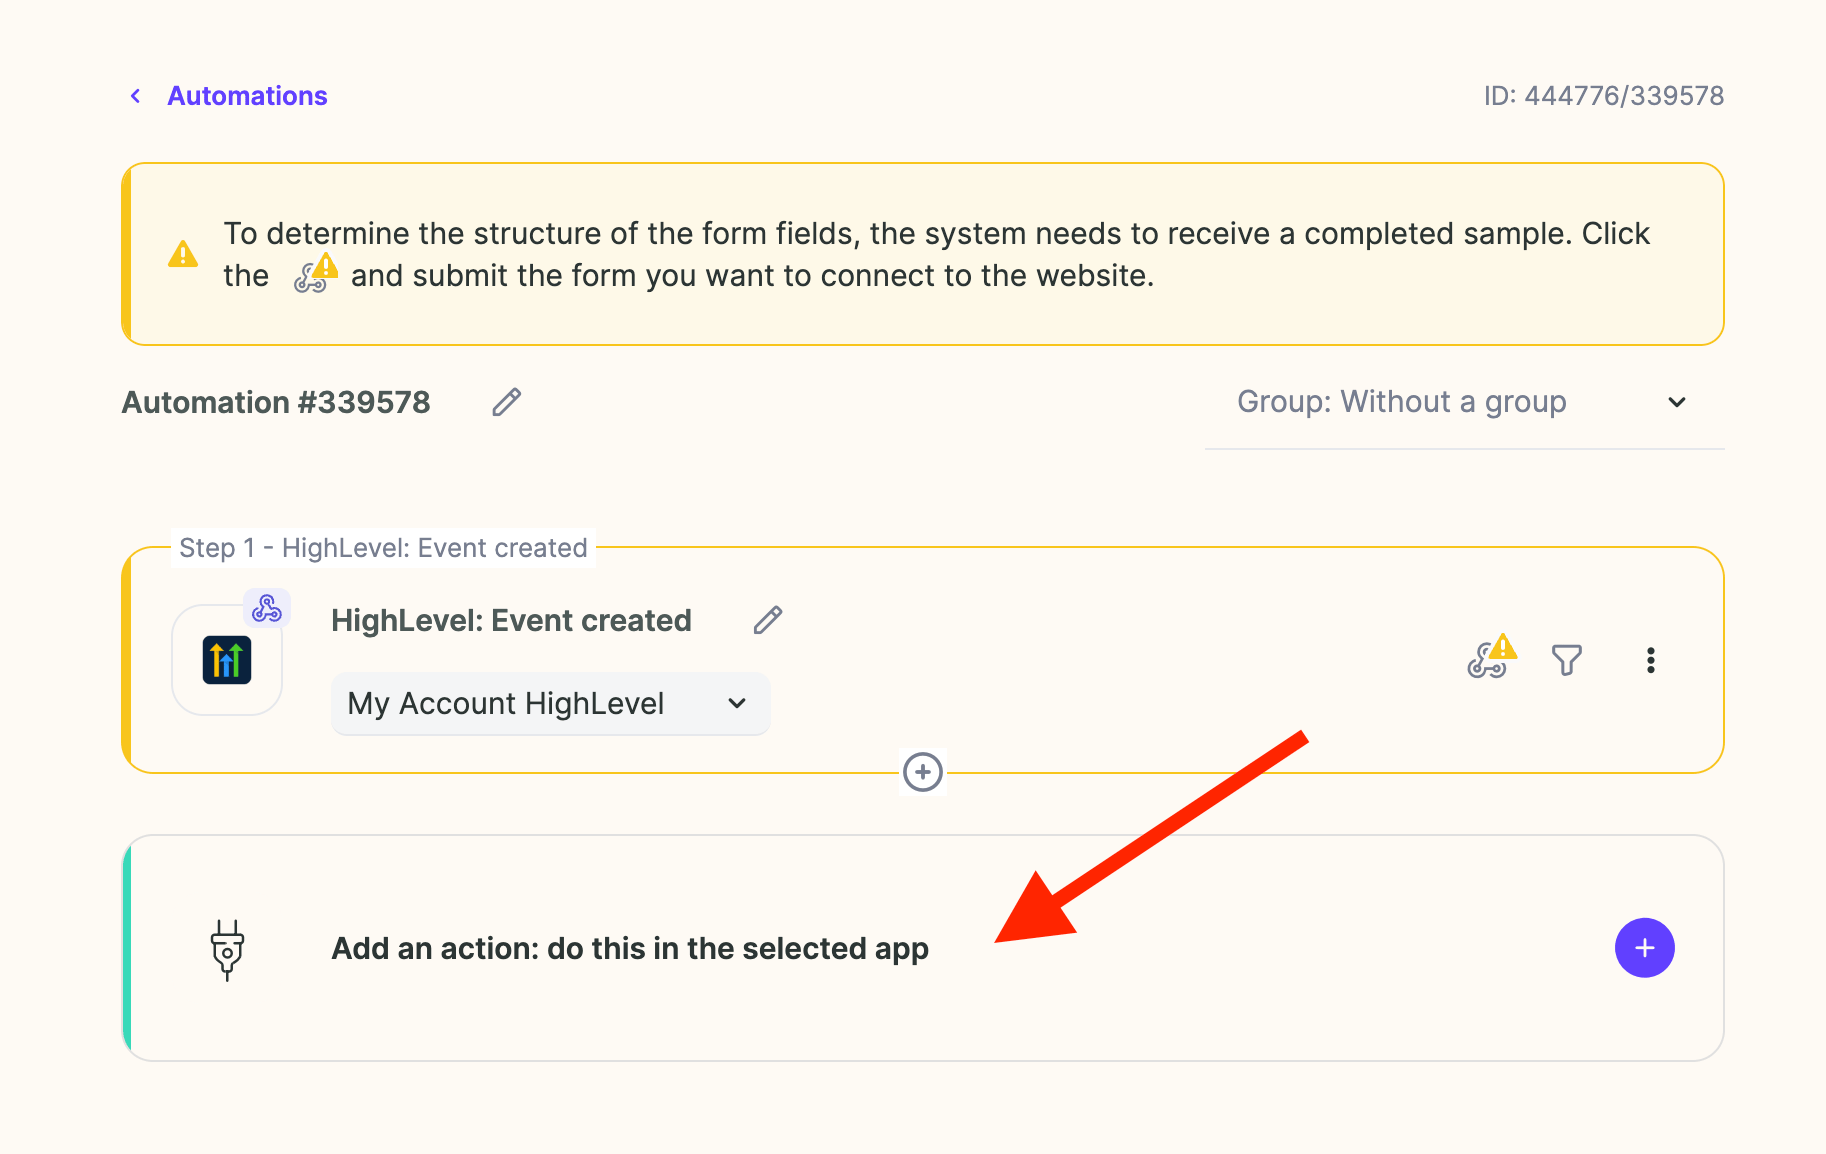
 Now back to Sendspark: We'll need set up the ACTION step by clicking it:
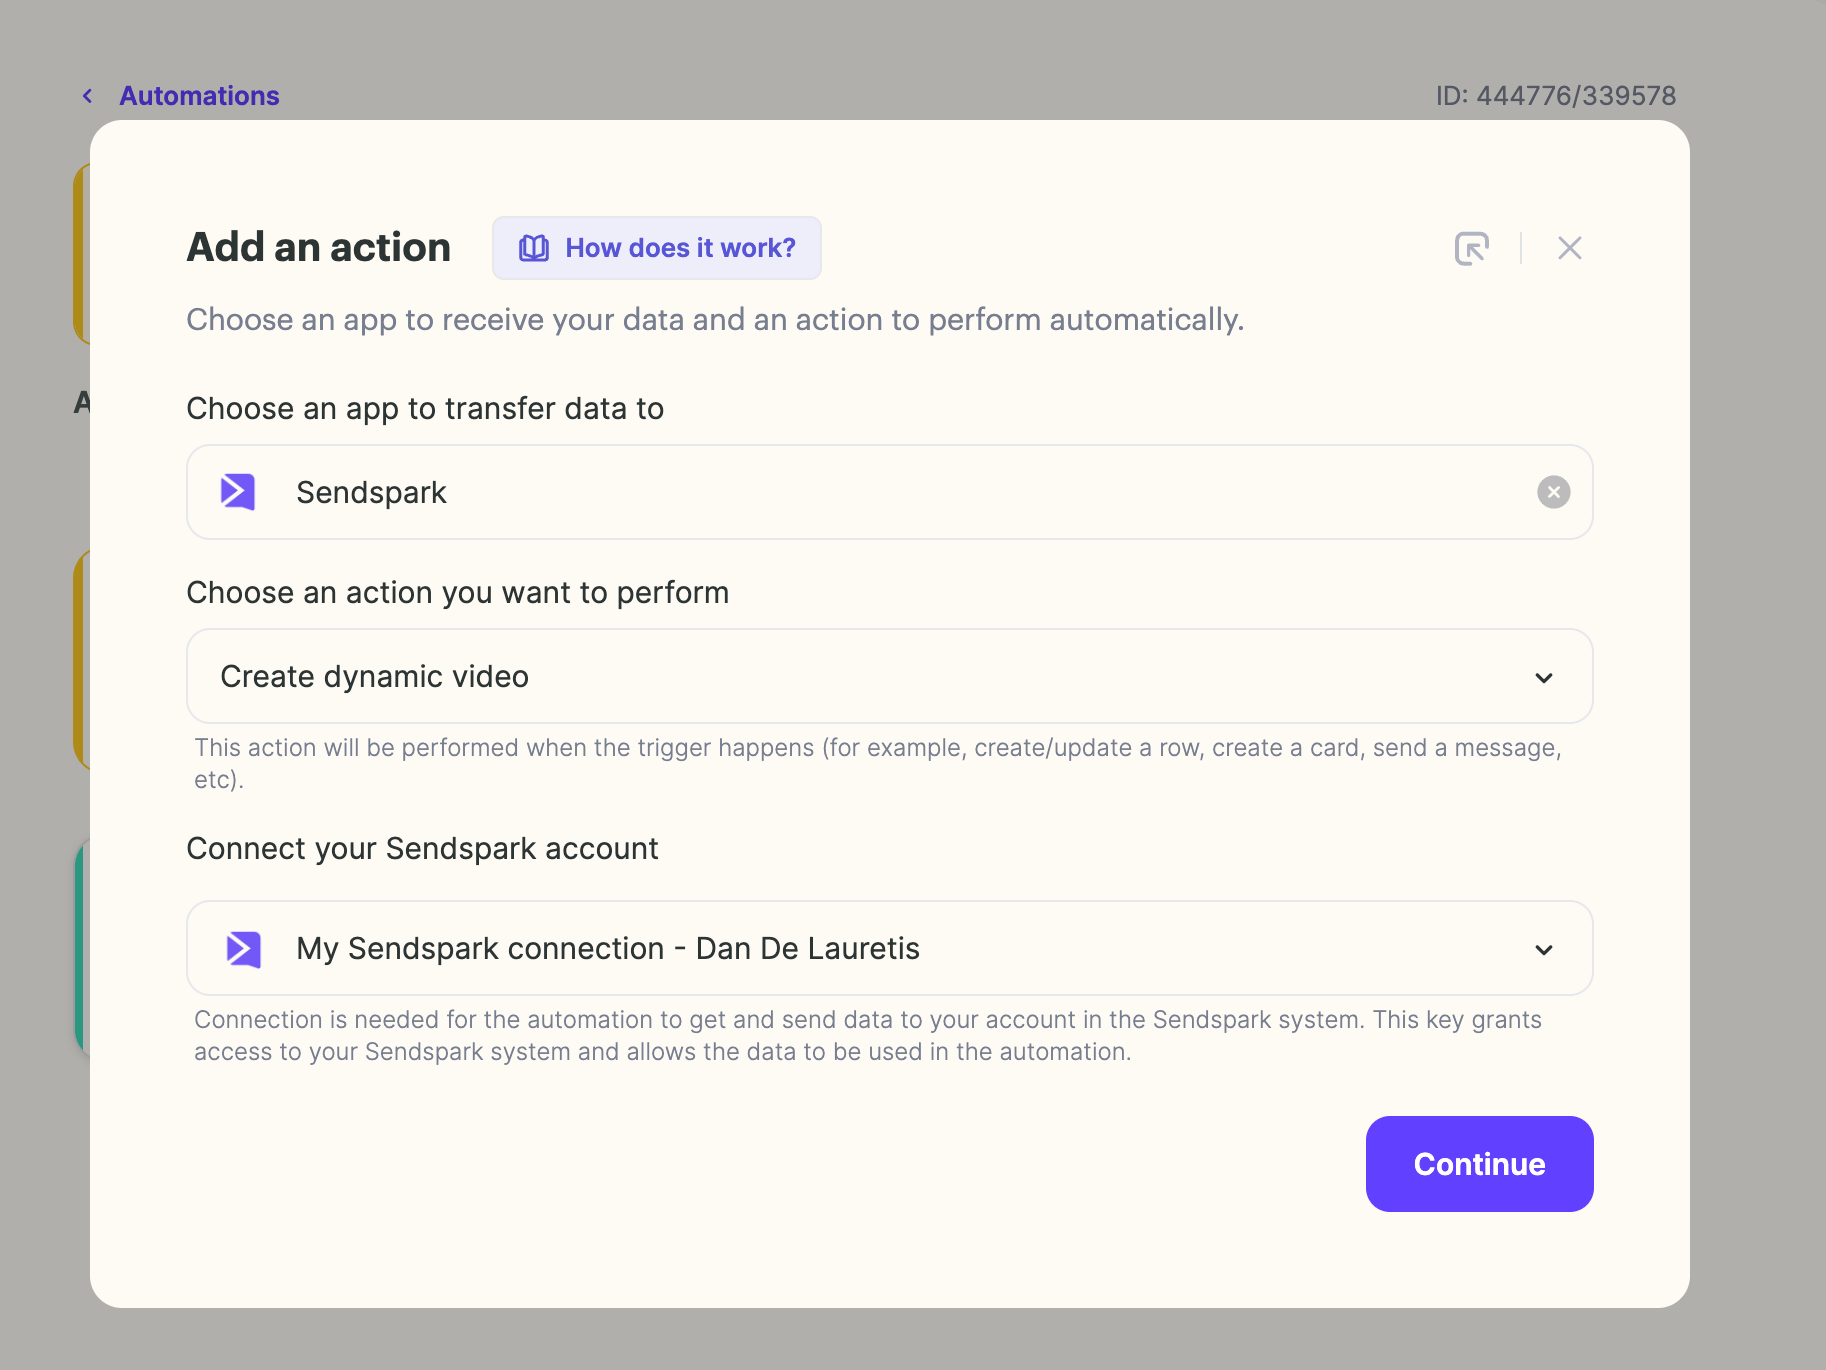
 Select Sendspark - Create a Dynamic Video - and Your Account and hit continue:
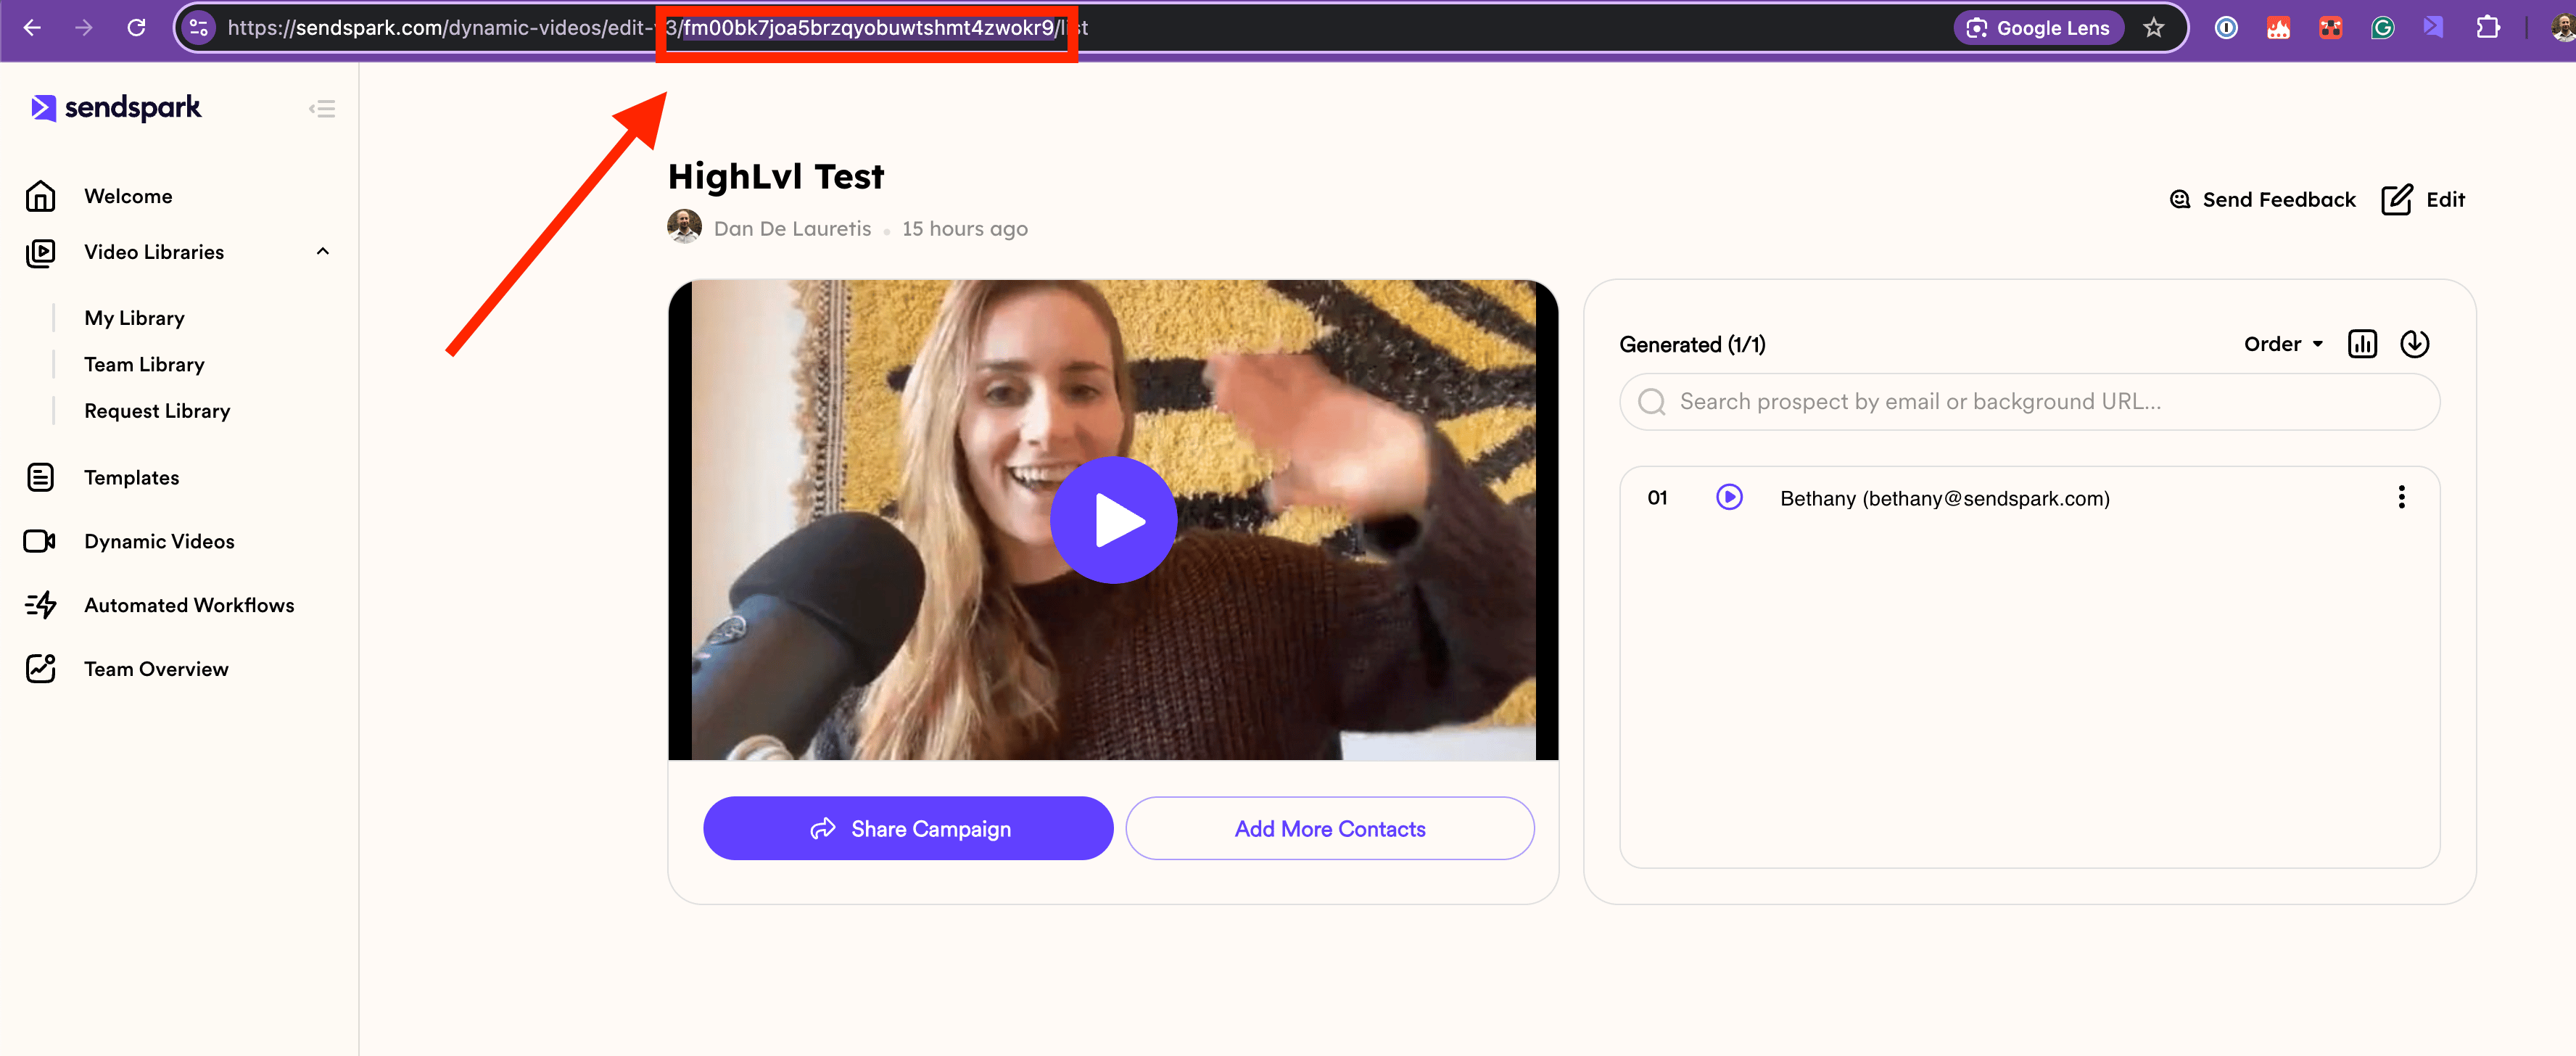
 You'll now need to create a new Dynamic Video Campaign or simply use one you had before, and copy the Campaign ID. Something you can extract from its URL:
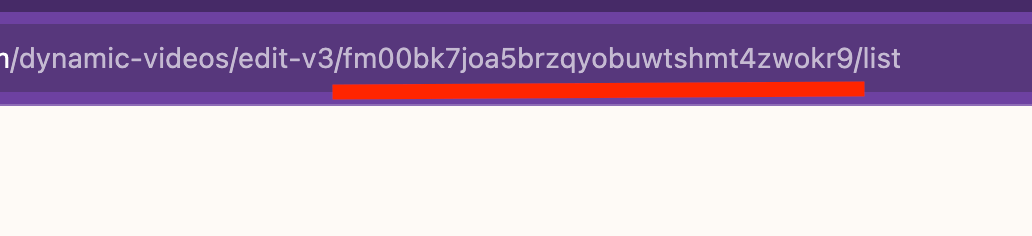
 Only this section:
 Paste the ID in the Action Step window:
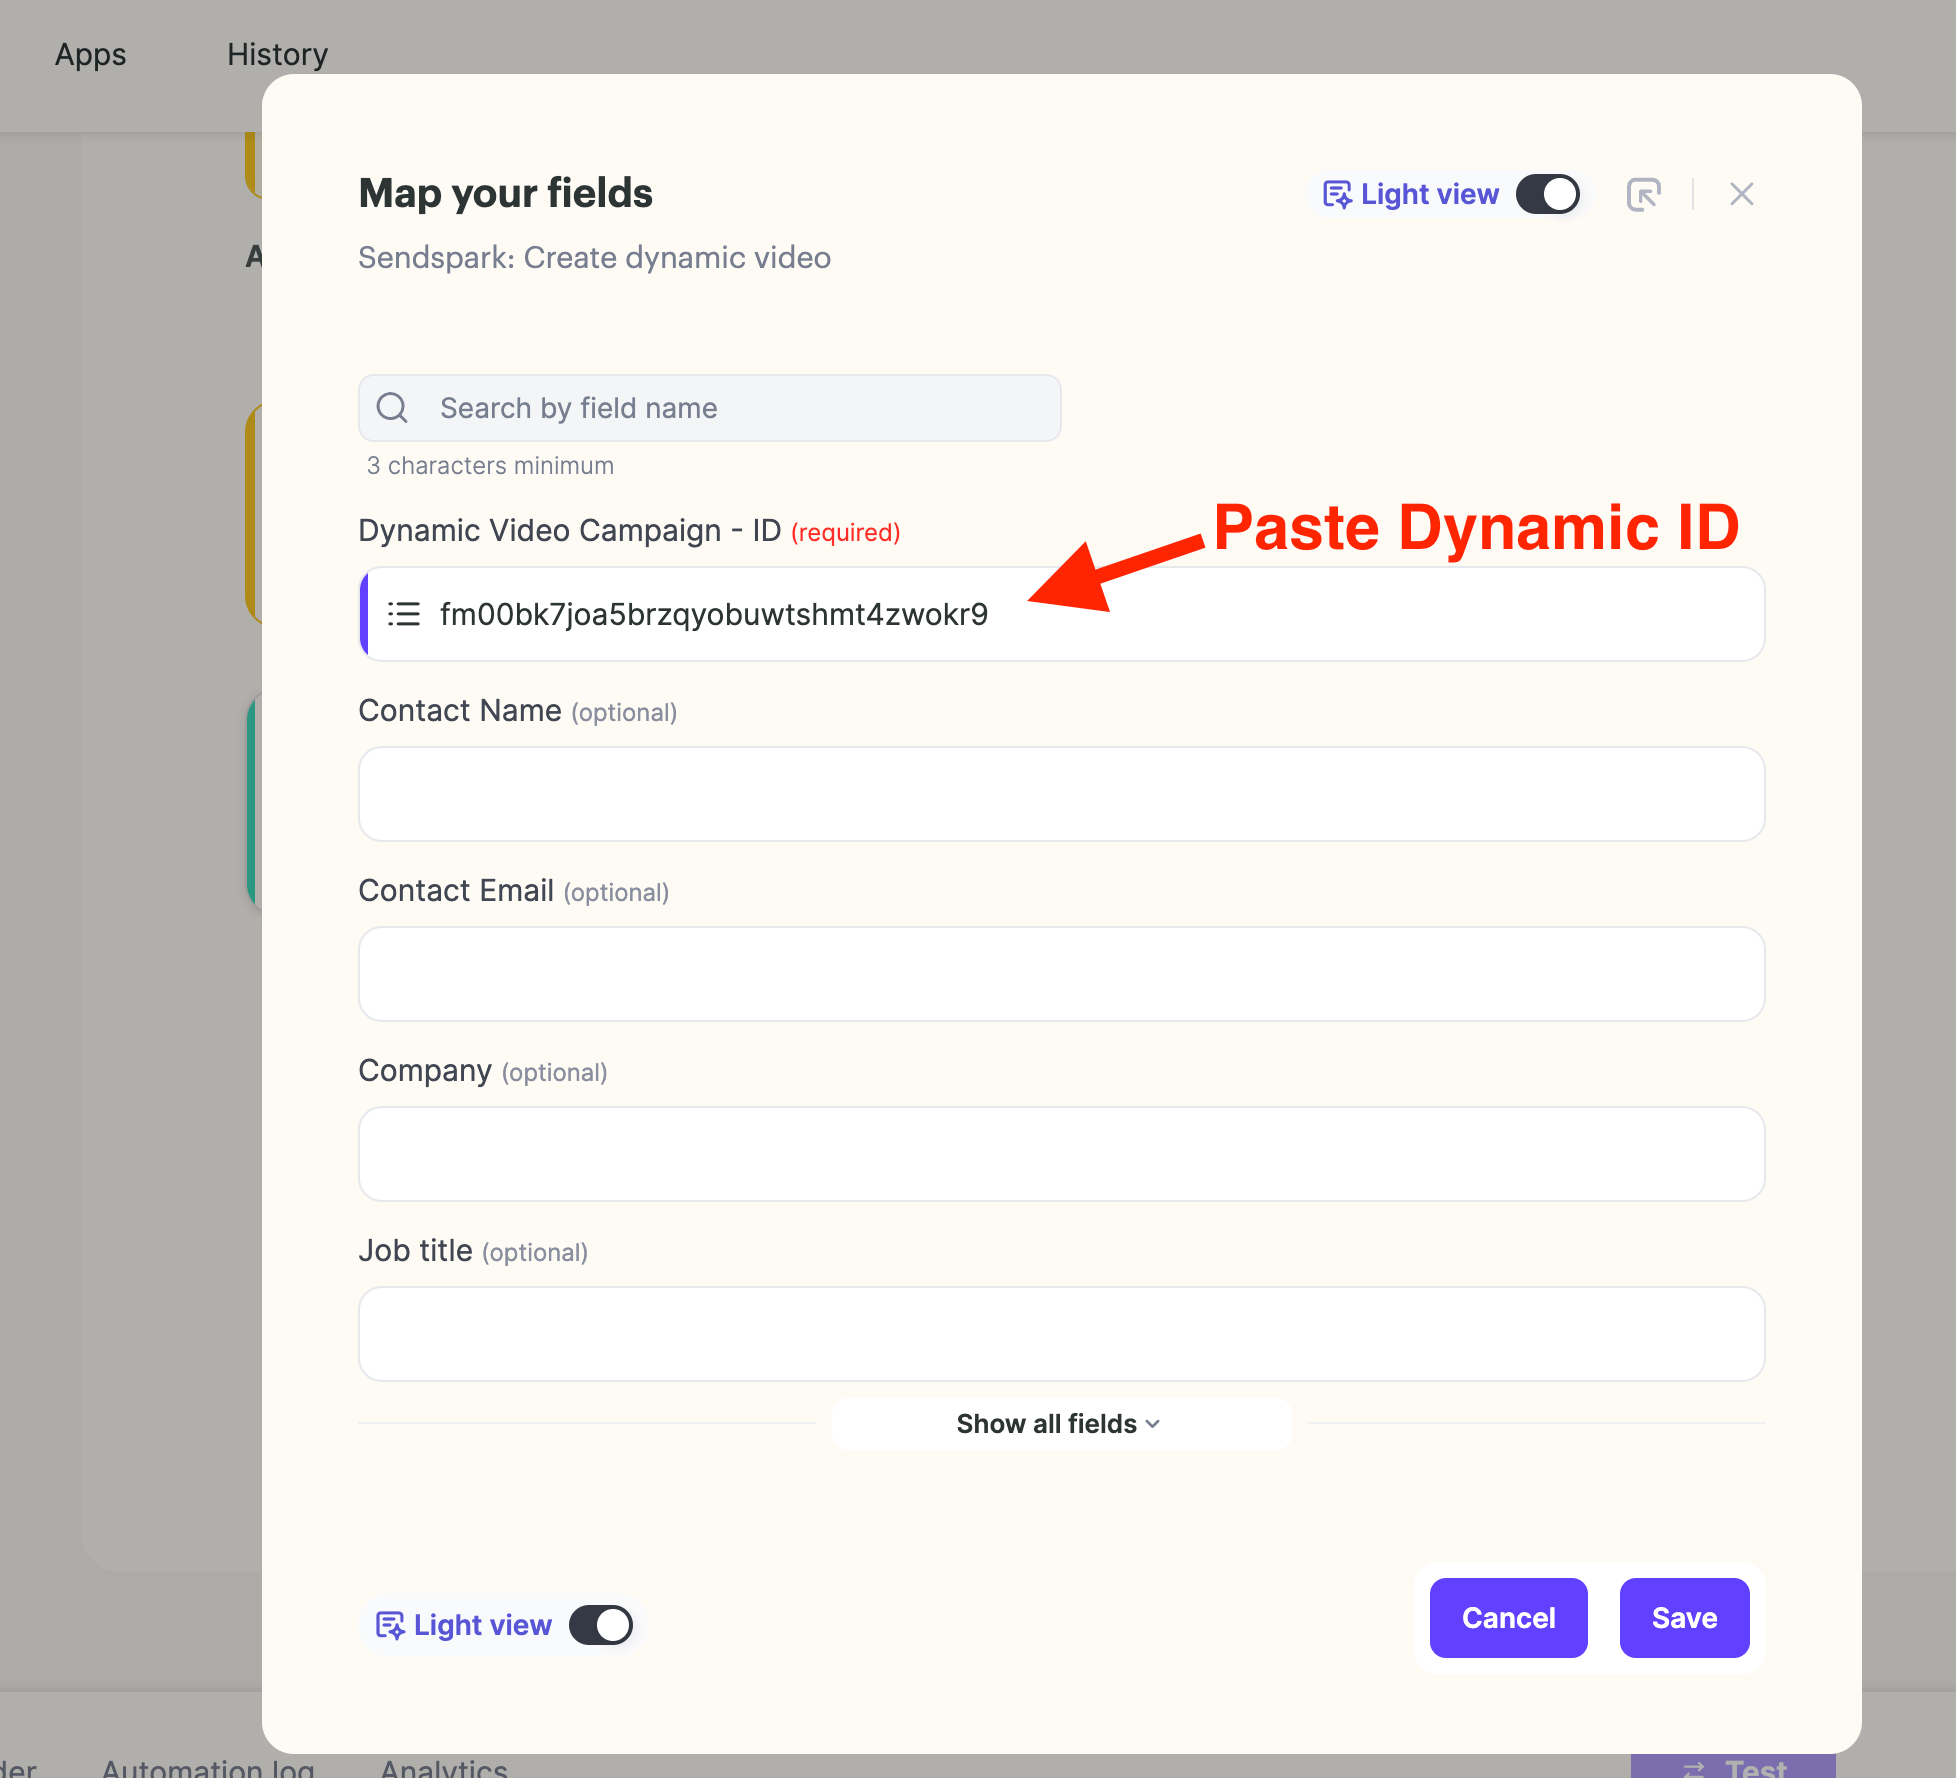 Turn OFF the Light View and map each field correctly by selecting the correct term for the correct field: Contact NAME --> FIRST SAME and so on
 Click on SAVE and your Workflow will be ready to test!
## Frequently asked questions
In HighLevel, select your Sub-Account and click Settings. Create your API with the blue button right below the Business Profile Settings, then copy the API key. You'll paste it into Sendspark the first time you connect HighLevel.
This example uses the Form Submission trigger in HighLevel. There are a number of different ways to trigger the workflow, but Form Submission is used here — you add a filter and select the form you created.
Through a webhook. Sendspark provides a WebHook Catcher URL that you copy, then add as a Webhook step in your HighLevel workflow using the POST method and that URL. The HighLevel workflow completes with Create Contact and Webhook steps.
In Sendspark's Action step, select Create a Dynamic Video and your account. Create a new Dynamic Video Campaign (or use an existing one) and copy the Campaign ID from its URL. Paste the ID into the Action Step window, turn off Light View, and map each field to the correct term.
*Updated July 2026.*
Click on SAVE and your Workflow will be ready to test!
## Frequently asked questions
In HighLevel, select your Sub-Account and click Settings. Create your API with the blue button right below the Business Profile Settings, then copy the API key. You'll paste it into Sendspark the first time you connect HighLevel.
This example uses the Form Submission trigger in HighLevel. There are a number of different ways to trigger the workflow, but Form Submission is used here — you add a filter and select the form you created.
Through a webhook. Sendspark provides a WebHook Catcher URL that you copy, then add as a Webhook step in your HighLevel workflow using the POST method and that URL. The HighLevel workflow completes with Create Contact and Webhook steps.
In Sendspark's Action step, select Create a Dynamic Video and your account. Create a new Dynamic Video Campaign (or use an existing one) and copy the Campaign ID from its URL. Paste the ID into the Action Step window, turn off Light View, and map each field to the correct term.
*Updated July 2026.*